Happy Easter from The Laundry and Laundryetc.

Happy Easter from The Laundry and Laundryetc.

Apologies for my long absence. I’ve been reassessing how I allocate my time! That and my Mum being ill has given me a lot to think about. That doesn’t mean I haven’t been busy though. Once you have been following the seasons with ingredients, watching, anticipating, harvesting, canning and preserving for a while, it becomes second nature, the way that you live and a direct and real connection to the food you eat. I’ve become particularly aware of this by being displaced due to my Mum being ill. I have by necessity been spending time away from my home and my patch, the place I have been observing and making use of so intensely for the last few years. It just meant I’ve had to find new connections in a city I left 30 years ago.
Yesterday it was time to rustle up my Christmas wreath. The wreath base has been used on previous occasions and is a favourite; washed and weathered, looseley twisted vine that comes already wrapped with some tatty raffia from a previous incarnation, perfect. I wanted my wreath to be a celebration of what nature has handed me in 2011 and would have searched for a few remaining sloes on branches or scavenged some crab apples of a neighbours tree, but I didn’t want it to turn into a performance. So I just went around the garden looking and snipping and then very simply pushed stems through between the twisted vine base. I used some lengths of straggling clematis that the cold had turned dark crimson, some plump orange-red rosehips, sprigs of bay; the fresh growth tips of bay trees branches, hypericum with black fruits set amongst stunning red tinted leaves and finally some unripe blackberries that found themselves double-crossed by deceiving weather conditions. You don’t need much for it to work. My tip if you are new to this sort of thing and want to have a go, is to use your foliage in 3’s, to give a loosley structured and organic result odd numbers work best.
I hope that you enjoy the holiday season ahead, whatever it means to you and look forward to starting afresh in 2012. In such uncertain times one thing shouts out to me loud and clear – CANNING IS THE WAY TO GO! Just saying. Have a good one.

There is much excitement close to home, as me and next door are about to collaborate on our first chicken keeping venture. We have placed our order for 5 orpingtons; 2 lavenders, 2 buffs and a lavender cockerel, and will be taking delivery in a couple of weeks time. We can’t expect any eggs from them until around November time but most importantly – the names have been chosen. As I’ve never kept chickens before I’ve begun to swat up on them. I do know people who keep chickens, so suspect it isn’t too difficult and can already see which way this new interest is likely to go as even at this early stage we have started to discuss other breeds we might like and what colours of eggs they will hopefully produce.
In the meantime, I bought my first book on the subject; Hens in the Garden Eggs in the Kitchen by Charlotte Popescu. I’ve collected several other books of hers and can really recommend them. As well as chicken keeping, she writes about other subjects close to my heart, from wild fruits and apples to vegetable gardening and bee keeping. They are all small paperback books packed with useful information and recipes presented in a very simple and modest way.
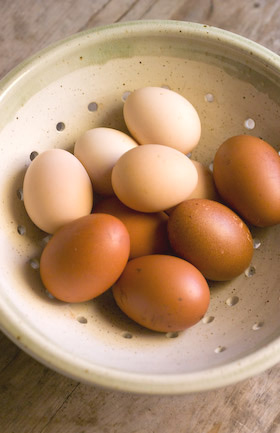
In my new hen book she gives this really useful guidance about the freshness of eggs, particularly relevant to those people who know exactly when their eggs are laid. If you are buying shop bought you’ll just have to guess I’m afraid.
Your eggs need to be as fresh as possible if you want fried or poached eggs. For boiled eggs that you wish to peel, it is best to use eggs that are about a week old as the shell and skin are really difficult to peel off on fresh eggs. ….
If you are scrambling your eggs or making an omelette, eggs can be up to a week old. For baked dishes, eggs can be older than a week. If you want to separate the yolks and the whites to make meringues, eggs are best a few days old as the whites whisk up better if not too fresh.
Pickled eggs have never interested me until I came across a recipe for Pickled Huevos Haminados in another lucky find, The Mediterrannean Pantry by Aglaia Kremezi, published 1994. As soon as I read the recipe I knew I had to make it, though haven’t done so yet. I’m actually growing the red onions at the moment, which is, I suppose, beyond the call of duty. I have found the recipe online here if you fancy having a go and beating me too it. I’ll be tempted to serve a pickled egg with some asparagus spears pickled earlier.
This week I’ve been trying to make some room in the freezer before the berry season kicks off. I’m not a big fan of freezing as mine works on an ‘out of sight out of mind’ principle. I tend to forget what’s in there, all the while those ingredients are racking up additional running costs! (This year I’ll be canning fruit in jars as much as I possible.) I used a tub of blackberry puree, picked and prepared last August, and rustled up 4 pots of blackberry curd, which is a delicious way of using up eggs. A spoonful or two of fruit curd swirled through some Greek yoghurt is fabulous, or you can use it as the filling in a simple sponge cake or dollop on meringues (making use of even more eggs).
Oh yes, I’ve got eggs on the brain and this is only the beginning.
Well this week I managed to get my asparagus bed planted, which felt like no mean feat. The soil needed a lot of attention and I took great care to remove any perennial roots I could find as I sifted through it, as all the books tell you you must. When the asparagus crowns were safely in their straddling positions and covered with earth, instead of feeling a great sense of achievement I was positively down in the dumps; only 2 more years to wait for a crop. Whoopee, roll on 2013! By then I’ll be two years older but hey, I’ll be eating my own homegrown asparagus. I don’t seem to have quite the right attitude, do I?
Anyway, what next? Time to plant some seeds to fill in the gaps around my fruit bushes. I love buying the packets with inspiring pictures of my prospective crops on the front, but you really do have to get them in some compost as they don’t do that themselves. I decided to go visit my friend Shelley, who is a brilliant gardener and font of horticultural knowledge, for a masterclass in seed sowing. She will surely give me the inspirational uoomph I seem to be currently lacking to restore my gardening mojo.

Shelley is really into growing veg. She grows some for her local show and the competitive bug has well and truly taken hold. Her garden is set out in quite a formal way, with geometric shaped raised beds all working towards central focal points, in the style of a classic parterre with finials on every corner. There is a four sided regency arch with a chandelier hanging from the centre which will soon have sweet peas and climbing beans scrambling over it. The difference with Shelley’s planting style is that she fills the beds with vegetables and uses them in a decorative way. So instead of the beds being edged with box hedging, she uses broad beans with green stakes, or leeks growing for showing in terracotta tubes. Each year the planting changes as the crops rotate. She starts her potatoes off in small pots of compost then plants them as part of the pattern, planting and earthing up in one fell swoop. The soil looks amazing and she is the best person I know to consult when I want to know just what particular element a certain crop will need, beit more nitrogen or a little potash to get the best results.

First she showed me some seedlings that she hadn’t grown from seed. Both of us seem to have arrived at the point where we have realised it can be unproductive to want to grow absolutely everything. Sometimes being over ambitious can be a problem. Though we both share a love for unusual plant varieties we’ve concluded it’s better to grow a good classic, great tasting spud than some weird purple sort that only looks good in a photo. There is always room for experimentation but the best flavoured crops are now a priority. Shelley has some dill seedlings that were bought as one pot from Homebase which she then split to make six very healthy looking plants. That would suit me fine too. I need some dill for my pickling, so this would also work well for me. No need to always invest in a whole packet of seed.

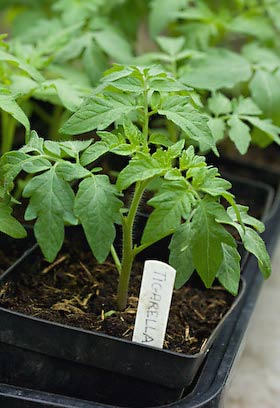
Next she planted up a tray of her special Serbian pole beans. She’d been given this bean some years ago and saves more seed each year. This bean apparently has a very fine flavour, can be eaten fresh but stores well when dried. Perfect for my preserving garden. The compartments of a recycled seed tray were filled with Shelley’s specially mixed seed compost and a bean was pushed into each one, covered with a bit more compost, et voila, that was easy enough.
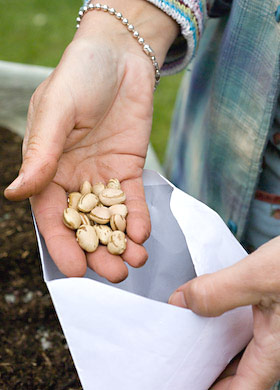
Shelley showed me her trick for broad beans, where she germinates the beans in a plastic bag partly filled with compost, just throwing her handful of beans inside, tying the bag and placing it by her Rayburn for a few days. It is also a good way of testing the viability of the seed if it has been hanging around for a while. This means that only germinated seeds get planted and avoids any gaps in the rows that you sometimes find when planting straight into the ground.
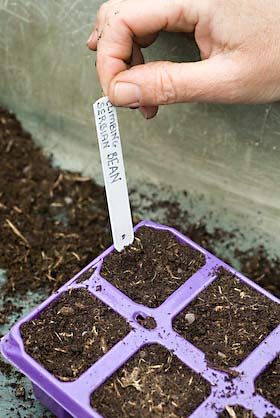
Seeds that traditionally would be sown straight in the ground and resent root disturbance can still be started off in pots, but for these a biodegradable pot works best. Beetroots and parsnips fit into this category. Shelley had some paper pots already made from newspaper for this job using a paper potter. The beetroot seeds contain several seeds in a cluster, so it is only necessary to put one seed per pot. By the time they are ready for planting out the newspaper will easily disintegrate and allow the roots to work their way out into the surrounding soil.
As the rows of seeds were sown each was labeled to avoid any confusion later on. All the seeds were lightly covered with compost except some romanesco brassica seeds that like to be planted on the soils surface. For these a light sprinkling of vemiculite neatly finished them off. All the seeds were given a sprinkling of water from the watering can then placed out of the way to germinate, in Shelley’s case on a shelf in a cold greenhouse.

So spurred on I set of back home, my tray of Serbian pole beans on the car seat beside me as well as a globe artichoke plant and a bunch of freshly picked lovage. I’m now feeling full of enthusiasm to get planting. As Shelley opened the gate for me to drive away, I thought I’d give something back in return and handed her a very healthy looking Jerusalem artichoke that just happened to be sitting in a bag in the car, recently collected from someone on Freecycle, who had offered them for free. They are the plumpest, healthiest artichokes I’ve ever seen in my life! Shelley was also suitably impressed with their quality and happily accepted my gift. That’s the great thing about gardeners, simple things can mean such a lot.
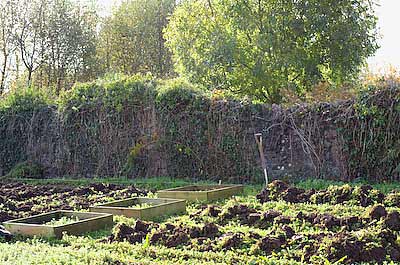
I am writing this post to cheer myself up. I’ve been busy knocking my allotment into shape for the growing season ahead and I think I’ve overdone it. Somehow no matter how much I dig and how many hours I spend trying to get through the jobs on the list, they just never get all ticked off. I’m the same with decorating the house. It is only once the job is completed that I feel the slightest glimmer of hope. So with still loads to do I decided to look back to see how far the plot has come since I first wrote about it here on my blog in October 2009. Looking at my original ‘before’ pics is helping me recharge so I can get out there some more.

I set out to plant a garden specifically with preserving in mind, so the bones of the plot are my fruit bushes; blackcurrants, gooseberries, white, pink and red currants, strawberries in abundance and rhubarb even more abundant. There’s a row of blueberries as well as raspberries and angelica, a mirabelle plum tree and an old English greengage. So the second season begins on an optimistic note even though I am momentarily gloom and doomy.

Thing is there is still a whole lot needs to be done. I’ve ordered asparagus crowns so their patch needs to be well and truly weeded and ready when they arrive in the next few weeks. The stone wall that bounds two sides of the plot has been cleared of ivy and I plan to plant along it, with some espaliered fruit trees, like apricot, fig and cherry along the top edge, where the most sun reaches. The ground along the wall is full of the roots of the ivy, nettles, ferns, ground elder and brambles, so the clearing out involved is quite exhausting and I’m impatient for it to be sorted so I can plant this season. That is the part of gardening that does my head in, learning to be patient and accepting the limitations that time allows.
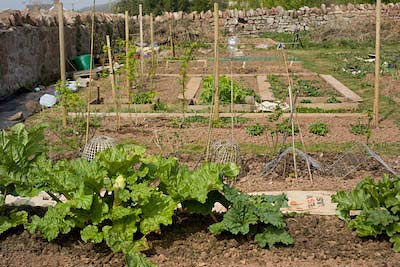
I’m quite pleased with the layout of the plot. The beds are all rectangles and squares made up as I went along, so the look is quite orderly but asymmetrical at the same time. I bought a job lot of old scaffolding planks last year intending to use them to edge the beds but I’m liking them laid down to form the paths between the beds with some hessian coffee sacks also covering some of the paths like fitted carpet. They’ve been pegged down with bent wire pins and will last for a year, hopefully longer, but in the meantime give the plot a nice tidy look and keep the weeds away. We have problems with rabbits and pheasants on the site, so you have to be on the defensive whenever anything is planted. Happily, there are fewer slugs and snails than I’ve ever experienced before.

With April upon us, it is now time to plant some seeds to fill in the gaps around the fruit. I’ve got some straightneck squashes to sow, that I loved in bread and butter pickle last year, dill for more pickling and borlotti beans for drying. My garlic for pickling scapes is growing well and hopefully the rabbits won’t take a shine to it.
The rhubarb is doing splendidly. I’ve harvested a few stalks already and will have more in the weeks ahead even though I need to go easy on the cropping as this is still early days. I think next year it will come into its own and again some patience is called for. Today I noticed there were a few flower heads starting to form, so it was necessary to cut them off so the plants don’t waste their energy needlessly.

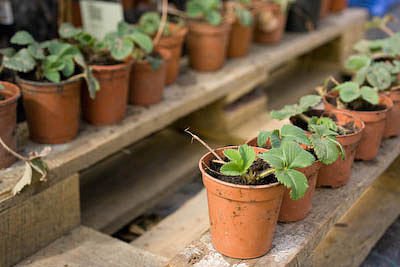
I have high hopes for the strawberries planted last year. Fingers crossed they will do well this year and the preserving pan will be ready and waiting when they do (and some will be consumed fresh as well of course). I haven’t finished weeding the second strawberry patch yet and already have plenty of little plantlets potted up ready for a new home in my garden. Well, I’m feeling cheerier already. I’d best get out there and continue with the digging.
Just to let you know that I will be exhibiting at The Selvedge Spring Fair on Saturday the 2nd April 2011 at St Augustine’s Church Hall, Langdon Park Road, London N6 5QG. 10am – 5pm Entrance £2.50 I will be selling textiles from The Laundry, vintage French jam jars as well as some of my homemade preserves. My talented and creative friend Deborah Schneebeli-Morrell will also be bringing along some of her amazing papercut designs and we are working on some really special labels for labelling preserves which wont be like any others you have come across before. I will tell you more nearer the time, but in the meantime, do make a note of the date in your diary. See the Selvedge website following the link to see who else will be there.
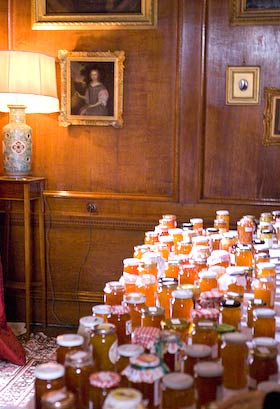
The marmalade making season is now full on. I don’t need a whole cupboard full of Seville orange marmalade, just around 8-10 jars will keep me going throughout the year and a few jars for my Mum. I have a couple of other marmalade recipes I like to make as well, so there is never a shortage in my house. Last year I made my lemon, fig & lavender maramalade and pink grapefruit, rhubarb and cardamon , especially to enter in the Marmalade festival at Dalemain Mansion, Nr Penrith. The lemon, fig & lavender marmalade didn’t score too well at the festival, even though it has been a big hit elsewhere, has been chosen to be included in a canning book out later in the year in Canada, and provided the inspiration for a few other canners who tweaked the instructions to suit themselves but came back with a resounding thumbs up. It is quite a robust marmalade and perhaps just wasn’t citrussy enough for the Dalemain judges. I did receive a little scorecard back after the event but unfortunately it has become lost in the mists of time on my desk, so I can tell you no more than that.
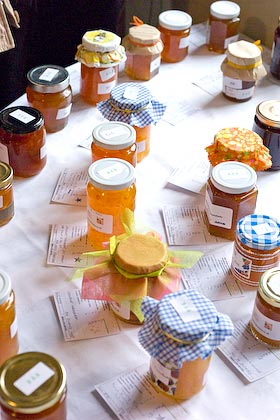
The pink grapefruit, rhubarb & cardamon marmalade did quite well in the ‘romantic’ category and has now become a running joke in my family as the scorecard said ‘nice try’. But it is the taking part that is important and Dalemain has become such a well publicised event for all sorts of worthy reasons that I would encourage anyone to participate and if possible go there and see what an extraordinary sight it is; tables laden with more jars of glowing amber preserves than you can possibly imagine in a grand English stately home setting. The event is now so well established that jars are sent in from all over the world, with entries from Japan, Australia and the US. Last year the tally was over 650 entries from amateur makers with a third of those entries being from men.
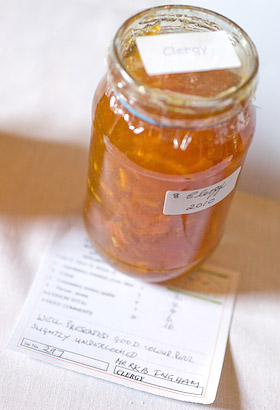
In last years Clergy class, despite divine intervention, Mr Ingham was let down by his ‘peel slightly undercooked’.
The categories have changed this year, so alongside category 1, ‘thin cut Seville orange marmalade’, category 6 has a ‘peers & political’ theme, and category 7 a ‘military’ vibe. I imagine the titles are open to interpretation, but last years ‘B & B’ category (not included this year) was for boarding house proprietors and ‘clergy’ (included again this year) is presumably for right reverends men (and women) of the cloth or their housekeepers. Anyway, I’m fancying category 11, ‘inventive’ and perhaps some trad thin cut Seville this year. You can find my recipe for this classic here.
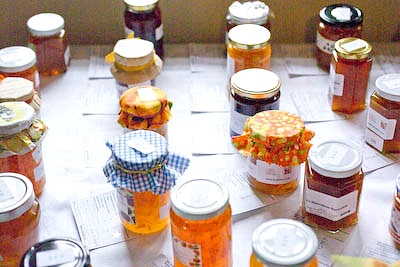
The Marmalade Festival at Dalemain Mansion, Nr Penrith, Cumbria takes place Saturday 12th & Sunday 13th February 2011 10am-4pm See their website here for more information and to download the form to accompany your entry, which needs to reach them by 6th February. The event is held in aid of the Hospice at Home, Carlisle and North Lakeland.
You can also find details on the website of special events taking place with Pam ‘the jam’ Corbin demonstrating how make the perfect marmalade and Dan Lepard, baker extraordinaire, showing how to make the perfect loaf to serve with it.
Dan Lepard, as country farmer amongst the aconites at Dalemain, 2010.


Today is a gloriously sunny day but it doesn’t fool me. We’ve already had a few nippy evenings, sent to prepare us for autumn ahead. Hopefully, we’re due a good September weatherwise but Autumn’s coming whether we like it or not. So as well as lots of canning projects over the next 2 months to stock up the store cupboard (more plums, damsons, apples as well as pears, quinces and all the hedgerow berries to look forward too), I’m also trying to get a few other jobs done to make life warm and cosy. I really must replace the fire bricks in the Rayburn soon, it’s no good leaving it till the weather has already taken a turn for the worse. There is a box of them beside the Rayburn, been there since last year. And I need to get the chimneys swept.

I intended laundering all my blankets in the spring, but didn’t get around to it, so today resolved to make a start. I love blankets and as you can see, once they are collected together, I have quite a few. Vintage Welsh blankets are my favourites, the weaves and colours are just wonderful. So first I piled all the blankets up so I can work my way through them, washing them one by one, restoring them, to their pristine glory ready for colder months ahead. I have 5 cats so my house consists of lots of cat beds, in fact it is lots of cat beds all joined together. The blankets collect fur as well as dirty wet paw marks.

I have on occasions washed blankets in the washing machine with sometimes good, sometimes disastrous results. I’m not prepared to chance it with any of my precious blankets. They are all pure wool and some feel more robust than others. If your blankets say on the label to wash in the machine, then you’ll be fine. Don’t think any of mine have labels so common sense is the best approach. Once wet, they become big heavy unwieldy things to handle so you do need a bit of muscle and a cup of tea and a biscuit (or a prize winning scone perhaps!) every now and again.

HOW TO WASH A BLANKET
Give your blanket a good shake out doors. If like mine, they have animal hairs on them, it is a good idea to run the hoover over the hairy bits, holding it taught as the suction of the nozzle removes the excess. If your blanket has any stains, these will need to be dealt with as appropriate for its type. A good old fashioned bar of soap rubbed into the stained area will sort out most stains, but dried blood or grease marks may require a product designed specifically for that job. Don’t rub the area with too much gusto otherwise it could felt the surface of the wool.
If your blanket is too large to fit in the sink use the bath. Fill the sink or bath with plenty of lukewarm water, so the blanket can move about in it, and add some soap flakes, Woolite or Stergene to give a good lather. Lower the blanket into the water and agitate it gently, working around the blanket but not rubbing it excessively. Remove the plug and allow the water to drain away and try and gently squeeze out as much excess water from the blanket as you can. This is where you need muscles. A washing up bowl or bucket is also useful here, as you can lift the blanket into it while you rinse out the sink or bath and refill with clean warm water for the first rinse. It is really important that wool blankets are not subjected to sharp changes in temperature to prevent felting, so try to keep the water at a similar lukewarm temperature throughout.
Rinse the blanket a couple of times in clean water until the water stays clean and shows no sign of suds. You can add fabric conditioner to the final rinse if you wish. Lift the blanket and squeeze as much water as you can from it. If you have a washing machine robust enough to take the wet blanket you can then spin it in the machine. If the blanket is too heavy for your machine you will need to fold the blanket, place it flat on a large towel and then roll the towel up so it soaks up the excess liquid from the blanket.
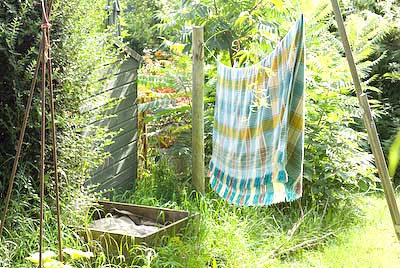
Hang the damp blanket on a washing line out in the fresh air and use plenty of clothes pegs to hold it straight and taut. Pull the blanket into shape so warp and weft threads run straight, giving any tight edges a gentle tug and stroke out any creases. A gentle breeze on a warm day is the ideal scenario so your blanket will dry quickly and be in great shape. If you have the time, move the blanket part way through its drying time and re-peg, that way you wont end up with a crease where it is folded over the line and it will prevent the pegs from making indented marks on the fabric. Your blanket should now be clean and soft as well as smelling as fresh as a daisy.
So that’s one blanket sorted. Only another 15 to go!

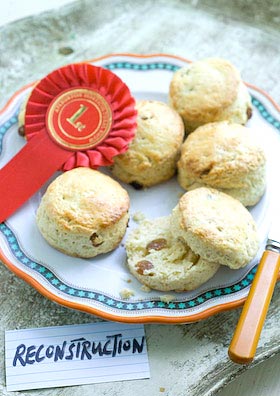
I want to share my joy with you, the moment my scones, entered into the produce show at our village hall at the weekend, won first prize. I certainly never expected this triumph so when I went into the hall to find out the results and spotted I’d been awarded the first prize, OK I can see now, it was a bit over the top, running round the hall punching the air with my jumper pulled up over my head!
I’d been in a right quandary in the lead up to the event. Last weeks British Bake Off programme on TV had featured scones and it was only then I thought I’d enter some in the Aylburton show. The scone class has always seemed too highly contested for me to have winning ambitions. After the British Bake Off programme I pressed the red button to watch expert baker and programme judge Paul Hollywood show how to make his ‘failsafe’ scones. With classic baking like this it is always extraordinary how the same ingredients can be mixed to give totally different results. I was appalled that he used 2 eggs and when out of the oven I thought his scones too high baked. Straight to Twitter someone described his scones as ‘pants’ so I wasn’t alone. How we all have an opinion; to add fruit or leave plain, use self raising flour or plain, adding the traditional cream of tartar and baking soda yourself, using sour milk, buttermilk etc etc. See this excellent and comprehensive roundup about scone making.
Even though I’ve made scones loads of times this all sent me a bit wobbly and over the following few days I made several batches trying different recipes, other than my own, thinking they would be appreciably better than mine, but none worked out how I wanted. On the morning of the show facing the decision whether to enter fruit scones or not I fell back on my own tried and tested recipe that you can find here. The first batch I made I forgot to put the sugar in. There was just enough time to make another lot and get it right, though the look of the second batch wasn’t so good. Suffice to say, got down to the village hall, added my entry to the baking table and as they say… the rest is history.
Couldn’t find my favourite cutter so had to use a slightly larger 6.5cm (2 1/2in) diameter cutter instead. This made 7 scones and the last 2 had to be cut from reformed dough, which isn’t ideal if you are aspiring for 6 perfect matching specimens. Also as the category was for fruit scones I added 50g sultanas to my plain scone recipe as well. Paul Hollywood gave a good tip in his red button masterclass. He said when brushing the tops of the scones with milk/egg wash watch none drips down the sides as this can set and prevent the scones from rising evenly. Mind you, a wonky scone looks quite good, don’t you think?
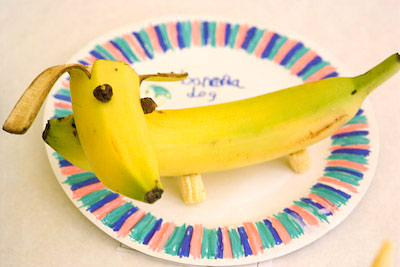
Our village show is really great. Very charming and relaxed. So relaxed in fact that you can never guauge what the criteria is for success. You can spend time faffing about with your presentation only to be beaten by a bottle of ketchup in a plastic bottle, but it is all good fun and everyone pretends they are taking it in good heart and that’s the main thing. Will be posting more pictures later but this is my highlight of the show this year – Banana Dog.
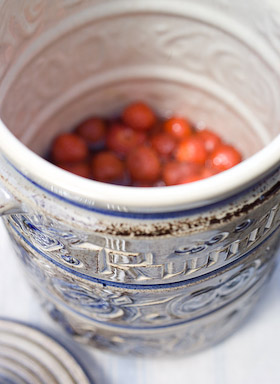
Tigress got the ball rolling back in June when she wrote about her plans to start a rumtopf using her new-fandagly fermenting crock. I don’t think I’m the only one she inspired to rumtopf-along with her, but first I needed a suitable jar. The only pots I’ve seen for making rumtopf have always struck me as hideous; big bulbous lumpy jars illustrated with fruits and the word ‘rumtopf’ etched on the front, the recipe is right there on the jar. A fermenting crock would be a very cool to use, but as they are hard to find and when found cost in the region of £80, one of them was way out of my league. I kept my eye on Ebay and eventually found a jar that I could live with. You can make do with a tall clip-top preserving jar instead if you like but I’m enjoying making my rumtopf in its own purpose designed container.
So the jar eventually arrived and it is definitely vintage 70’s. I peered inside and caught a glorious wiff. The jar was not only vintage but had been used before. I knew this as the lightly crazed inside had soaked up previous alcohol and fruit flavours. It smelt fabulous, fruity spirit with a hint of lovage! I couldn’t stop sniffing and shoving my head further inside to soak up the aroma. The jar is about head size, you could effortlessly slip your head inside whilst becoming mesmerised by this magical scent and the desire for more, but slipping it out again may not have been quite so easy. I stopped short of ending up in casualty with a rumtopf on my head. That would have been ridiculous but, come to think of it, would have ensured a mention in the Forest Review.
So what is a rumtopf? It is a way of preserving fruit in alcohol. You start it June – July time, add different fruits in layers as they come into season, throughout the summer and autumn, along with some sugar and enough rum or brandy to keep it submerged, and when it is full, about 6 – 8 weeks before Christmas, you then leave it till ready to devour at Christmas time. The contents can be decanted into kilner jars to give as gifts, the fruit can be eaten with cream or ice cream and the alcohol, which I understand is deceivingly dangerous, can be drunk as a liqueur or added to sparkling wine.
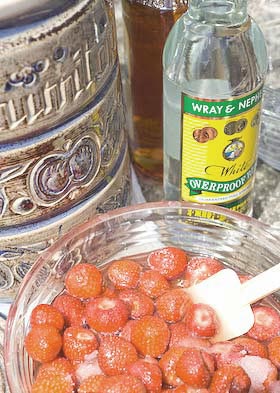
Most fruits are suitable with just a few exceptions; melon is too watery, the skins of blueberries and gooseberries go hard, bananas turn to mush, citrus fruits and rhubarb are a no-no. Traditionally you start with the first strawberries of the year, any amount between 250g – 750g plus half its weight in sugar. Remove the stalks and leave the fruit and sugar in a glass dish to marinate overnight and help release the juices before decanting it into the rumtopf jar. Pour rum or brandy over it until it is completely submerged, then find a plate or saucer that will fit inside the jar and push it under the alcohol so that the fruit can’t bob up to the top. I have read that the alcohol should be at least 54% proof and as spirits on general sale are usually around the 40% mark I had to seek out some overproof stuff. Asda sells an overproof white rum at 63%, so I mixed it, two thirds overproof to one third normal dark rum to get somewhere near the 54%, make the rum go further and give it a darker colour. I think this may be a mere detail and am sure that most people don’t go to so much trouble.
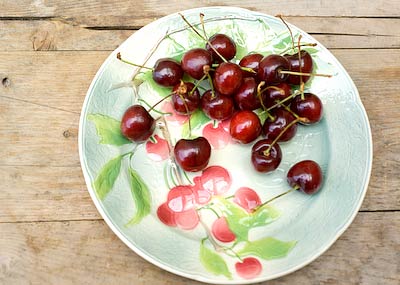
You continue to add more fruity layers as they appear; raspberries, cherries, nectarines, peaches, pears, plums, apricots and blackberries. Use any amount of fruit you have, adding half its weight in sugar each time and making sure to add more alcohol when needed to keep it covered. Cover the top of the jar with clingfilm and put the lid on top of that then leave it in a cool place out of the way to do its thing. If using a clear glass preserving jar, keep in a dark place as well. I’m up to my third layer of fruit so far but just can’t stop myself having a sniff everytime I walk by the jar.
