LOVING A DUTCH BABY
Tuesday May 12th 2015, 12:16 pm

Keeping chickens does make me appreciate any recipe that includes eggs, and the more the merrier. I especially collect recipes that will help me conquer the mountain of eggs that regularly accumulates in my house and as first impressions are so important, find myself going straight to the egg count when reading a new recipe.
Too many eggs is always a good excuse to make a dutch baby pancake, not that excuses are needed. As well as an over-abundance of eggs, there might be no bread in the house for toast and there are always jars of preserves and compotes need emptying. A dutch baby is perfect for a late breakfast / brunch type of thing at the weekend or great at any time when a pudding is called for. If you have never experienced a dutch baby, it is basically somewhere between a big fluffed up Yorkshire pudding and a gooey egg custard, crisp along the edges but soft and luscious in the centre. I like to make mine in a cast iron skillet that goes straight from oven to table, but you can make individual ones in a Yorkshire pudding tin if you like, just adjust the cooking time and keep an eye on them.
The pancake puffs up and every time you make one you get a slightly different wild and wonderful result The down side is it will then quickly deflate, still looking pretty good but not such a show stopper. This provides an ‘ooooo’ factor to the proceedings and does require everyone to be ready at the table, to really appreciate the full experience.
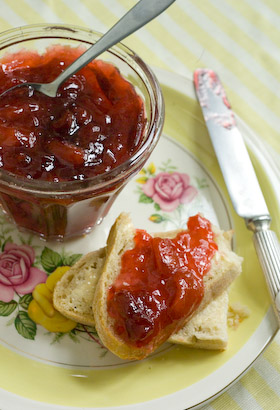
I most often add my homemade vanilla essence and pop open a jar of compote to go with; nectarine and blueberry compote being my absolute favourite, then really push the boat out by serving with cream, the thicker the better! Alternatively you could add some lemon juice and zest to the batter. Maple syrup, caramelised apples …. well I wont go on, but you can serve the pancake with all manner of accompaniments, all equally delicious.
DUTCH BABY SKILLET PANCAKE
Serves 4-6
100g plain flour
3 large eggs
200ml milk
1tsp vanilla essence
50g sugar
pinch salt
50g unsalted butter
Preheat oven to 230C 450F Mk8 and place a 30cm (12in) skillet on a central shelf with plenty of room above for the pancake to puff up.
Place all of the ingredients except the butter in a blender and blend until everything is combined to make a batter. You can prepare the batter in advance if you want and keep overnight in the fridge.
Remove the skillet from the oven and quickly add the butter, which will melt and bubble immediately. To keep it good and hot, I usually place the skillet on a hot hob whilst doing this. Pour in the batter and immediately place back in the oven. Bake for 20 minutes, until the pancake has puffed up nicely and the edges are looking golden brown. Serve immediately.

BLOOD ORANGE AND PINK RHUBARB
Sunday February 02nd 2014, 2:52 pm
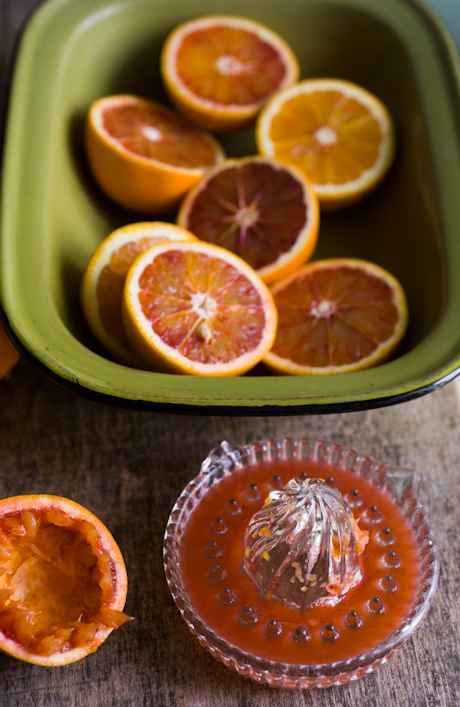
I haven’t posted on my blog for ages, so long in fact that I’ve forgotten how. This morning I found myself eating marmalade straight from the jar with a spoon and savouring the flavours; a fresh citrus hit with a tangy aftertaste. I could smell the light scent of cardamon from the jar, but should it perhaps be stronger in the syrup? Savouring and ruminating. The overall result was a good one creating an instinctive response to down another spoonful. So it seemed a fitting time to share the recipe. I have deemed this preserve a success and love the idea that others will enjoy it too.
Last week my quest for new season citrus gave the perfect excuse, in case one were needed, to treck off to Monmouth to see what Munday & Jones, my favourite local greengrocers, had to offer. They did not disappoint with a crate of blood oranges and some super perky looking early Yorkshire rhubarb on sale, the colours of which were enough to instantly lift my heart, but then I am after all a fruit geek.

I decided to make a marmalade that is a variation on a previous recipe from 2011, pink grapefruit, rhubarb and cardamon marmalade, simply substituting blood oranges for the ruby grapefruit. Yorkshire rhubarb doesn’t come cheap, so this is a good recipe to make a small amount go a longer way. It also meant I had a few sticks left over to make an upside down polenta cake as well.
As I mentioned, I am still undecided whether the cardamon could do to have a bit more impact. I freshly ground the spice in a pestle and mortar, placing it pods and all in a muslin bag to macerate with the rhubarb. Perhaps the cardamon I have could be fresher, who knows? I might buy some new for next time I make this marmalade. But still, too much cardamon would not be good either. It is always a very exacting thing when using spices and herbs in preserves, but better to underdo than over. Of course the ideal is to get it bang on!
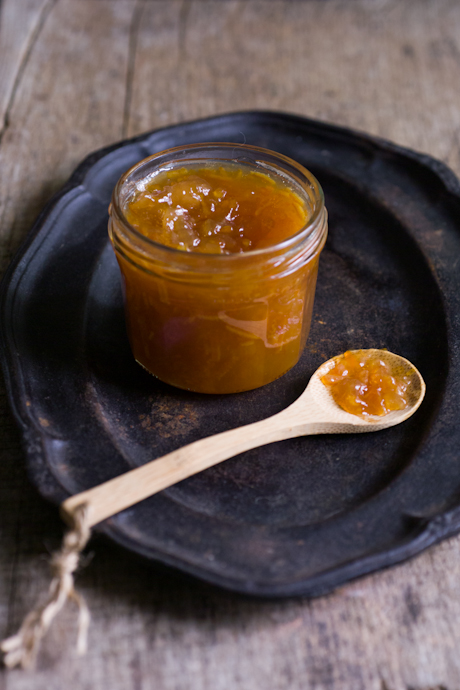
BLOOD ORANGE, RHUBARB AND CARDAMON MARMALADE
Makes approx 1.3kg (3lbs)
0.4Kg (1lb) rhubarb
1kg (2.2lbs) sugar
juice of 1 lemon
seeds from 14 cardamom pods, crushed
800g (1.75 lb ) blood oranges
Rinse the rhubarb stems and chop into 1cm (1/2 in) evenly sized pieces, slicing thicker stems lengthwise to make the pieces uniform. Place them in a bowl with the sugar and lemon juice. Tie the crushed cardamom seeds, pods and all, in a piece of muslin and push them inbetween the rhubarb, then cover with baking paper or clingfilm and leave overnight or for up to 24 hours, so the juices ooze out of the rhubarb and turn the sugar to syrup.
Wash the blood oranges and remove the peel with a sharp knife or potato peeler, leaving as much of the pith on the fruit as possible. Finely cut the peel into shreds. Squeeze the fruits, collecting the juice and tie the remaining pulp, pith and pips together in a muslin bundle. Place the shreds, juice and bundle in a pan, add 1.4ltr (2 1/2pt) water and simmer for 2 – 2 1/2 hours until the peel is cooked through and tender. Remove the muslin bundle and, when cool enough to handle, squeeze the juice from it back into the pan, then discard. Pour the peel through a sieve and collect and measure the liquid, adding more water if necessary to make it up to 1ltr (1 3/4 pts).
Prepare the jars and canner if you plan to hot water process the marmalade, otherwise, make sure your jars and lids are clean and place them in a warm oven to heat and sterilise. Place the cooked shreds, cooking liquid and the contents of the rhubarb bowl in a preserving pan and bring slowly to the boil, stirring to make sure all the sugar is dissolved. Bring to a rolling boil and cook on a high heat until setting point is reached, that is when a small blob of the syrup on a cold plate quickly forms a skin when you run your finger across the surface. It took me 20-25 minutes for the marmalade to reach setting point at a fast rolling boil, showing 104C (220F) on a thermometer. Remove the cardamom bundle.
Fill the jars, leaving the appropriate amount of headroom for canning, and seal. Hot water process for 10 minutes, then remove from the canner, leave till cold and test that the lids are sealed. Label and store. Alternatively, without canning, top jars with sterilised lids or use traditional wax paper circles and cellophane with elastic bands to seal. This marmalade should store safely without canning, but hot water processing will make doubly sure that your jam will keep and store without a hitch.
Defrosting the Freezer – so Baked Cranberries
Wednesday August 14th 2013, 7:32 pm
Yes it has been a while since I last posted, so long in fact that I have forgotten how. But that doesn’t mean I’ve been idle. For anyone who doesn’t know already, I do post regularly on facebook so do feel free to like my page and then you can follow what I am up to.
The other day it became imperative that I defrost the freezer. I don’t like my freezer particularly as it is a dumping ground for things I tend to forget about, all the while it is costing money to run. But it does offer a convenient and practical option now and again and I daresay for some foods it is the best way to preserve them. I fill the freezer up with stuff as it is effortless to do so but I prefer bottles on shelves to a forgotten freezer-full, out of sight out of mind. The other day I realised the freezer was defrosting of its own accord, demanding some attention, so I gave it a good clear out, defrosted it, washed it down with bicarb then switched it on all ready to start the process again. There were luckily few casualties, I took the opportunity to edit down the contents, but 2 bags of cranberries, put away last Christmas (or could it have been the year before!) and some redcurrants from last summer had started to thaw so needed using up.
With an abundance of freshly picked summer fruits in urgent need of preserving, these blasts from the past were something I could do without, but there was no way I wanted them to go to waste either. The redcurrants went into a traubleskucha redcurrant cake courtesy of nadel & gabel. The cake was a big success; a light sponge base with a layer of tart redcurrants topped with a macaroon lid that cracked and splintered as the fork went in. I’ll be making that one again and perhaps will add some vanilla or almond extract to the sponge next time too. So highly recommended and you may still find some currants for sale, my local supermarket has them right now.
So that left the cranberries. In the UK, fresh cranberries are only for sale for 2 minutes round Christmas time. Last year Sainsburys sold Kent grown cranberries but only in selected Kent stores. Otherwise they are always imported. I’m sure I’ve seen them all year round for sale at the farm shop down the road that sells frozen fruits loose from big tubs, that you can buy by weight by the scoopful. I haven’t had cranberries enough to really develop a love for them .. till now anyway.
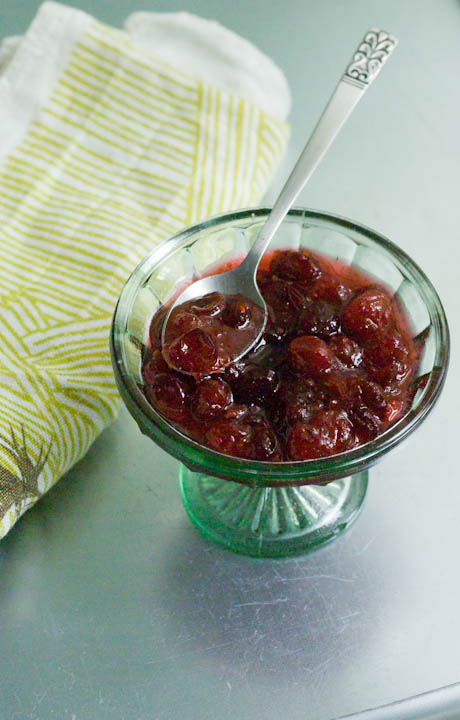
For inspiration I decided to refer back to one of my all time favourite books, an American book I have mentioned before, Fancy Pantry by Helen Witty (1986) and her recipe for baked cranberries with orange and cardamon is a triumph. You can eat it like jam or a compote, it is somewhere between the two, and it is the easiest preserve you will ever make, requiring no bringing to setting point. The flavour is fresh and amazing and even though it is out of season, I am wolfing it down and planning the next batch. Eat it as an accompaniment to savoury dishes too, in the same style as a traditional cranberry sauce. It isn’t overly sweet, it’s just right. The sugar content is not high enough to make a preserve that will keep, so best store in the fridge, if it lasts that long, or do what I do and water process (can / bottle) it so it will keep on the shelf for a year or more.
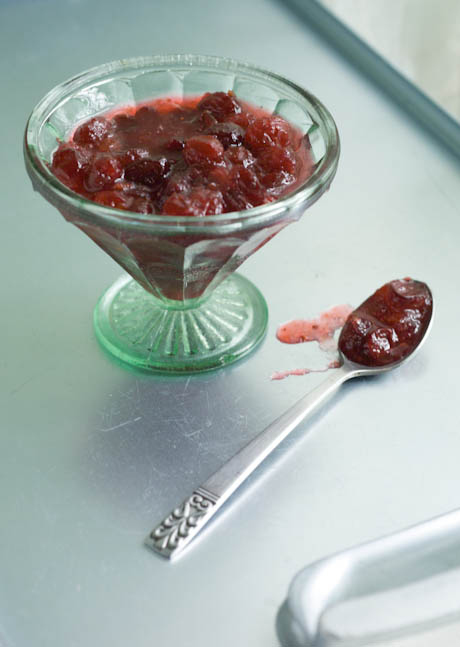
BAKED CRANBERRIES WITH ORANGE AND CARDAMON
Makes approx 5 x 250g (half pint) jars
600g (1lb 5oz) cranberries
1 large seedless orange
500g (1lb 2oz) white sugar
1/8 tsp ground cardamon (seeds removed from pods and freshly ground)
60ml (4 Tbsp) water
Pre-heat the oven to 175C /350F /Mk4. Spread the cranberries in a ovenproof glass dish (I used 2 square Pyrex baking dishes). Remove the peel from the orange and pull away and discard the pith from inside and any surrounding the flesh. Chop the orange and peel roughly and blitz it in a blender or food processor to make a pulpy puree.
Pour the puree, sugar, cardamon and water over the cranberries and mix everything together. Cover the dish with foil and bake in the oven for 30 minutes. Lower the temperature to 160C / 325F / Mk3, remove the foil and bake for a further 50-60 minutes, turning the mixture over with a spoon every 10-15 minutes. The cranberries will look slightly translucent and be surrounded by syrup.
Spoon the hot preserve into hot sterilised jars and seal, or alternatively process them in a boiling water bath for 10 minutes. Remove from water bath and leave till cold before testing the seals.
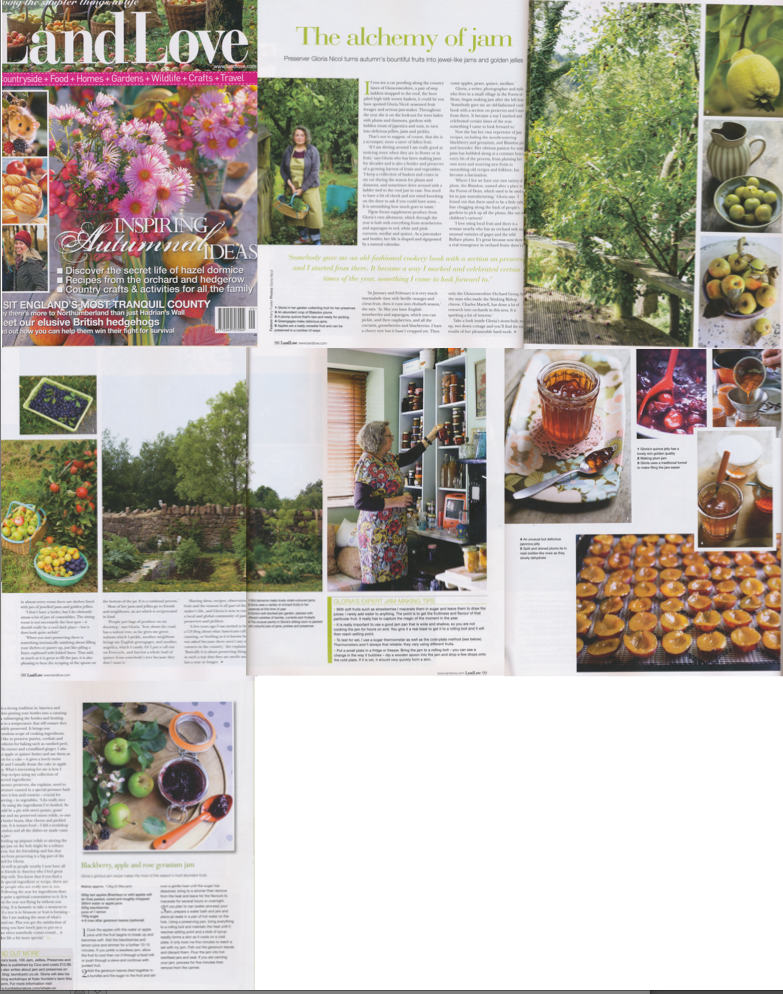
I’ve got 6 pages in Landlove magazine this month. The magazine isn’t available online so until it is off the newstands, you will have to buy a copy to read it. I’m really pleased with the feature and I think it captures the spirit of what preserving is all about for me.
CANNING FOR BEGINNERS WORKSHOP AND MEAL
Tuesday February 26th 2013, 5:12 pm

Our London canning event is now just days away. There are a few tickets still remaining so you still have the opportunity to learn about canning and bottling, how to stock your own pantry and then make fabulous meals inspired by your glorious comestibles.
To book your ticket, follow the link here. I will be bringing along an assortment of my own preserves, pickles and relishes so we can enjoy matching flavours and coming up with the perfect combinations. Kerstin and I will be preparing a banquet from jars. I would love you to be as inspired by food in jars as I am.
More information about canning and the event in my last blog post here.
Just Mad About Canning
Wednesday February 13th 2013, 10:38 pm
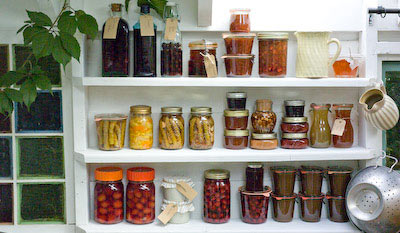
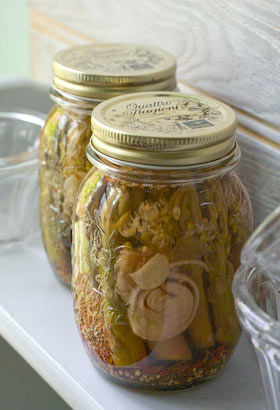
I’ve been a keen jam maker for donkeys years. Since I was 20, it’s been rare that a summer has passed by without a batch of strawberry or damson jam reaching setting point in my little kitchen. I love the tradition and never tire of celebrating the berry season each year. A few years ago I started **canning and learnt of a life beyond … jam.
Jam is lovely, and all that, and I’m still jam making with avengeance, but once you know how to can or bottle stuff in jars, it opens up another preserving dimension altogether. I now ‘put up’ all kinds of compotes, purees, pie fillings, cordials, syrups and ketchups. Sometimes I preserve fruit without any added sugar at all so my beautiful jarred comestibles become potential ingredients ready to turn into dishes, desserts and baked goods later down the line. More recently I’ve begun pressure canning vegetable soup and pulses made with homegrown vegetables from the plot.
**Canning or bottling enables produce in jars to be processed in such a way that the contents will become sterilised and so keep for a year or more safely unopened. The process involves immersing the filled jars in a boiling water bath or heating them under pressure using a special pressure canner. The correct technique called for depends on the acidity or alkalinity of the ingredients.
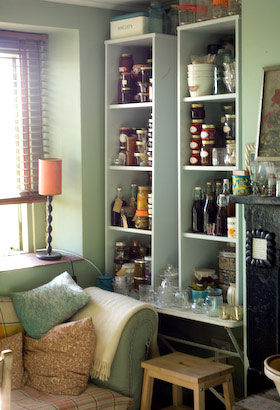
At first my ambition was to fill the shelves. A well stocked pantry or store cupboard is a thing of beauty with a real feelgood factor and the added advantage a ready supply of comestibles means you wont starve. So I filled the shelves with colourful and flavour-filled jars in tidy ordered rows till there was hardly room to fit more, all very satisfying. Then I realised the turnaround, opening jars and using up the contents, was the next vital part of the job. The scraping sound as the spoon scoops the last morsels from the sides of the jar has become music to my ears. Oh yes, an empty jar offers another opportunity, to be refilled with something even more delicious. And so the cycle continues. I’m on a voyage of discovery to find the preserves I adore and can’t get enough of. I don’t want anything nondescript taking up valuable shelf space in my house.
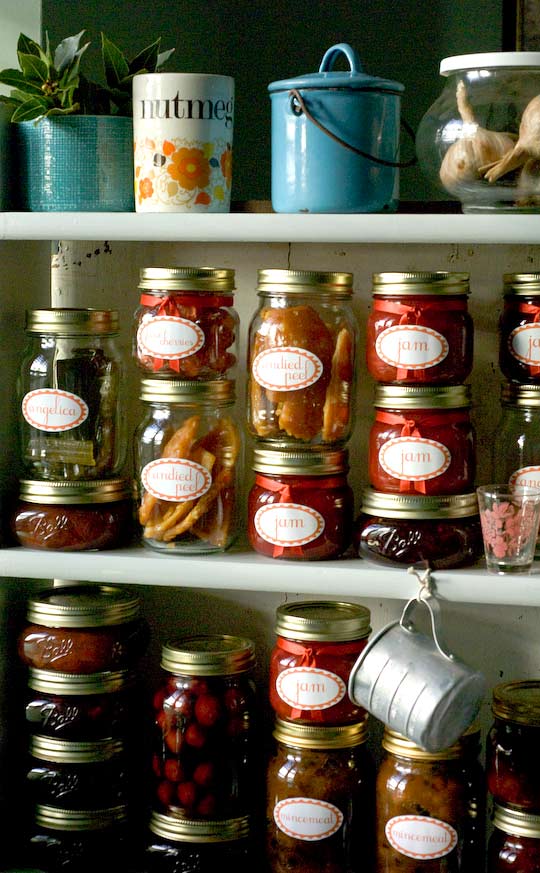
Learning how to can or bottle produce has totally changed my approach to how I source ingredients, store food and cook it. Making use of mainly homegrown or locally grown produce means naturally following the seasons and going with the flow. I feel it allows me to appreciate more living in the moment. I just love that.
Bottling fruit was once a common activity in the UK, especially during wartimes until freezing food became the easier option. Once every household had a freezer, bottling was seen as to much of a faff, all but one of the companies in the UK making the necessary equipment died a death and only a handful of diehard allotmenteers and make do and menders managed to keep the craft alive. I too own a freezer and it is filled to busting with stuff I generally forget about. I have realised that if I freeze some homegrown veg, all the while it languishes in the freezer it is clocking up additional cost. It is an expense most of us are quite prepared to accept, but with utility bills rapidly on the rise, these considerations become more relevant. Those bargain beans will have cost a fair bit more by the time I use them, that’s if I remember to use them at all of course. Alternatively, the joy of jars on shelves means once bottled the food doesn’t cost a penny more or require defrosting either. Pop open the jar and it’s ready to go. It is surely time to revive this culinary craft and give a big tick for sustainability.
But apart from all the practical reasons to love canning, the flavours are the biggest plus. I was brought up to think that preserved foods were second rate and nowhere near as tasty as fresh. What I have experienced first hand confounds these ideas. By following correct practice and keeping cooking times safe but to a minimum, you can capture the most intense and delicious flavours in a jar, capture the absolute essence of those ingredients.
These Are few of My Favourite Things :
Squashed Strawberries
With months of rain over the summer, 2012 was a difficult one for growing fruit and veg here in the UK. For a couple of weeks in July a freak strawberry glut meant strawberries were on sale at a bargain price, juicy, flavourful local strawberries. I bought loads and bottled them. They have been my favourite and most useful preserve of the year and they’ve been eaten with yogurt, rice pudding, cake … just about anything. Now down to my last couple of jars and hoping such good fortune is to be found this summer for a repeat performance. Canning means you can make the most of bargain-priced ingredients when they come your way.
Rhubarb Ketchup
I gave my recipe for rhubarb ketchup a couple of years ago and it has been a big hit with everyone who has tried it. I like to add it to my vegetarian cottage pie. I grow rhubarb anyway, so is generally in plentiful supply and I try to make enough ketchup to see me through the year. This is a good one for people with savoury tastes too.

Quince Blood Orange Cordial
Stocking up with cordials is when canning makes such sense. You can make combinations you will never see for sale anywhere and quince blood orange and coriander definitely fits that category. (For this fabulous recipe see my top-notch canning chum Shae’s blog – Hitchhiking to Heaven) Can be given added sparkle or served flat, scope is endless for a non-alcoholic tipple or as part of more potent cocktails.
Straight Bottled Morellos
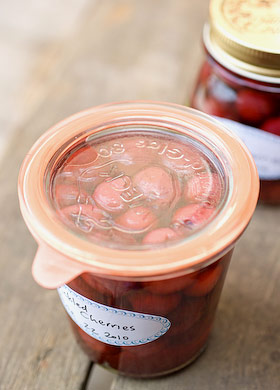
Though the canning cycle naturally runs over 12 months, some people like to stock up for longer in case next year their tomato crop is destroyed by blight or unpredictable spring weather ruins the quince harvest that should rightfully follow. Most produce if bottled and stored correctly will stay good for a year or two. I’ve got a couple of jars of morello cherries bottled in 2011, still delicious and destined to become clafoutis. Fingers crossed the local cherry harvest is bountiful this summer so I can stock up again.

* I CAN SHOW YOU HOW TO CAN *
It is always so much easier to have someone who knows what they are doing to show you the ropes. Kerstin Rodgers (aka Ms Marmite Lover) has invited me to run a special canning class on 3rd March 2013 starting at 2pm, as part of The Secret Garden Club at her The Underground Restaurant, in North London, followed by a special supper focusing on food from jars.
At Canning for Beginners, you will learn all you need to know to get started; Which ingredients call for what approach, a basic sequence to follow every time you prepare your jars, how to water process high acid ingredients and a brief introduction to pressure canning for low acid ingredients and what you need to consider to keep your canning safe.
We will cover the best jars to use, how they work and what tools and equipment you will need and I will be advising on the best sources for specialist bits and pieces that are harder to find.
After bottling some fruit compote to take home, there will be a meal based around preserved ingredients.
Be prepared to be surprised by just how wonderful the flavours of preserved foods can be.
JAR MEAL (PROVISIONAL) MENU
Soup in a jar
Selection of Cheeses and individual hand pies with an abundance of pickles and relishes to go with and sample. The pickles and relishes to include jarred garlic scapes, black grape chilli jam, pickled golden beetroot with onion, rhubarb ketchup, pickled greengages, etc.
Little Cardamon or almond puddings baked in vintage French jars served with pear vanilla compote or roasted rhubarb and clotted cream.
Damson mincemeat and Bramley apple jalousie served with ginger syrup cream.
You will leave with a goody bag to take home containing a preserving jar, a pair of jar lifters and a list of useful resources as well as my suggested reading list so you feel ready to go off and stock your own pantry with wonderful things.
The event is by ticket only and there are limited places available. To reserve you place book here.
FORAGING FOR BLACKBERRIES
Tuesday October 02nd 2012, 12:39 pm

For the last few years, the apple harvest in my area has been abundant and neighbours growing orchard fruits have been hard pressed to give away their surplus crops. Boxes and bags filled with bramleys and Blenheim orange apples, stacked up by garden gates with hand-written ‘apples for free’ signs are not an uncommon sight September- October time, and as an obsessive preserver I’ve been ready and waiting to take full advantage. But after this year’s early burst of spring followed by what seemed like months of summer rain, the 2012 harvest is set to be on a much more modest scale.
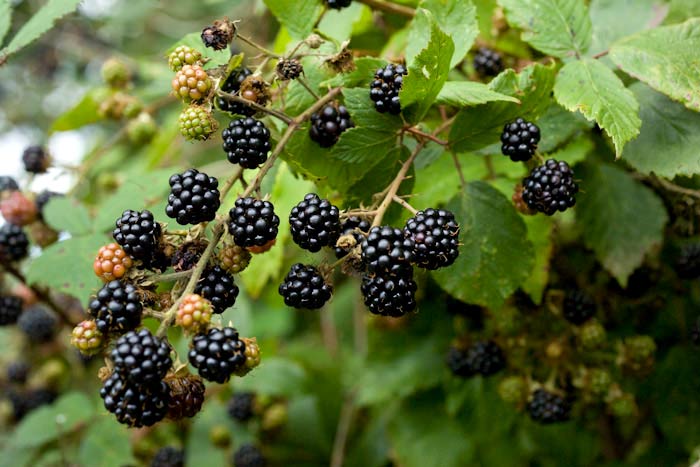
Apple and pear trees usually heaving are either bare or noticeably sparse. One neighbour, with her own orchard, told me, the bees just weren’t around at the right moment to pollinate the blossom. Thankfully there is always some crop or other that has benefited from another’s struggles and this year the blackberries in the hedgerows seem plumper and more plentiful than I’ve ever seen them before. The early foraged blackberries, usually containing more pectin, make the best jam with good setting power, whilst the later ones are more useful for cordials and chutneys. By mixing them with some of the few apples around, I’ve managed to eek out the best of both worlds. The two wild apple trees near to home still carry a few fruits that need using up.

Blackberry and apple jam is a classic that works equally brilliantly for breakfast, spooned onto scones or, as the purists serving suggestion, on bread and butter. I prefer to leave the blackberries whole and love their texture, but you can put the fruit through a food mill or sieve to make a smoother seedless jam more to your liking. I acquired a rose attar scented pelargonium earlier in the year to pair with blackcurrants, so here’s another opportunity to break off a few leaves and add them to the pot. It just adds the extra element required to make this simplest of jams into something exceptional.
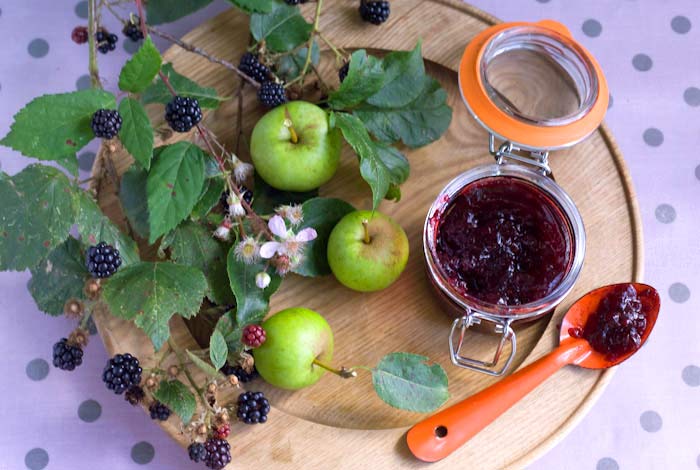
BLACKBERRY, APPLE, ROSE GERANIUM JAM
Makes approx. 1.2Kg (2 1/2 lbs) of jam
500g (1 lb) tart apples, bramleys or wild apples will do fine, peeled cored and roughly chopped
300ml (10 fl oz) water or apple juice
500g (1 lb) blackberries
juice of 1 lemon
750g (1 3/4 lbs)sugar
4 – 6 rose rose attar geranium leaves (optional)
Cook the apples with the water or apple juice until the fruit begins to break up and becomes soft. Add the blackberries and lemon juice and simmer for a further 10-15 minutes. If you prefer a seedless jam, allow the fruit to cool then run it through a food mill or push through a sieve and continue with pureed fruit.
Add the geranium leaves tied together in a bundle and the sugar to the fruit and stir over a gentle heat until the sugar has dissolved, bring to a simmer then remove from the heat and leave for the flavours to macerate for several hours or overnight.
If you plan to can (water process) your jam, prepare the water bath and jars and place jar seals in a pan of hot water on the hob. Using a preserving pan, bring everything to a rolling boil and maintain the heat until it reaches setting point and a blob of syrup readily forms a skin as it cools on a cold plate. It only took me 5 minutes to reach a set with my jam. Fish out the geranium leaves and discard them. Pour the jam into hot sterilised jars and seal. If you are canning your jam, process for 5 minutes then remove from the canner.
SUMMER THROUGH ROSE TINTED SPECTACLES
Tuesday July 10th 2012, 6:37 pm

For anyone reading this in sunnier climes, in the UK it has rained and rained and rained. Other countries have their rainy seasons but our monsoon season always comes as a complete surprise. Even the most determined gardeners have had their endeavours thwarted by perpetual rain. Food producers have lost their crops on flooded land. God forbid, we’re all set for a scarcity of potato crisps in the months ahead! Whatever happens, food is bound to cost us more.
I’d been waiting for a dry sunny day to go and harvest the fruit on my allotment. Despite my lack of horticultural effort this year, I have been rewarded with a fair amount of produce. The berries would no doubt have benefited from a bit more sun, or any sun, but a few days ago I was still able to pick strawberries, raspberries, white, pink, red and black currants, gooseberries and even a handful of alpine strawberries. The currants were tedious to pick and the red ones turned mouldy in an instant, before I had time to get them in the pan. So sad as they are such a glorious fruit. There are still more white currants to harvest as patience got the better of me after stripping 5 bushes. This is my first year of any kind of crop as the bushes were planted just a few years ago.
The pink currants are particularly beautiful and as this is my first opportunity to preserve them I was curious to see whether their marvellous colour would follow through in a jam. They are a variety called Gloire de Sablon. I made the simplest jam with them, just berries, sugar and water, pushed through a food mill to remove the seeds, but not dripped in a jelly bag which would have given a clearer result. The jam has the look of a jelly but with just a tad more texture, a bright tangy flavour and will be eaten with relish on toast for breakfast. All currants contain plenty of pectin, the stuff you need to help jam set, so achieving a firm set shouldn’t be a problem.
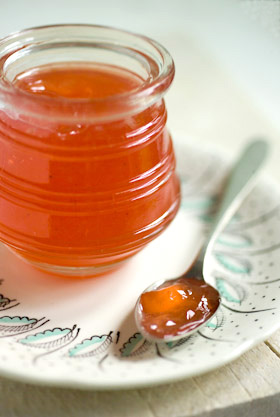
PINKCURRANT JAM
Makes approx 750g (3 x 1/2 pint jars)
550g (1 1/4lbs) pink currants
500g (1lb) sugar
300ml (1/2 pt) water
Place all the ingredients in a pan and bring slowly to a simmer, stirring all the time until the sugar has dissolved. Simmer for 5-10 minutes until the currants are cooked and burst. Take the pan off the heat, pour the contents into a bowl and leave covered overnight.
Next day push the currants and syrup through a sieve or food mill, collecting the juice and puree in a bowl underneath. Prepare your jars by sterilising them and their lids in a warm oven for 15 minutes or alternatively prepare a water bath, preserving jars and seals, if you plan to process (can) your jam.
Place the puree and syrup in a preserving pan, bring to a rolling boil and maintain to setting point, which should only take around 5-10 minutes. Skim to remove any froth from the edges of the pan, then pour into hot jars and seal. Alternatively, pour into hot preserving jars, seal and water process for 5 minutes. Remove from the water bath and leave to cool for 24 hours before testing the seals.
A MARMALADE MAKERS BLUEPRINT
Tuesday March 13th 2012, 11:04 pm

The big citrus preserving fest is just about over now. The Seville oranges have finished for the year and though there is always some citrus fruit available to buy all year round, with a plentiful supply of rhubarb just around the corner, I’ve had quite enough of the colour orange and am ready to don my rose tinted spectacles. Actually I haven’t made too much marmalade this year for one reason or another, but full of the usual good intentions still managed to buy the fruit anyway.
So time to clear the decks. That bowl of kumquats that I searched so earnestly to find, that pomelo that has sat patiently in the kitchen for the last few weeks and the handful of ruby oranges that I had almost forgotten were there, all need using up pronto. And then there are unwaxed lemons, 2 limes with peel starting to yellow and 3 bog-standard oranges that somehow got mixed in with the blood oranges at the fruit and veg shop. Oh, and a few bitter Seville oranges too. So to celebrate the last of the citrus why not use the whole lot in one fell swoop.
In some ways a recipe for this fruit-medley marmalade isn’t necessarily that useful to anyone else as the chances of you having the same mixture of fruits may be unlikely and the idea of going out with a shopping list for this exact combination fruitless. But knowing some basic principles for making marmalade is useful and can encourage everyone to use what they have as well as give you confidence to do your own thing if you fear stepping outside of the box. If that all sounds too much like hard work, by all means follow the recipe to the letter or sample a marmalade made earlier; pink grapefruit, rhubarb and cardamon marmalade or gooseberry and lime marmalade or perhaps lemon, fig and lavender marmalade, which is a good one for making just about any time during the year.
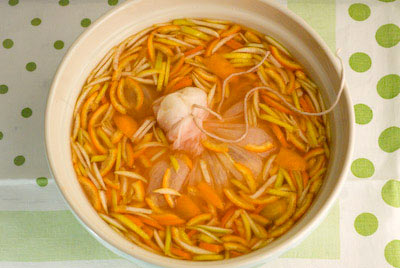
I love marmalade with a tart edge to it rather than being too sweet, so using bitter oranges suits me down to the ground. There is a difference between a bitter marmalade and a BITTER marmalade, the latter caused by the inclusion of the fruit’s pith. An overpowering unpleasant bitterness somehow coats the inside of your mouth and stays with you for ages after you’ve eaten your toast! I also love peel in my marmalade, lots of peel. Without it marmalade would simply be jelly! Hand cutting peel can be a tedious part of the process and it is hard to get a really fine even cut. For me this is all part of the ceremony of marmalade making, though luckily I don’t make huge batches. I do have a special bean shredding attachment for my Kenwood Chef which can do the job neatly, easily and quickly, though rarely use it, but if you intend to make marmalade big time it might be worth finding something similar to streamline the job.
The peel needs to be really well cooked first, seemingly overcooked, as it candies and hardens once it is boiled in the sugar syrup. Jane Hasell-McCosh, who founded and organises the annual Marmalade festival at her home, Dalemain Mansion, Nr Penrith, told me that undercooked peel is the most common reason for entries being marked down. The peel should first be cooked until when pressed between finger and thumb it disintegrates, and that can take between 1-2 hours of slow cooking to achieve. Of course, if you like a chewier texture, cook it for less time but don’t expect any rosettes for your efforts.
Different kinds of citrus fruits contain varying amounts of pectin, the stuff that helps jam to set, so you do need to do whatever you can to make the most of what pectin there is. Tying pips and pith into a bundle with muslin and soaking them with the peel in the water or juice overnight helps to extract the available pectin. I have never found it necessary to add extra pectin to my marmalade.
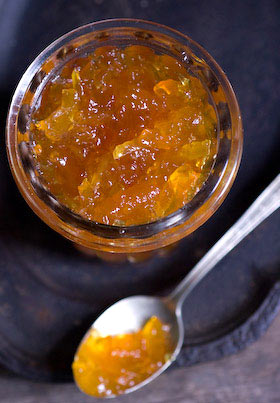
Use your own combination of citrus fruits. You could include grapefruits, mandarins and sweet oranges as alternatives. Roughly match the total weights shown in the recipe but don’t get too hung up on matching measurements exactly.
MIXED CITRUS MARMALADE
Makes approx 1.25Kg (4 x 1/2 pint jars and a bit)
Fruit with combined weight approx 1240g (2 3/4lbs):
kumquats (325g / 12oz)
1 pomelo (465g / 1lb)
3 Seville oranges (325g / 12oz)
1 lemon (125g / 4 oz)
300ml (1/2 pt) mixed citrus fruit juice (I used blood oranges and limes, close to past their prime but still full of juice)
1.2ltrs (2 1/4 pts) water
approx. 800g (1 3/4lbs) sugar
Wash and scrub all the fruit and drain in a colander. Cut the kumquats lengthways into quarters and remove and collect the pips. Remove the peel from the pomelo, Seville oranges and lemon. Pull away the thick pith from the pomelo and any from the oranges and lemon that comes away easily and discard it, then roughly chop the flesh from the fruits, collecting it together with any juice and the kumquat pips. Finely chop the peel into shreds. This made approximately 360g (12oz) chopped peel and 750g (1 1/2lbs) pips and flesh. Wrap the pips and flesh into a bundle with muslin tied securely with string.
Place the peel, muslin bundle, juice and water in a bowl and leave to soak for 12-24 hours. Put everything from the bowl into a pan with a lid, bring to a simmer and cook gently until the peel is soft, which may take 1 – 2 hours. Remove the muslin bag, collecting any liquid that drips from it. Separate the peel from the juice by pouring through a sieve over a bowl, then measure and weigh them both separately.
At this stage it made 700ml (1 1/4pts) juice and 480g (1lb) cooked peel. To calculate how much sugar I needed I made two calculations; one for the amount of juice and one for the weight of the peel then added them together. I choose a classic sugar to juice ratio as used for making a jelly of 400g (14oz) sugar to every 600ml (1 pint) juice = 460g (1lb), plus 70% sugar to weight of peel = 336g (12oz). 460g (1lb) + 336g (12oz) = 796g Rounded up to 800g (1 3/4lbs).
Prepare clean jars and lids by sterilising them in a low oven, keeping them warm till needed. If you plan to can (water process) your marmalade, prepare the water bath and jars and place jar seals in a pan of hot water on the hob.
Place the peel, juice and sugar in a preserving pan and stir over a gentle heat until the sugar is dissolved, then turn up the heat and bring to a rolling boil until the marmalade reaches setting point (a blob of the syrup on a plate quickly forms a skin that wrinkles when you push a finger over it). This took me about 10 minutes to achieve. Skim if necessary and allow the marmalade to cool for 5-10 minutes then stir to distribute the peel. Pour the marmalade into hot jars and seal. If you are canning your jam, process for 5 minutes then remove from the canner. Leave till cold, then test the seals. Don’t forget to label and date your marmalade.
FESTIVE JAM FROM FAR FLUNG PLACES
Monday December 19th 2011, 9:57 am
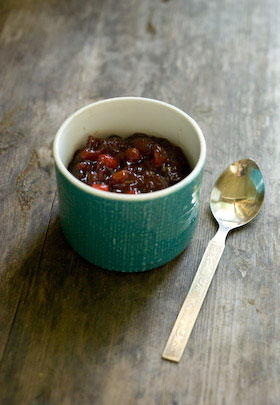
I prefer to use the ingredients I find on my doorstep, but sometimes occasion decrees it’s time to push the boat out. I’d love to find homegrown cranberries but have never seen them for sale on my travels, though Sainsburys are selling Kent grown cranberries this year, but only available in that area. So for my special Christmas jam, my cranberries are from the US, dried apricots from Turkey and pineapple from Costa Rica. I hope all you locavores will forgive me! For some of you lucky enough, these ingredients will be on your doorstep.
I saw mention of this combination in an old book of mine and thought it worth exploring. In that recipe the pineapple came in a tin and for my first experiment I used a tin of crushed pineapple in natural juice. Having noticed fresh pineapples not much different in price to tinned, I decided to use fresh for my second batch. Both work well with perhaps the fresh having just that added zing you might expect. The final flourish – apricot brandy, just makes this fabulous jam extra special, befitting the season.
The fruits cook down to a ‘feltly’ consistency, which from my experience means you need to watch it doesn’t catch on the bottom of the pan and burn. So don’t leave the bubbling jam kettle for even a minute or your jam may be spoilt. My recipe calls for relatively little sugar. This does mean that it is advisable to store the preserve in the fridge or the ideal alternative, do like I do and can it. That way it will store for a year or even longer. Serve on toast, scones or with your celebration meal as a relish. I’m off to make some more.
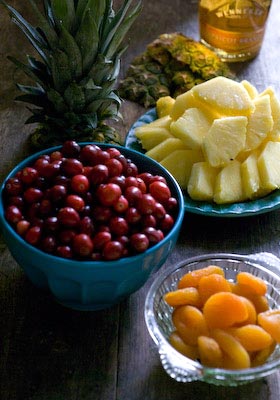
CRANBERRY, APRICOT AND PINEAPPLE JAM
Makes 1.3Kg (5 x 1/2pt jars)
1 med size pineapple, approx 1100g (2 1/2lbs) in weight or a 432g (15oz) tin crushed pineapple in juice
150g (5oz) dried apricots
300g (1x 12oz pack) fresh cranberries, rinsed and drained
450g (1lb) sugar
apricot brandy (optional)
Prepare the pineapple; slice off the top and base and pare away the skin. Chop down through the centre lengthways and cut into 4, then remove the woody core. Slice the flesh into chunks then pulse in a food processor to give a fine texture. Pour into a sieve over a bowl and collect the juice that drips through. With my 1100g pineapple, this gave me 280g (10oz) pulp and 200ml (7 fl oz) of juice. (You don’t need to be spot on here just aim for approximately that amount.) Chop the apricots into small even pieces and place in a bowl with 200ml (7 fl oz) of boiling water plus the pineapple juice and leave to soak for several hours or overnight.
If you plan to can (water process) your jam, prepare the water bath and jars and place jar seals in a pan of hot water on the hob. Alternatively, prepare clean jars by sterilising them in a low oven, keeping them warm till needed. Place the cranberries, apricots, crushed pineapple and soaking juices in a preserving pan. Add another 200ml (7 fl oz) water and cook gently for approximately 20 minutes, until the cranberries have started to pop and the mixture combines and takes on a ruby glow. Remove from heat for 5 minutes then add the sugar. Stir over a gentle heat until completely dissolved, then up the heat and bring to a rolling boil, taking great care that it doesn’t burn. It only takes 5-10 minutes before you can see the texture is thickened and a small blob on a cold plate will hold its shape. Turn off the heat. Leave for 5 minutes then stir in 3-5 Tbsp apricot brandy.
Pour into prepared hot jars leaving 0.5cm (1/4in) headroom, tap jars on worktop to de-bubble, clean rims and seal, then process for 10 minutes. Remove jars from water bath and leave until completely cold before testing the seals. Alternatively, pot the hot jam into clean hot jars and seal then store in the fridge when cold.
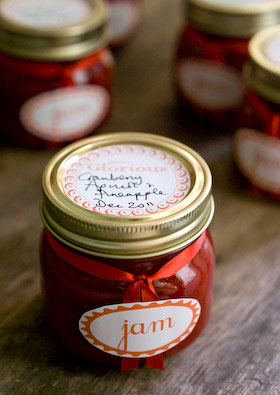
BLAISDON PLUM & LAVENDER JAM
Thursday August 04th 2011, 4:04 pm

Just drove up the road to my house and the road side is lined with windfall plums, like a guard of honor greeting me back home. The plum thing round here is just about to kick off and I want to be ready to make the most of this abundant harvest. It’s on the doorstep and comes for free. I have written about Blaisdons, our local plum variety before and last year bottled them, see here . I also bottled squashed plums very simply, stoned and cooked in a light syrup. They were delicious and kept me in dessert for several months with custard, yogurt or cake. I need more of them alright, the larder needs to be well-stocked to take me through the winter.
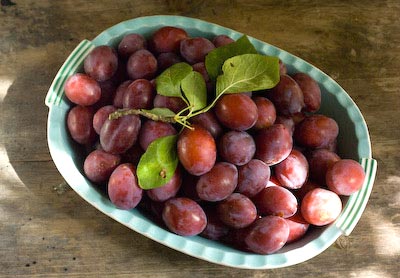
So to ease my way into the season I thought I’d start with a jam. I generally find plum jam quite uninspiring and one dimensional, so this jam called for the addition of careful thought to really make it sing. As I said on Facebook yesterday, good jam does not come from throwing everything in a pan and boiling like billio. That’s just stewing fruit and you end up with jars of sweet pink mush that somehow remain in the larder for years and that you are unable to ever get rid of. I want to make jam that is so fantastic that you quickly run out and vow you’ll make more next year. I like to macerate the fruit to draw out the juice and the fresh flavours and this method suits my way of life really well. It means you can begin to process your newly picked fruit at it’s freshest without having to get the jars and all the other paraphernalia ready. It gives you a day or two’s grace to get your head round the task in hand. You do need lots of bowls and in my kitchen and sitting room table-top space is often at a premium as bowls of fruit covered with cling film wait their turn, all topped and labeled with post it notes.
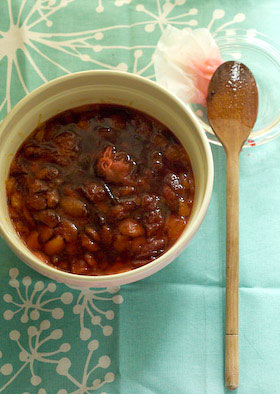
I mentioned in my last post that using lavender as a flavouring requires a light touch. It needs to be just present so it’s hard to put your finger on just what the flavouring is, to really work. This jam is delicious and is a brilliant colour too. The cooking time is kept to a minimum without too much sugar, so the plums have a tart edge to them, which any good jam should have in my opinion. I used lavender recently harvested from the garden, so though dry is also very fresh. Blaisdon plums are a cling-stone plum, so you either remove the stones after cooking them, filching them out one by one, or you cut the flesh from the stone. Some of my plums were windfalls so I needed to cut off any bruised and manky bits, so the second method, though time consuming, worked well in this instance. I have no doubt that as the season progresses, stone filching will become tedious. Right now I’m just loving the thrill of anticipation. Blaisdons – bring them on!
BLAISDON PLUM & LAVENDER JAM
Makes 1.125 kg (2lbs 4oz)
1.2Kg ( 2lb 8oz) plums or 1kg (2lb 4oz) when stoned
750g ( 1lb 12oz) sugar
juice of 1 lemon
1 Tbsp dried lavender
Chop the plums into quarters and remove the stones. Place the fruit in a bowl layered with the sugar, add the lemon juice and push the lavender, tied in a piece of muslin, down into the fruit. Cover and leave overnight to macerate.
Next day, pour the contents of the bowl into a pan and heat it through stirring until the sugar is completely dissolved. Bring to a simmer then remove from the heat, pour back into the bowl, push a piece of greaseproof paper down onto the surface of the bowl’s contents, then cover and leave to macerate for anything between 3 – 24 hours, whatever fits into your schedule.
If you plan to can or water process your jam, prepare your jars and seals, otherwise make sure your jam jars and lids are clean and hot by placing them in a warm oven for 20 minutes. Remove the lavender bundle, then with a slotted spoon remove the plum pieces from the syrup. There is no need to be too painstaking about this, it just means that your finished jam will have some nice chunks of plum flesh instead of it all being cooked into an homogenised mass!
Place the remaining syrup in a preserving pan, heat to boiling then maintain at a rolling boil until it reaches setting point. This took me about 10 minutes to achieve. Add the plum pieces and bring back to the boil and check for setting point again. Pour the jam into hot jars and seal. If you are canning your jam, process for 10 minutes then remove from the canner. Leave till cold, then test the seals. Label and date your jam.
