THE GREATEST SCAPES – PLANTING GARLIC
Thursday November 25th 2010, 1:48 pm
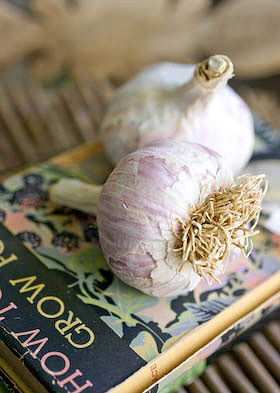
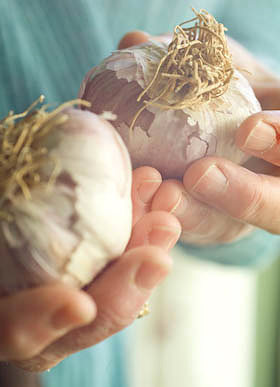
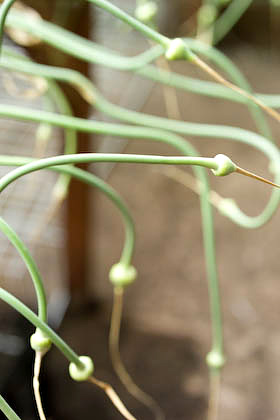
Though parts of the country have had snowfall overnight, here in the Forest of Dean, it may be crisp and cold, but the sun is shining. I really must get my garlic planted today. I bought two bulbs a month or so ago from Dobies; Garlic Vayo, a hardneck variety for Autumn planting, and was really pleased when the plump healthy bulbs arrived in the post. Hardneck garlic varieties need to be planted now so that they experience at least two months of the cold and frost they need to form their cloves. They are also the kind you need to grow if you want to be able to harvest garlic scapes, the winding flower stems they throw up that are a delicacy when pickled.
I always associate garlic scapes with Elspeth Thompson. Elspeth, in case she isn’t familiar to you, was an amazingly talented and beautiful garden writer, who tragically died earlier this year. I can’t really call her a close friend but I did get to know her to some degree over the last few years. Elspeth lived a few streets over from me in Brixton and I knew which was her house, even though I didn’t know her. When I took on my first allotment, her book The Urban Gardener, a compilation of her weekly newspaper columns in the weekend Telegraph, became my bible and as it was written in a diary format, I could dip into it and look up the features that Elspeth had written about for a particular week. She was ahead of the game, always. She started to write about her allotment well before growing your own veg in the city became the most fashionable thing to do. I knew where her allotment site was and that she walked her dog in the park that I lived alongside. I knew people who were her friends but I never actually knew her.
After I left London, one day out of the blue, she sent me an email asking me if I knew anything about pickling garlic flowers. She had eaten some at a wedding and thought they were fantastic. Wow, it is quite a thrill when someone you’ve admired from afar just happens to get in touch. Embarrassingly I knew ****all about garlic flowers but in true journalistic style I soon found out and sent her back lots of information. And so began our ongoing email correspondence.

All my research was not for nothing. The flowers, actually known as scapes, are never found for sale in the UK so growing your own is the only way to experience them. So now is the moment when you need to get planting if you are to have scapes to pickle next year. Choose a suitable hardneck garlic variety and plant the individual cloves in drills, 10cm (4in) apart with 20cm (8in) between rows. You can use a dibber to make holes to drop them in, making sure they are sitting the right way up with the root end underneath. Cover with 25mm (1in) of soil. You should have green garlic to lift next May/July and hopefully plenty of scapes to pickle as well.
Dear Elspeth, you will always be in my thoughts as I plant garlic now and in the years ahead and admire jars of pickled scapes on the pantry shelves. You were a truly amazing, inspirational and beautiful person. As a gardener I’m sure you would understand this unconventional tribute.
POACHED QUINCE ON MY PORRIDGE
Tuesday November 16th 2010, 10:36 pm
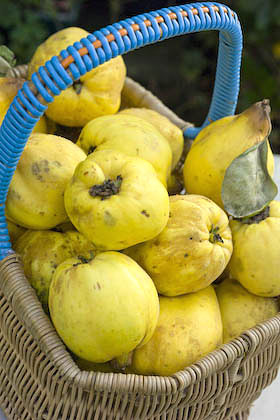
Month eleven, already the penultimate month of Tigress’s can jam canning challenge and for November the ingredient chosen by the talented artisan preserver Confituras aka blogger Cosmic Cowgirl is apples, pears and quince, a versatile selection of orchard fruits with delicious potential.
I could find a gazillion uses for each of these, but have chosen luscious quinces for this canjam contribution. A few days ago I used up the last quince of the year. I always vow to bottle plenty and never seem to achieve my ambition. Once this fruit grabs you, you are totally smitten. Considering how fab they are it surprises me that quince aren’t more popular; they are still seen as an unusual fruit. You have to seek them out and may find a supply at a farmers market, otherwise you need your own quince tree or to know someone else who has one. They take at least 5 years to produce fruit by the way if you are thinking of planting one.
They are one of the few fruits that I love so much, I’d pay real money just for a whiff of, never mind a taste of, each year, though this time was lucky enough to find a supply for free when someone kindly advertised quinces up for grabs on the local Freecycle. I moved at the speed of light to get round to that house, believe me. These Freecyclers had 2 trees heaving with fruit, that were so laden they had had to be propped up with stakes and ropes. It gave me the opportunity to see quinces growing on the tree for the first time and to notice what untidy trees they are to produce such exceptional fruits.
Of course, one of quinces magical qualities, apart from the wonderous unmistakable scent, is the way a hard unpalatable fruit turns delicious at the same time turning such a wonderful shade of deep ruby red as it cooks. I’m generally of the mind that long cooking times are of no benefit to ingredients, but quince turns this notion on its head. You need to slow cook ’em and slow cook ’em till they change colour, which can take 3 – 6 hours.
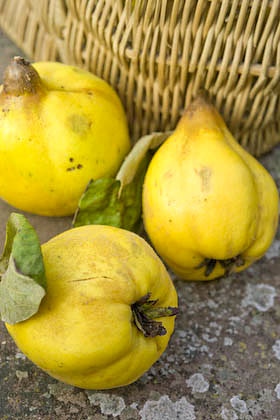
As regards the pantry, I want a supply of quince in spiced vanilla syrup, as straightforward as that. This is when canning makes such perfect sense and in theory allows you to preserve such a fabulous ingredient to last you all year round till the next time, though I haven’t managed that thus far. Preserving enough quince in jars is my ambition. A favourite way to serve them, on oatmeal porridge with Greek yogurt for breakfast. As simple as that. To prepare, they are quite hard work to peel and cut, so don’t expect elegant slices.
POACHED QUINCE IN VANILLA SYRUP
To fill 2 x 500ml (1 pint) jars
6 – 8 quinces
1 lemon
600ml (2 1/2 cups) water
250g (1 cup) sugar
1 cinnamon stick
1 vanilla pod
a few cloves
Scrub the quinces to remove the fuzzy coating. Peel, quarter and core the fruit. Cut each quince quarter into 2 or 3 slices, depending on the size of the fruit and immediately drop them into a bowl of acidulated water (water with some lemon juice added, as they discolour very quickly if you don’t).
You can put peel and cores in a pan, cover with water and simmer for 4 hours, topping up with more water if necessary, then pour into a jelly bag, collecting the juice that drips through overnight. You can use this juice to top up the syrup if you find you need more to fill your jars and use what is left to make quince jelly. I also put the pulp left in the jelly bag through a food mill to make a quince puree, so nothing goes to waste.
Preheat the oven to 110 C (225 F, Mk 1/4). Make a sugar syrup by heating the water and sugar together, stirring until the sugar has dissolved. Drain and place the quince slices in a large ovenproof casserole, adding the cinnamon stick, cloves, a few pieces of lemon peel and the vanilla pod, after splitting it lengthways and scraping and the seeds out from the middle. Pour the syrup over the fruit and spices. Put the casserole on the hob and bring to the boil then remove from heat. Place a lid on the casserole and cook in the oven for 5 – 6 hours.
Another way to cook the quinces is to use a slow cooker. Place the quince, spices and hot sugar syrup in the slow cooker casserole and cook on high for the first hour, then turn down to low and cook for 6 – 8 hours, by which time the fruit will have turned a deep red wine colour.
Prepare the water bath, jars and seals ready for canning. For more info about how to hot water process, refer to the guide here.
Fill hot jars with quince slices, distributing the spices and vanilla pod amongst the jars and top up with syrup, leaving the required headspace for your type of jars. De-bubble, to remove air pockets, wipe the jar rims clean then seal and process for 15 minutes. Remove from the water bath and leave till completely cold before testing the seals and labelling.

OATMEAL PORRIDGE
For 2 people
100g (1/2 cup) organic medium oatmeal
650ml (3 1/4 cups) water
a pinch of salt
Toast the oatmeal in a pan for a few minutes, stirring with a wooden spoon until you begin to smell the toasted oat aroma. Add the water and salt and bring to a simmer, then cook for 20-30 minutes until thickened as you like it and cooked through, adding more water if necessary. That’s all there is too it!
STORING BRAMLEYS & APPLE GINGERBREAD
Sunday November 14th 2010, 2:04 pm
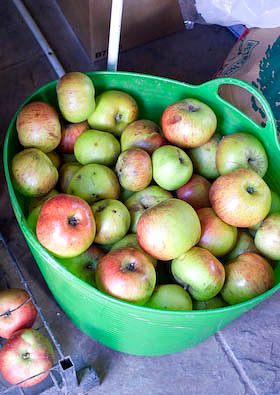
Bramley Seedling apples are one of the most popular apples grown for cooking in the UK. They are an apple that stores well; if kept in the right conditions they should keep for 6 or 7 months. Even so, I will still be using some to make apple sauce, pie fillings and apple butter, processed in jars to stock the pantry. It is just really convenient to have some jars already to go.
If you have some Bramleys you want to store, choose the best unblemished fruit for longer storage and use up any bruised fruit first. It is usually a good idea to wrap fruits separately in tissue or newspaper, but there is no need to do this with Bramleys, simply arrange them so they aren’t touching each other by placing them in shallow drawers or crates. A dark cool frost-free shed, garage or cellar is the ideal place, preferably with an optimum temperature of 6 – 7 degrees C. Make sure to check them every few weeks and weed out any bad apples before they have any influence on the rest.

Here is another easy recipe that uses more of the same apple puree I made for the apple cake recipe posted yesterday. I’m very partial to cake recipes where the butter is either rubbed into the mixture or melted. Even though I have the help of my trusty vintage Kenwood Chef, I for some reason avoid the creaming the butter and sugar together thing whenever I can. Anyhow, this apple gingerbread cake is perfect for serving in the afternoon with a cup of tea and can be rustled together as quick as a flash if someone decides to call round. I have put a thin layer of ginger icing over the top of the cake. Another alternative that I think could work well would be an apple cider syrup poured over the cake after piercing the top with a skewer. Next time perhaps …
APPLE GINGERBREAD
First make the apple puree:
500g (1lb) bramley or other cooking apples, peeled, cored and roughly chopped
125ml (1/4 cup) of cider or water
125ml (1/4 cup) maple syrup or sugar to taste
Place the apples in a pan with the cider or water and bring to a simmer, then cook gently for around 20 minutes, until the apples become a fluffy puree when stirred with a spoon. Add the maple syrup or sugar to taste. Leave to cool. This will make slightly more than you will need, but it leaves a bit extra to serve with the gingerbread.
175 g (6 oz) plain flour
2tsp baking powder
1tsp ground ginger
3 cloves, 5 black peppercorns and the seeds from 4 cardamons, ground fine in a pestle and mortar
85g (3oz) brown sugar
100g (4oz) golden syrup (is this what is called corn syrup in the US?)
85g (3oz) butter
125g (5oz) apple puree
30g (2 lumps) stem ginger, roughly chopped
1 egg, beaten
Preheat the oven to 180C (350F, Mk 4). Grease a 20cm (8in) square baking tin and line with baking paper. Sift the flour, baking powder and spices into a bowl. Place the brown sugar, syrup and butter in a pan and heat gently till everything is melted and combined then leave to cool. Add the syrup mixture and all the remaining ingredients to the flour and spices in the bowl and mix together to combine. Pour the mixture into the prepared tin and bake for 25 – 30 minutes. Remove from the oven, leave to cool for a short time until firm enough to turn out onto a cooling rack.
To ice the cake:
85g (3oz) icing sugar
1 Tbsp stem ginger syrup
1-2 tsp warm water, if required
Sift the icing sugar and add the syrup. Mix together, adding some water if needed to a spreadable consistency. Pour the icing over the still warm cake and spread evenly with a knife. I like a very fine layer of icing on my cake. If you like a thicker icing then double up on the ingredients and make it less runny so it doesn’t all run off the top of the cake.


