LOVING A DUTCH BABY
Tuesday May 12th 2015, 12:16 pm

Keeping chickens does make me appreciate any recipe that includes eggs, and the more the merrier. I especially collect recipes that will help me conquer the mountain of eggs that regularly accumulates in my house and as first impressions are so important, find myself going straight to the egg count when reading a new recipe.
Too many eggs is always a good excuse to make a dutch baby pancake, not that excuses are needed. As well as an over-abundance of eggs, there might be no bread in the house for toast and there are always jars of preserves and compotes need emptying. A dutch baby is perfect for a late breakfast / brunch type of thing at the weekend or great at any time when a pudding is called for. If you have never experienced a dutch baby, it is basically somewhere between a big fluffed up Yorkshire pudding and a gooey egg custard, crisp along the edges but soft and luscious in the centre. I like to make mine in a cast iron skillet that goes straight from oven to table, but you can make individual ones in a Yorkshire pudding tin if you like, just adjust the cooking time and keep an eye on them.
The pancake puffs up and every time you make one you get a slightly different wild and wonderful result The down side is it will then quickly deflate, still looking pretty good but not such a show stopper. This provides an ‘ooooo’ factor to the proceedings and does require everyone to be ready at the table, to really appreciate the full experience.
I most often add my homemade vanilla essence and pop open a jar of compote to go with; nectarine and blueberry compote being my absolute favourite, then really push the boat out by serving with cream, the thicker the better! Alternatively you could add some lemon juice and zest to the batter. Maple syrup, caramelised apples …. well I wont go on, but you can serve the pancake with all manner of accompaniments, all equally delicious.
DUTCH BABY SKILLET PANCAKE
Serves 4-6
100g plain flour
3 large eggs
200ml milk
1tsp vanilla essence
50g sugar
pinch salt
50g unsalted butter
Preheat oven to 230C 450F Mk8 and place a 30cm (12in) skillet on a central shelf with plenty of room above for the pancake to puff up.
Place all of the ingredients except the butter in a blender and blend until everything is combined to make a batter. You can prepare the batter in advance if you want and keep overnight in the fridge.
Remove the skillet from the oven and quickly add the butter, which will melt and bubble immediately. To keep it good and hot, I usually place the skillet on a hot hob whilst doing this. Pour in the batter and immediately place back in the oven. Bake for 20 minutes, until the pancake has puffed up nicely and the edges are looking golden brown. Serve immediately.

FIRST DUCK EGG – A GOOD EXCUSE FOR A CAKE
Sunday March 17th 2013, 7:29 pm
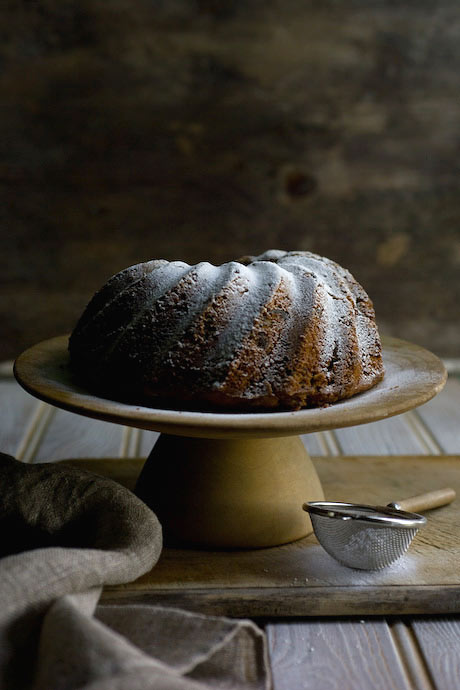
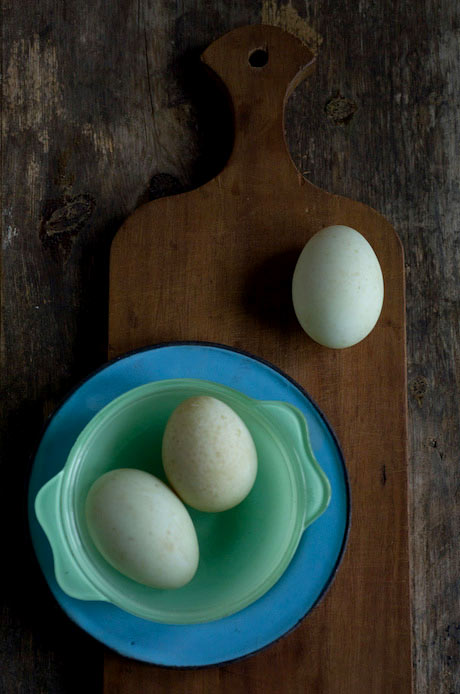
At the end of last year four rescue ducks arrived, 2 runner ducks and 2 call ducks. They have joined our merry flock of chickens, sort of, as they all seem to rub along together but the ducks live their lives in a different way. The ducks are quite ditsy and get in a flap about things, giving the impression they are total air heads and they walk everywhere in a line, in order of height, tallest leading. They are muckier and muddier than chickens and dredge up water so it doesn’t stay clean for long. But they are very cute and the first time one of them jumped into a bucket and bobbed around on the surface of the water, was a very sweet sight. They do have a little pond made out of a babies paddling pool in the shape of an apple. The other morning I found an egg on the floor of their house, our first duck egg, and there has been an egg waiting first thing, each day since. Its seems like a good reason to bake a cake to celebrate.
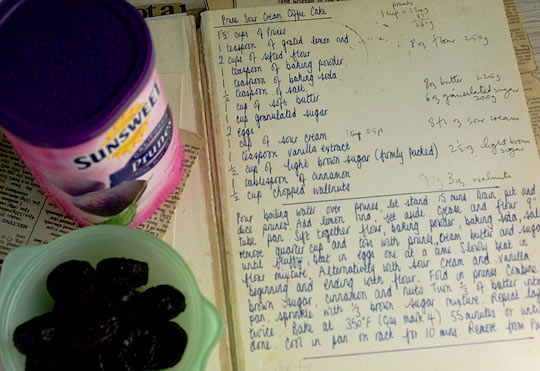
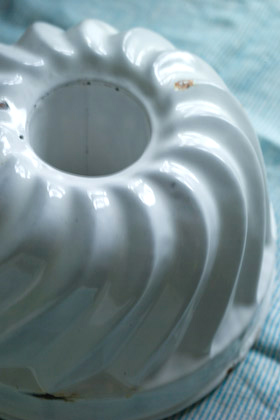
My first thought was a prune sour cream coffee cake, which is a real favourite of mine. I came across the recipe printed on the side of a box of prunes, when learning to bake in the 70s. I copied the recipe by hand onto the end papers of my first cookery book, Traditional British Cooking for Pleasure by Gladys Mann, and every now and again get the book off the shelf and bake the cake again. To begin with, as a complete novice, I didn’t have a clue how to translate the ingredients, as it was an American recipe, written in cup measures and called for a tube pan. It took some years to work out what a tube pan is, what a cup of butter looks like and why a cake called a coffee cake has no coffee in it. I suppose I’m just more cosmopolitan these days. Consequently I’ve had many a disaster bumbling along and following the recipe but it still became a favourite as the flavour of the cake is so good. So here is the recipe with my conversion to metric. It is also a good reason to use a vintage enamel bundt tin that takes up far too much house space and needs to occasionally earn it’s keep.
PRUNE SOUR CREAM COFFEE CAKE
250g (1 1/2 cups) ready to eat prunes
100g (1/2 cup) walnuts, roughly chopped
75g (1/2 cup) soft brown sugar
1 tsp grated lemon rind
275g (2 cups) plain flour, sifted
1 tsp each of baking powder and baking soda
1/2 tsp salt
1 Tbsp cinnamon, ground
225g (1 cup) butter, unsalted
200g (1 cup) sugar
2 large eggs
225ml (1 cup) sour cream
1 tsp vanilla extract
Grease a large bundt tin and pre heat the oven to 180C, 350F, Mk 4. Chop the prunes into smallish pieces and place in a bowl, add the walnuts, brown sugar, lemon rind and 2 tbsp of the flour and stir together to combine and coat the prunes. Sift together the remaining flour, baking powder, soda, salt and cinnamon. Cream the butter and sugar till light and fluffy then add the eggs one at a time. Slowly beat in the flour mixture, alternating with the sour cream and vanilla extract. Fold in the prunes. Turn the mixture into the bundt pan and bake for 55-65 minutes until a skewer when pushed into the centre comes out clean and the top feels set. Cool on a cake rack. Turn out and dust with icing sugar.
HOW TO MAKE BUTTER
Sunday January 08th 2012, 4:19 pm

I was visiting my Mum in hospital over Christmas and suddenly became aware that I was talking about the price of potatoes. I wisely stopped short of telling how I had bought 2 bags of organic spuds on special offer for just £2 the previous day! Once I realised the mundane nature of my conversation, it struck me as so absurd I was stricken with a bout of hysteria that left me unable to speak for 10 minutes or so, no doubt to the relief of the other family members present.
You see, I find frugality and penny pinching totally dull. Having said that, whereas 6 years ago I wouldn’t have been able to tell you the price of butter, times have changed. I’m now a dab hand at rustling up a feast using ingredients from the ‘reduced for quick sale’ bin at the supermarket and can sniff out a bargain a mile off these days. There seems to be an assumption that preserving is part of a ‘make do and mend’ mindset but for me it is far from that. It is primarily about the quality of the food we eat, taking notice of and making use of what is often right there on our doorstep, respecting those ingredients and reducing waste in the process. At the same time, by following the seasons through ingredients it certainly reminds me to savour the seasons, so time doesn’t simply pass by in a heartbeat.
I’ve been wanting to make my own butter for ages. Having read quite a bit about it, it was a matter of finding the raw ingredient, to have a go. Last June my wonderful canning chum Tigress wrote here about making enough butter to see her through the year, freezing the butter and bi-product buttermilk. Much respect Tigress, who having driven to Vermont to collect the cream, then hand churned it one Mason jar at a time!
Nothing quite so romantic or arduous for me, I was just waiting for the cream to appear at the supermarket on special offer, then my trusty vintage Kenwood Chef would do the hard work for me. With Netherend Dairy just down the road producing butter that is highly appreciated in foodie circles, there is hardly much point in making my own unless the cream comes at a bargain price. Seemingly, once Christmas is out of the way, the supermarkets have plenty of excess cream going cheap, ridiculously cheap. To make butter you need normal double or whipping cream, not the UHT longlife stuff. I bought up plenty last week and have been pleasantly surprised by how much butter it has turned into, much more than I’d expected. Being short of freezer space I now have the problem of where to put it!

HOW TO MAKE BUTTER
900ml (32 fl oz) double cream produced 468g (1 lb) butter and 285ml (1/2 pt) buttermilk
Using a Kenwood Chef or other stand mixer fitted with paddle or ‘K’ beater, beat the cream on a medium speed for approximately 10 minutes, keeping a keen eye on it towards the end. The cream will thicken then begin to stiffen, then in an instant the butter and buttermilk separate. At that moment you need to be ready to turn the mixer off, otherwise the buttermilk sloshes all over the place.
Pour into a sieve, collecting the buttermilk in a bowl underneath. The butter needs to be washed in water to remove any other buttermilk trapped inside it. Some people use their hands to mash the butter under a running tap, others use a potato masher. Whichever method you choose, the water needs to run clear as any buttermilk remaining will encourage the butter to go rancid quicker.
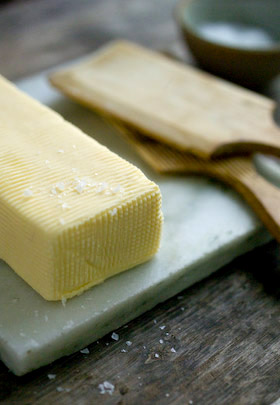
Once all the buttermilk is away you can press the butter into a bowl or give it a good wacking with butter pats, which leave lovely traditional ridge patterns on the surface. If you wish to add salt then this is the time to work it through the butter so it is evenly distributed. The butter can be wrapped in waxed paper or placed in sealed storage boxes before freezing. The buttermilk can be used for baking and I have frozen some in smaller cup-sized containers so they are handy sized for when I want to make scones, soda bread or my blueberry buttermilk and almond cake – yum!

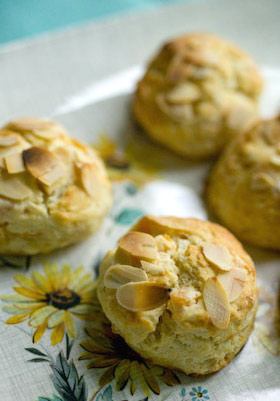
This apricot vanilla buttermilk scone recipe is another great way of using both butter and buttermilk. I love making these for breakfast as they aren’t too sweet and are soft enough to be eaten without any extra butter spread on them. You can of course add a dollop of jam if you really have too and serve them for tea later in the day.
APRICOT VANILLA BUTTERMILK SCONES
Makes approx 10 small, 5cm (2in) diameter scones
60g (2oz) dried apricots, soak in boiling water for an hour or more, drain then pat dry with kitchen towel before chopping into small chunks
225g (8oz) self-raising flour
pinch of salt
75g (3oz) butter
30g (1oz) caster sugar
1tsp vanilla extract
4-6 Tbsp buttermilk, plus a bit more if needed and to brush the tops
Flaked almonds
Pre heat the oven to 220C (425F) Mk7
Sift the flour and salt into a bowl. Cut the butter into pieces and rub into the flour until the mixture resembles breadcrumbs. Add the sugar and dried apricots. Mix the vanilla extract into the buttermilk and add it to the flour mixture, working quickly with a fork to form a dough which is soft but not sticky. Bring the mixture together and with floured hands press it onto a floured surface so it is about 2.5cm (1 in) thick.
Cut out scones and place on a greased baking tray. Push the dough offcuts together again and cut the last scone or 2 from that, so none goes to waste. Brush the tops with buttermilk and sprinkle with flaked almonds. Bake for 15-20 minutes until they are risen and starting to be tinged golden. Remove from oven and eat them warm. They are lovely split and toasted later on too.
MY CHRISTMAS PIE FOR VEGETARIANS
Friday December 23rd 2011, 11:57 am

I just remembered this partially prepared blog post from a few months ago and thought it appropriate to finish it. At the time I was gathering mushrooms from the field by my house and it had reminded me of my favourite mushroom pie recipe that I have made many many times. The recipe comes from a book from 1972, Cookbook For The New Age, Earth Water Fire Air by Barbara Freidlander. When given to me, I’d just decided to become vegetarian, had married at a ridiculously young age and was starting out learning about life and food and cooking. I have made this pie and variations of it on so many occasions and it has been served as part of Christmas lunch many times as well, which is why I’m publishing it now, in case you are looking for some last-minute inspiration.
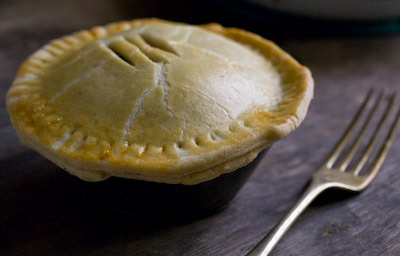
I’m not so pleased with my pictures here but it is the recipe that is important on this occasion. The book is American so is written in cups and pounds, which at the time was very peculiar and exciting for me to translate. I’m going to copy it as is and for the sake of speed have no intentions of adding the metric conversion this time round, but hope you’ll get the gist and feel inspired anyway. More often than not I’ve used hazelnuts in place of the cashews and usually toast them lightly first.
MUSHROOM PIE
Makes 1 large or 2 small pies
CRUST
2 cup pastry flour
1/4 tsp salt
1/4 pound butter
1/4 cup cold milk
FILLING
1 pound mushrooms, sliced
5 celery stalks, chopped
1 small onion, chopped
1/4 cup unsalted cashew nuts, chopped
pinch of thyme
salt and pepper to taste
4Tbsp butter
Cream sauce **
Make the pastry in the usual way (rub the butter into the flour and salt then add the milk and bring it together to form a ball). Leave in fridge to chill whilst the filling is prepared.
Saute the first 6 filling ingredients together in 4Tbsp butter, cover and cook until the mushrooms are tender. If there seems to be lots of liquid from the mushrooms, cook for a while without the lid to help it evaporate.
Meanwhile in another pan make the cream sauce** Combine the sauce and mushroom mixture and blend well. Check the seasoning and adjust at this point. Preheat oven to 400F 200C Mk6.
Cut the pastry dough into 2 pieces, one slightly smaller for the pie lid than the other for the base. Roll out the pastry on a floured board for the base and line a greased pie tin. Pour/spoon in the filling. Roll out the pastry lid, cut a few slits in the centre, brush the base edges with milk or water and lay the lid in place sealing the edges. Brush the top with milk or beaten egg to glaze. Place in the oven, reduce the temperature to 350F 180C Mk4 and bake for 40-45 minutes till nicely golden.
** CREAM SAUCE
2Tbsp butter
2Tbsp flour
1/2 cup milk
salt and pepper
freshly grated nutmeg
Melt the butter in a pan over low heat, add the flour and stir to form a roux. Gradually add the milk, stirring between each addition to make a smooth sauce. Let it cook for a few minutes then season. For the pie the sauce can be quite thick as the mushroom mixture will make it thinner.

SHOW ME THE WAY TO A MORELLO
Thursday July 28th 2011, 12:43 am

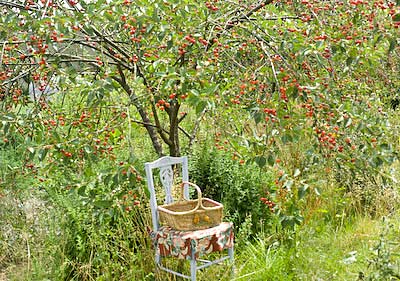
It is cherry time again and the pitter is at the ready. Last year it was put to good use as I removed the stones from an abundance of fruit going well into the night. This year I’m unlikely to be so lucky … or unlucky depending how you look at it. The cherry harvest is nowhere near as lush as it was in 2010, but that’s OK. I like my canning years to have distinctive differences, so each year I have new ingredients to find and explore.
I’ve still got some jars of canned morello cherries in the larder as so many were put away last summer and the joy of canning means you can store enough to see you through more than one season, if you do it right. Morellos are a sour cherry, for culinary use only, that I have never found for sale. The ones I preserved in a light syrup were, on first tasting, fairly undistinguished and plain – no big deal. That is until you add a splash of kirsch and pour on some cream, and then they become something totally exquisite. I have served them that simply on many occasions since last summer and opened a jar to make the filling of a black forest brownie cake more than once. So this year my cherry canning is set to be on a modest scale.
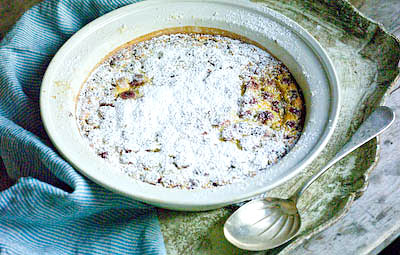
Cherry clafoutis is another traditional pudding that uses sour cherries and works well with fresh or bottled fruit. This isn’t time to skimp on filling – it should be well packed with fruit with all the gaps adjoining melded with custardy batter. There is some debate as to whether you should leave the stones in the fruit or remove them. As the stones imbue a slight almondy flavour to the pudding, many people say they are essential. I prefer to serve and eat food without the hassle of filching out stones as I go, so add a splash of amaretto or kirsch to complete the flavours. A clafoutis is so easy to make and needs to be eaten whilst still warm from the oven, though having said that, I have eaten leftovers for breakfast the next day, and very nice it was too. Any syrup remaining can be drunk like cordial with sparkling water added.

CHERRY CLAFOUTIS
Serves 6 (generously)
3 eggs
100g (1/2 cup) caster sugar
1tsp vanilla extract
1/4tsp salt
40g (1/3rd cup) plain flour
200ml (1 cup) milk
450g (16oz) fresh cherries, pitted or whole
(or 400g (14oz) if using bottled/canned , well drained)
kirsch or amaretto
some icing sugar (optional)
Butter a 25cm diameter earthenware or enamel dish. Pre-heat the oven to 200C (400F, Mk 6).
If you are using a mixer, just throw the first 6 ingredients together and beat together to form a smooth batter. Working by hand, whisk eggs, sugar, vanilla and salt together, then add the flour followed by the milk to make a smooth batter.
Pour half into the prepared dish, spread the cherries over the batter and splash with a few teaspoonfuls of your chosen liqueur. Pour the rest of the batter over the fruit. Bake for 40-45 minutes until the top is lightly golden and the custard centre is beginning to set. Leave to cool for a while so the custard sets further. Serve warm dredged with icing sugar and another drizzle of liqueur if you like.
HIGH HOPES FOR AN EGGY FUTURE
Saturday May 21st 2011, 2:03 pm

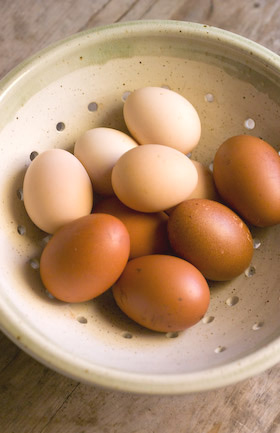
There is much excitement close to home, as me and next door are about to collaborate on our first chicken keeping venture. We have placed our order for 5 orpingtons; 2 lavenders, 2 buffs and a lavender cockerel, and will be taking delivery in a couple of weeks time. We can’t expect any eggs from them until around November time but most importantly – the names have been chosen. As I’ve never kept chickens before I’ve begun to swat up on them. I do know people who keep chickens, so suspect it isn’t too difficult and can already see which way this new interest is likely to go as even at this early stage we have started to discuss other breeds we might like and what colours of eggs they will hopefully produce.
In the meantime, I bought my first book on the subject; Hens in the Garden Eggs in the Kitchen by Charlotte Popescu. I’ve collected several other books of hers and can really recommend them. As well as chicken keeping, she writes about other subjects close to my heart, from wild fruits and apples to vegetable gardening and bee keeping. They are all small paperback books packed with useful information and recipes presented in a very simple and modest way.
In my new hen book she gives this really useful guidance about the freshness of eggs, particularly relevant to those people who know exactly when their eggs are laid. If you are buying shop bought you’ll just have to guess I’m afraid.
Your eggs need to be as fresh as possible if you want fried or poached eggs. For boiled eggs that you wish to peel, it is best to use eggs that are about a week old as the shell and skin are really difficult to peel off on fresh eggs. ….
If you are scrambling your eggs or making an omelette, eggs can be up to a week old. For baked dishes, eggs can be older than a week. If you want to separate the yolks and the whites to make meringues, eggs are best a few days old as the whites whisk up better if not too fresh.
Pickled eggs have never interested me until I came across a recipe for Pickled Huevos Haminados in another lucky find, The Mediterrannean Pantry by Aglaia Kremezi, published 1994. As soon as I read the recipe I knew I had to make it, though haven’t done so yet. I’m actually growing the red onions at the moment, which is, I suppose, beyond the call of duty. I have found the recipe online here if you fancy having a go and beating me too it. I’ll be tempted to serve a pickled egg with some asparagus spears pickled earlier.
This week I’ve been trying to make some room in the freezer before the berry season kicks off. I’m not a big fan of freezing as mine works on an ‘out of sight out of mind’ principle. I tend to forget what’s in there, all the while those ingredients are racking up additional running costs! (This year I’ll be canning fruit in jars as much as I possible.) I used a tub of blackberry puree, picked and prepared last August, and rustled up 4 pots of blackberry curd, which is a delicious way of using up eggs. A spoonful or two of fruit curd swirled through some Greek yoghurt is fabulous, or you can use it as the filling in a simple sponge cake or dollop on meringues (making use of even more eggs).
Oh yes, I’ve got eggs on the brain and this is only the beginning.
MAKING EVERY HOT BUN A HAPPY BUN
Thursday April 21st 2011, 3:34 pm
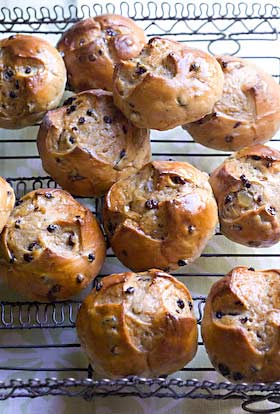
Whilst once upon a time hot cross buns only turned up in the shops just before Easter, they can now be bought any old time. So one-a-penny, two-a-penny, hot cross buns are now ten-a-penny, having lost their seasonal specialness. I try each year to make my own, even if it is only just once and the buns turn out far superior to anything shop bought. Even using mixed spice from an old packet that has sat in the cupboard for just about forever, you make a better bun. But it is only when you actually grind and blend the spice mixture yourself, moments before baking, that you learn to appreciate what a difference really fresh spices make to the taste. With a comparative whiff of your own fresh and zestful mixture alongside an already opened packet of the shop-bought sort, it is blatantly obvious that one is doing a merry dance with the occasional pirouette whilst the other is wearing misshapen Ugg boots and dragging its feet in a slovenly fashion.

It really is worth taking a little extra time to grind your own spice blend. Use whole spices that are as fresh as they can be, but even with whole spices you’ve had a while, if you grind them yourself just before you need them, they’ll will have bags more flavour than ones already ground that have sat on the supermarket shelf for who knows how long.
I do have an old Moulinex grinder somewhere that I use just for grinding spices but haven’t a clue where I’ve put it, and am certainly not prepared to allow my coffee grinder to be tainted with spice. So on this occasion I pounded and ground the spices by hand with a pestle and mortar, which is a job I very quickly tire of, but I got the result I wanted in the end. I do think some help from an electrical appliance is the best option.
If you use lots of mixed spice, you’ll be able to adapt the blend to suit your own tastes and tweak the amounts accordingly. Can’t say I’m that tuned in to it yet, but here is the blend I made for my hot cross buns that I am very satisfied with. Perhaps next time I’ll try a bit more cardamon and add some fennel seeds as well. I didn’t have a cinnamon stick so did add my cinnamon and ginger ready ground.
MIXED SPICE
2tsp whole allspice
1 1/2 tsp whole cloves
2tsp freshly ground nutmeg (probably best to grate it separately first)
2tsp ground ginger
2tsp ground cinnamon or ground fresh from a cinnamon stick
1/2 tsp coriander whole seeds
4 blades of mace, broken up
seeds from 4 cardamon pods
Grind them all together to a fine powder. Keep in a well-sealed jar and label with the date.

I’m not partial to tasteless flour paste crosses on my buns though can appreciate the tidy result. I cut my crosses with a razor blade just before the risen buns went in the oven and this gives a much more haphazard, somewhat charming homemade look. You can of course make them non-denominational if you prefer and dispense with the cross altogether.
HOT CROSS BUNS
Makes 16 buns
500g strong white flour
7g packet of fast acting yeast
60g soft brown sugar
2 heaped tsp of mixed spice
1 tsp salt
60g butter, melted
1 egg, beaten
grated zest of 1 lemon (optional)
60g candied peel **
250ml milk, slightly warmed
120g currants
For the sticky glaze:
2Tbsp sugar
2Tbsp water
Place all of the ingredients except the currants in a food mixer with a dough hook and mix to a sticky dough for 5 minutes. You can of course use a bowl and combine by hand, but the mixture is quite soft and sticky. Add the currants and stir them through the dough. Cover the bowl with a tea towel and leave in a warm place for a couple of hours or a cold place for 4-6 hours until the dough has more than doubled in size.
Punch the dough down and empty the bowl’s contents onto a floured board then knead it for 2 minutes, incorporating more flour if needed to make a manageable, smooth dough. Form the dough into an even circle, cut into 4 equal pieces then cut each of these quarters into 4. Form each piece into a bun shape and place with some space between, on greased baking trays. Cover with tea towels and leave to rise and double in size. This will take as little as 30 minutes in a warm kitchen, or a couple of hours in a cool room.
Pre-heat the oven to 220C (425F, Mk7). Slash a cross in the top of each bun with a sharp knife or blade just before they go in the oven. Bake the buns for 15 minutes until lightly browned. Remove from oven and whilst hot brush generously with sugar glaze. To make this, dissolve the sugar in the water in a pan and bring to the boil.
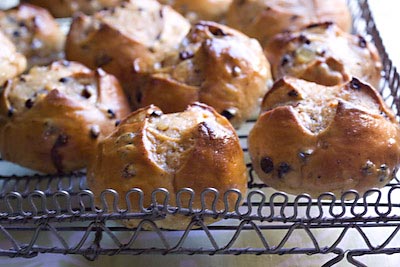
** I didn’t have any candied citrus peel in the house so used some candied melon peel, which gives texture, but without the tang, so then added 2 Tbsp chunky cut marmalade to the mixture as well. (I’m telling you this, not to confuse you but to encourage you to make things up as you go along!)
STORING BRAMLEYS & APPLE GINGERBREAD
Sunday November 14th 2010, 2:04 pm
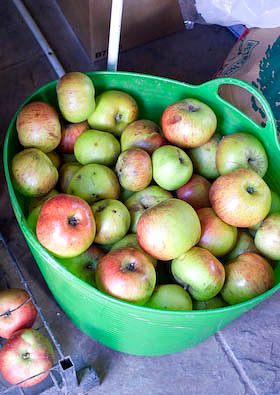
Bramley Seedling apples are one of the most popular apples grown for cooking in the UK. They are an apple that stores well; if kept in the right conditions they should keep for 6 or 7 months. Even so, I will still be using some to make apple sauce, pie fillings and apple butter, processed in jars to stock the pantry. It is just really convenient to have some jars already to go.
If you have some Bramleys you want to store, choose the best unblemished fruit for longer storage and use up any bruised fruit first. It is usually a good idea to wrap fruits separately in tissue or newspaper, but there is no need to do this with Bramleys, simply arrange them so they aren’t touching each other by placing them in shallow drawers or crates. A dark cool frost-free shed, garage or cellar is the ideal place, preferably with an optimum temperature of 6 – 7 degrees C. Make sure to check them every few weeks and weed out any bad apples before they have any influence on the rest.

Here is another easy recipe that uses more of the same apple puree I made for the apple cake recipe posted yesterday. I’m very partial to cake recipes where the butter is either rubbed into the mixture or melted. Even though I have the help of my trusty vintage Kenwood Chef, I for some reason avoid the creaming the butter and sugar together thing whenever I can. Anyhow, this apple gingerbread cake is perfect for serving in the afternoon with a cup of tea and can be rustled together as quick as a flash if someone decides to call round. I have put a thin layer of ginger icing over the top of the cake. Another alternative that I think could work well would be an apple cider syrup poured over the cake after piercing the top with a skewer. Next time perhaps …
APPLE GINGERBREAD
First make the apple puree:
500g (1lb) bramley or other cooking apples, peeled, cored and roughly chopped
125ml (1/4 cup) of cider or water
125ml (1/4 cup) maple syrup or sugar to taste
Place the apples in a pan with the cider or water and bring to a simmer, then cook gently for around 20 minutes, until the apples become a fluffy puree when stirred with a spoon. Add the maple syrup or sugar to taste. Leave to cool. This will make slightly more than you will need, but it leaves a bit extra to serve with the gingerbread.
175 g (6 oz) plain flour
2tsp baking powder
1tsp ground ginger
3 cloves, 5 black peppercorns and the seeds from 4 cardamons, ground fine in a pestle and mortar
85g (3oz) brown sugar
100g (4oz) golden syrup (is this what is called corn syrup in the US?)
85g (3oz) butter
125g (5oz) apple puree
30g (2 lumps) stem ginger, roughly chopped
1 egg, beaten
Preheat the oven to 180C (350F, Mk 4). Grease a 20cm (8in) square baking tin and line with baking paper. Sift the flour, baking powder and spices into a bowl. Place the brown sugar, syrup and butter in a pan and heat gently till everything is melted and combined then leave to cool. Add the syrup mixture and all the remaining ingredients to the flour and spices in the bowl and mix together to combine. Pour the mixture into the prepared tin and bake for 25 – 30 minutes. Remove from the oven, leave to cool for a short time until firm enough to turn out onto a cooling rack.
To ice the cake:
85g (3oz) icing sugar
1 Tbsp stem ginger syrup
1-2 tsp warm water, if required
Sift the icing sugar and add the syrup. Mix together, adding some water if needed to a spreadable consistency. Pour the icing over the still warm cake and spread evenly with a knife. I like a very fine layer of icing on my cake. If you like a thicker icing then double up on the ingredients and make it less runny so it doesn’t all run off the top of the cake.

SCONES AT THE VILLAGE SHOW
Tuesday August 31st 2010, 11:50 am
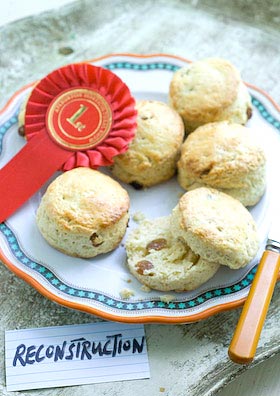
I want to share my joy with you, the moment my scones, entered into the produce show at our village hall at the weekend, won first prize. I certainly never expected this triumph so when I went into the hall to find out the results and spotted I’d been awarded the first prize, OK I can see now, it was a bit over the top, running round the hall punching the air with my jumper pulled up over my head!
I’d been in a right quandary in the lead up to the event. Last weeks British Bake Off programme on TV had featured scones and it was only then I thought I’d enter some in the Aylburton show. The scone class has always seemed too highly contested for me to have winning ambitions. After the British Bake Off programme I pressed the red button to watch expert baker and programme judge Paul Hollywood show how to make his ‘failsafe’ scones. With classic baking like this it is always extraordinary how the same ingredients can be mixed to give totally different results. I was appalled that he used 2 eggs and when out of the oven I thought his scones too high baked. Straight to Twitter someone described his scones as ‘pants’ so I wasn’t alone. How we all have an opinion; to add fruit or leave plain, use self raising flour or plain, adding the traditional cream of tartar and baking soda yourself, using sour milk, buttermilk etc etc. See this excellent and comprehensive roundup about scone making.
Even though I’ve made scones loads of times this all sent me a bit wobbly and over the following few days I made several batches trying different recipes, other than my own, thinking they would be appreciably better than mine, but none worked out how I wanted. On the morning of the show facing the decision whether to enter fruit scones or not I fell back on my own tried and tested recipe that you can find here. The first batch I made I forgot to put the sugar in. There was just enough time to make another lot and get it right, though the look of the second batch wasn’t so good. Suffice to say, got down to the village hall, added my entry to the baking table and as they say… the rest is history.
Couldn’t find my favourite cutter so had to use a slightly larger 6.5cm (2 1/2in) diameter cutter instead. This made 7 scones and the last 2 had to be cut from reformed dough, which isn’t ideal if you are aspiring for 6 perfect matching specimens. Also as the category was for fruit scones I added 50g sultanas to my plain scone recipe as well. Paul Hollywood gave a good tip in his red button masterclass. He said when brushing the tops of the scones with milk/egg wash watch none drips down the sides as this can set and prevent the scones from rising evenly. Mind you, a wonky scone looks quite good, don’t you think?
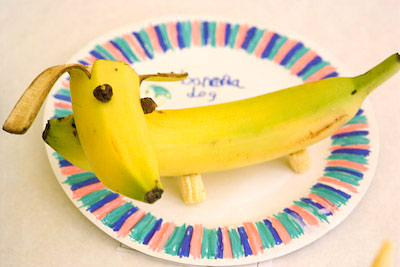
Our village show is really great. Very charming and relaxed. So relaxed in fact that you can never guauge what the criteria is for success. You can spend time faffing about with your presentation only to be beaten by a bottle of ketchup in a plastic bottle, but it is all good fun and everyone pretends they are taking it in good heart and that’s the main thing. Will be posting more pictures later but this is my highlight of the show this year – Banana Dog.
THE MARVELLOUS MS MARMITE-TEE-EE
Tuesday March 30th 2010, 4:29 pm
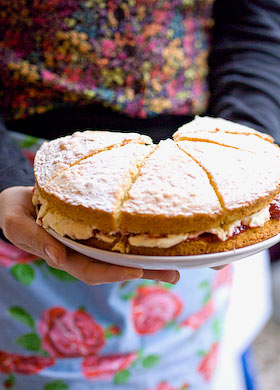
For me, running a business has at times felt disappointing. Obstacles seem designed to get in the way of creative thinking, and it takes training and experience to restore your enthusiasm and energy at times. Creative ideas are what fuel and excite me. The days of setting up a stall of your wares down the Kings Road, just because you could, are long gone. Spitalfields used to have that excitement for me too, but once the potential is spotted, big business takes over and the cost of shop leases goes through the roof. The many shows where individual makers can sell their wares, end up costing an arm and a leg to take part and you really have to know what you are doing to turn them to your advantage and make them pay. Unless you’re dead smart, most of ones business life can be coined by the phrase ‘putting it down to experience’. But what joy, the spirit of entrepreneurial adventure lives and this weekend I’ve seen it with my own eyes.
This Sunday the first underground farmers and craft market was held in secret in Kilburn, north west London. I say secret, because as an underground event it was operating outside the conventional ways of doing these things. Thirty-odd businesses, artisan makers, keen amateurs and a couple of friends who thought it might just be fun to do some baking, put our their wares in any space available in an ‘ordinary’ one bedroom flat with garden, summerhouse and balcony, the abode of the marvellous ms marmite lover. MsMarmitelover, has for some time now been causing a stir with her underground restaurant, holding special suppers in her home, attendance by ticket only. She is most definitely a trail blazer with a streak of anarchy. I have been following her on Twitter for some time now and when she tweeted to say she was hoping to hold a farmers and craft market in her sitting room, might anyone be interested to take part, I was there like a shot.
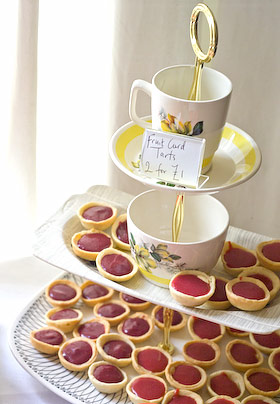
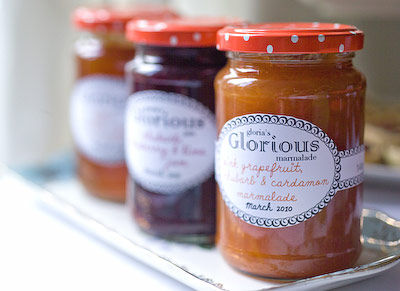
As a person who needs a deadline, it was a good reason to make me sort out some packaging for my jams, marmalades and fruit curds, at the same time without it being too big a deal. I made raspberry and blackberry curds using some frozen fruits grown organically here at Taurus Crafts and using eggs from my neighbour Jane Hale’s hens, that were as fresh as fresh can be. If I say so myself, they are pretty damn fab. I served up tasters in tiny pastry cases, tweeny weeny curd tarts stacked on my homemade wacky cake stand. I also made 2 marmalades; bitter seville marmalade and my special pink grapefruit, rhubarb and cardamon marmalade as well as a jam that went down a treat; rhubarb, blueberry and lime jam.
Back to the market, in the house, every inch of space was utilised to its best. Someone created a cocktail bar on the ironing board, the mantel shelf was used to display cupcakes, my jam jars were lined up along the top of the upright piano and the bed was strewn with wonderful baked goods and crocheted flowers. Occasional tables became shop fronts for chutneys, cup cakes, more cup cakes, sauerkraut, chocolate brownies, all the foodstuffs you could ever dream of, and a steady stream of enthusiastic customers wandered through, tasting and sampling as they went. There were wacky tourettes biscuits embossed with rude words, cupcakes in handmade flowery boxes and bundles of napkins made of 50’s inspired fabrics. It was utterly totally lovely.
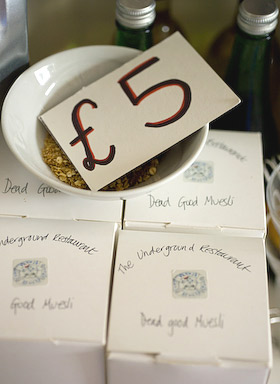
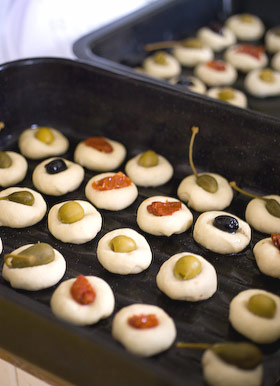
There were cookery demonstrations taking part in the kitchen; how to make your own hollumi cheese, Ms Marmite made her very own focaccio shots, that were delicious, Porridge lady made porridge the proper way using organic oatmeal and a lot of stirring. The atmosphere was buzzing and others taking part were a friendly bunch. I only wish I had had more time to enjoy the event as a customer. This will no doubt be the start of a new craze. Whether or not such energy can be recreated remains to be seen, but I’m up for it.
To be kept up to date on MsMarmite Lovers events you can find her blog here.
To see more of my pictures from the day look here and even more here. Feature in the London Evening Standard here.
Apologies for not naming all the participants photographed or taking pictures of everyone who took part, I had too much on my plate to record all that information.
