SHOW ME THE WAY TO A MORELLO
Thursday July 28th 2011, 12:43 am

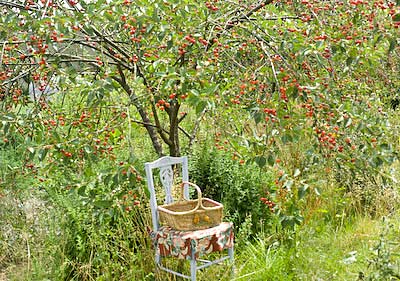
It is cherry time again and the pitter is at the ready. Last year it was put to good use as I removed the stones from an abundance of fruit going well into the night. This year I’m unlikely to be so lucky … or unlucky depending how you look at it. The cherry harvest is nowhere near as lush as it was in 2010, but that’s OK. I like my canning years to have distinctive differences, so each year I have new ingredients to find and explore.
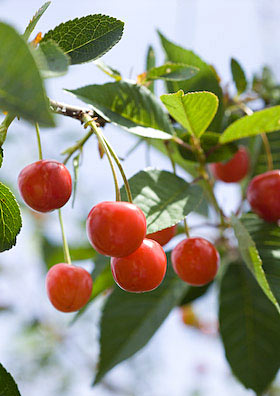
I’ve still got some jars of canned morello cherries in the larder as so many were put away last summer and the joy of canning means you can store enough to see you through more than one season, if you do it right. Morellos are a sour cherry, for culinary use only, that I have never found for sale. The ones I preserved in a light syrup were, on first tasting, fairly undistinguished and plain – no big deal. That is until you add a splash of kirsch and pour on some cream, and then they become something totally exquisite. I have served them that simply on many occasions since last summer and opened a jar to make the filling of a black forest brownie cake more than once. So this year my cherry canning is set to be on a modest scale.
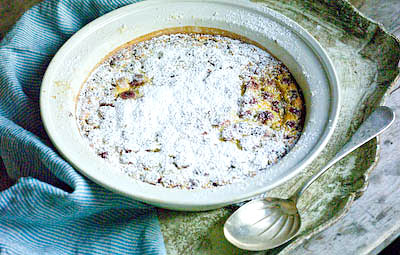
Cherry clafoutis is another traditional pudding that uses sour cherries and works well with fresh or bottled fruit. This isn’t time to skimp on filling – it should be well packed with fruit with all the gaps adjoining melded with custardy batter. There is some debate as to whether you should leave the stones in the fruit or remove them. As the stones imbue a slight almondy flavour to the pudding, many people say they are essential. I prefer to serve and eat food without the hassle of filching out stones as I go, so add a splash of amaretto or kirsch to complete the flavours. A clafoutis is so easy to make and needs to be eaten whilst still warm from the oven, though having said that, I have eaten leftovers for breakfast the next day, and very nice it was too. Any syrup remaining can be drunk like cordial with sparkling water added.
CHERRY CLAFOUTIS
Serves 6 (generously)
3 eggs
100g (1/2 cup) caster sugar
1tsp vanilla extract
1/4tsp salt
40g (1/3rd cup) plain flour
200ml (1 cup) milk
450g (16oz) fresh cherries, pitted or whole
(or 400g (14oz) if using bottled/canned , well drained)
kirsch or amaretto
some icing sugar (optional)
Butter a 25cm diameter earthenware or enamel dish. Pre-heat the oven to 200C (400F, Mk 6).
If you are using a mixer, just throw the first 6 ingredients together and beat together to form a smooth batter. Working by hand, whisk eggs, sugar, vanilla and salt together, then add the flour followed by the milk to make a smooth batter.
Pour half into the prepared dish, spread the cherries over the batter and splash with a few teaspoonfuls of your chosen liqueur. Pour the rest of the batter over the fruit. Bake for 40-45 minutes until the top is lightly golden and the custard centre is beginning to set. Leave to cool for a while so the custard sets further. Serve warm dredged with icing sugar and another drizzle of liqueur if you like.
SUNSHINE AND SUMMER BERRIES
Wednesday June 08th 2011, 7:30 pm

I’m so glad I made a concerted effort to get the preserving garden allotment sorted out earlier in the season. I’ve been distracted for the last few weeks so the plot has been neglected and there’s now much weeding to be done to make it all neat and tidy again. But sometimes a break is necessary if only to accept that to some degree, what will be will be. Now comes the payoff. The berries are ripening and my longed for supply of strawberries has become a reality.
The other day I picked my first substantial batch and there should be several more punnets full to come in the next few weeks. The bulk of my plants are Cambridge Favourite, which I chose as a classic jam making variety. Planted autumn 2009, there was no fruit to speak of last year and the plants sent out lots of runners, some of which I encouraged to root and establish. The plan was that this year would be the first season to expect any fruit and I’m not disappointed.
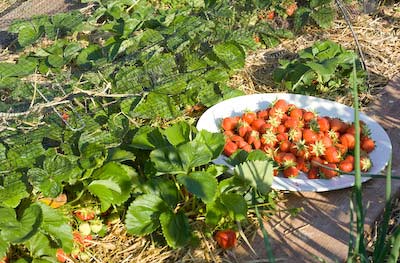
The rule of strawberry picking is to chose a warm dry day for it and, of course, to eat as many berries, warmed by the sun, as you can, right there and then. These berries are just so sweet and packed with flavour. When picked that warmth quickly ‘cooks’ them and they lose their polished look in moments once they are detached from the plant, so you need to get them cooled fast. Even after my seasonal binge there were still 3 kilos of fruit to take home to preserve.
I plan to make jam with subsequent pickings but for this first load I wanted to can compote and syrup, using my harvest as fresh as possible to capture this exceptional flavour. Strawberries aren’t highly rated for bottling as they overcook fast but making compotes to eat out of season to serve with yogurt or vanilla cheesecake or a simple sponge cake with cream …. well, that does it for me. This is were canning makes such sense. Jam is usually overladen with sugar and jam makers often complain that they have far too much of it to consume, but compote can contain much less sugar, so the flavour of the fruit shines through and by water processing it, you can then stock the pantry with jars that will keep throughout the year ahead.
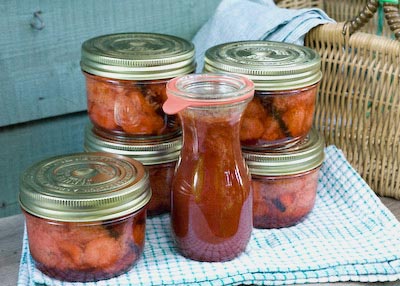
With canning generally, it is important to use jars that are a size that suits how many people you feed. I like to use smallish jars so once opened I know none will go to waste. My next door neighbours brought me these Le Parfait Familia Wiss 350ml jars back from France recently so they looked to be just perfect for the job. I canned the left-over syrup in a 250ml sized Weck flask and there is another half flask, in the fridge for using up now.
The berries need to be macerated with sugar overnight so their lovely juice is drawn out, turning the sugar to syrup at the same time. I wasn’t sure how much syrup the berries would produce but there was enough left over to bottle on its own. This syrup is just fab stirred through Greek yogurt and I’ll be churning some vanilla ice cream soon to make another perfect partnership. The compote will go with just about anything.

STRAIGHT-LACED STRAWBERRY COMPOTE
Makes 6 x 350ml (7 x 1/2 pint) jars compote, plus approx 375ml (3/4 pt) strawberry syrup
3Kg (6 1/2lbs) strawberries
350g (12oz) sugar (adjust to your taste)
2 vanilla pods
1Tbsp balsamic vinegar
Rinse and drain the fruit if you must! As I knew exactly where my fruit came from and that it had been mulched with straw to keep the berries clean and off the soil, I didn’t wash the fruit … so you choose! Remove the stalks and halve the largest berries then place in a large glass or ceramic bowl, sprinkling the sugar in layers between the fruit as you go. Split the vanilla pods and scrape out the sticky seeds then bury the pods and stir the seeds in amongst the berries. Cover the bowl with cling film or a plate and leave in a cool place or the fridge overnight.
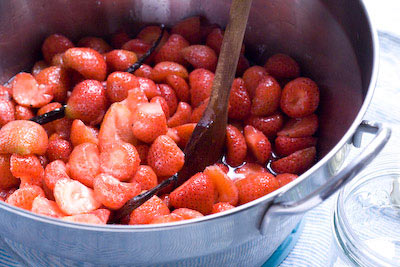
Prepare the water bath, jars and lids for canning*. Pour the fruit, sugar, vanilla and any juice into a preserving pan. Warm it through stirring until all the sugar is dissolved. Add the balsamic vinegar then bring all to a simmer and cook through for 2 minutes. Using a slotted spoon or sieve remove the berries and vanilla pods from the syrup into a warm bowl. This way the softened berries will still be surrounded by syrup. (Some fruit pulp will remain in the syrup. If you want to make a smoother syrup from your left-overs then pass it through a sieve.) Cut each vanilla pod into 3 then using a jam funnel, pack the strawberries into the jars, to come just below the headroom line for the type of jars you are using. Push a piece of vanilla pod down the side of each jar so it shows against the glass. Top up with hot syrup from the pan if necessary, so the berries are submerged.
De-bubble the fruit around the sides of the jar using a narrow spatula or chop stick to release any trapped air bubbles, wipe the jar rims clean and seal. Water process for 10 minutes then remove from the water bath and leave till cold. Check the seals and label your jars ready to store. If any of your seals fail, use the compote as if fresh*.
For the remaining syrup in the pan, bring to a brisk boil for 5 minutes till the syrup is slightly thickened or to your liking. Pour into hot jars to the headroom line appropriate for your type of jar (Weck flasks can be filled almost to the top), tap the jar on the counter to release any trapped air bubbles, wipe rims and seal. Process for 10 minutes then remove from water bath and leave till cold before testing seals are fixed.
*If you don’t intend to water process the compote and syrup it should keep, if refrigerated, for about a week.

PICKLING ASPARAGUS
Monday May 09th 2011, 9:18 am
The asparagus season is in full swing. 14 of the 15 crowns planted in my newly prepared asparagus bed have started to appear, sending up very fine spears that then become frothy graceful ferns. They must be left alone for the time being to build up energy and form good sound crowns for the years ahead and I must be patient. I’m hoping the 15th crown is OK and wonder if I could have planted it upside down, and if I did, will it find its way right way up in time?
The other day I came across some bargain priced asparagus at the supermarket that had reached its sell by date, so was going cheap, half price in fact. Recognising a bargain when I see one, I bought up the lot so I could do some pickling. Since the Canjam last year, when other canners participating produced pickled asparagus, I’ve been wanting to experience this preserve first hand, but with this prized vegetable never exactly in abundant supply and always required for immediate scoffing, I couldn’t envisage when the opportunity to pickle some would arise. So watch what you wish for, here was my golden opportunity and I grabbed it with both hands.
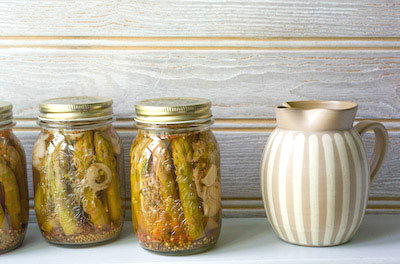
I am now the proud owner of 5 x 500ml (1 pint) jars of pickled asparagus. I canned 3 to start with then had the idea to add the last of some wild garlic flowers, picked that day, so canned a couple more jars. I have no intention of sampling these pickles until the memory of the fresh English stuff is a distant memory, as this is not intended as a replacement for what is available in season right this minute. Some pickled spears, served with hard-boiled eggs, a handful of salad leaves and a wedge of homemade bread and butter will be a simple lunch to look forward too in 6 months time.

Fitting the spears into the jars is a wasteful business as they do need to be trimmed especially short to fit. I made asparagus soup with the stem cut-offs, so none went to waste, but shorter dumpier spears to start with makes the task less painful. There is no way I would have wanted to do this if I’d paid top wack for my ingredients.
PICKLING ASPARAGUS
I used 2 x 200g bundles of fresh asparagus spears to fill each 500ml (1 pint) jar, but it will depend how long the stems are and how much stem you’ll need to chop off so they fit into the jars. Allow a few more spears so they can be packed tightly into the jars and cut them so they fit snuggly and sit below the level of vinegar headspace when packed upright in the jars.
For each 500ml (1 pint) jar allow:
400g (1/2 lb) asparagus spears
120ml (1/2 cup) white wine vinegar
120ml (1/2 cup) water
1 tsp dill seed
1/4 tsp chilli flakes
1 tsp sea salt
1 small shallot, finely sliced
1/2 clove garlic, sliced
6 fresh wild garlic flowers (optional)
*Prepare the canning bath and keep your empty jars submerged in there until they are needed. Prepare lids in another pan of simmering water. Blanch the asparagus spears fleetingly in boiling water for 60 seconds, then drain them and cool immediately with cold water, so they don’t cook any further. Mix the vinegar and water in a pan and bring to a simmer.
Place the salt and spices in each jar, then pack the asparagus spears upright (or you can do them pointing down if you like!) in the jars, adding the shreds of shallot and garlic, and the wild garlic flowerheads in amongst them as you go. Pour in the vinegar/water to cover the asparagus, leaving the headroom necessary for your type of jar. De-bubble, to release any trapped air pockets surrounding the spears, using a chop stick or thin spatula. Wipe the jar rims clean and seal. Process for 10 minutes, then remove from the canner and leave until cold before testing the seals.
*Once canned like this your pickled asparagus will keep for a year or even longer. Pickling can be done successfully without hot water processing so long as the acidity of the vinegar / water used is high enough. Canning removes the guesswork!

JAM JARS & MARMITE
Monday February 28th 2011, 2:27 pm

This is supposed to be a quick one, but in true geek style has become something more. Inspired by Kerstin Rodger aka MsMarmiteLover trailblazer and proprietor of the first underground supper club in the UK, whose blog post at The English can Cook about her love of jars and forthcoming supper club event this Friday Jar Food – Pickles, Potions and Preserves , got me thinking about …. jars. Seemed like a quick blog post to gather some of my favourite jars together, without it becoming some big deal would be a possibility. Trouble is, that when the differences in ridges on glass are something you admire, you get sort of, caught up. Anyway, here are just a few from my collection and I hope you enjoy them as much as I do.
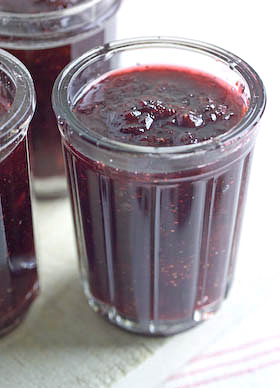
Vintage French jam jars are such classics and feature plenty of ridges and facets in all sorts of variations. A good heavy handful and chunky lipped edge are what you want. A few nibbles around the top are OK too. You can always use them as candle holders and vases if you don’t have any confiture to fill them with. I will be selling some of my vintage French jam jars at the Selvedge Spring Fair on the 2nd April in London. Follow link for more info.

When I wrote Fruits of The Earth my preserving book, (sorry currently out of print but will be available again in paperback in June) the publisher asked me to use some Ball jars, to suit the American market. They are virtually impossible to buy here in the UK but by one means or another, I’ve acquired a few along the way. These vintage ones in beautiful turquoise glass look great when used as vases.
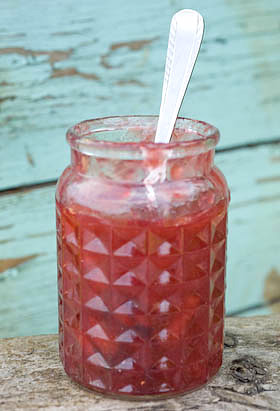
I always look out for interesting shaped jars and my vintage English Wye Valley Preserves jars (I’ve got 2 of them) are real favourites. They just wouldn’t make them like that these days. Finding them was sheer fluke, so sorry no tips on where to look. Just keep your eyes peeled.
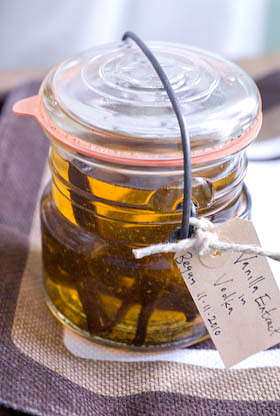
Another Ball canning jar, this time with wire bale clip top. These aren’t recommended any more for canning but people do still use them. Finding new rubber seals is the problem. See the brilliant Food in Jars for more info about this.
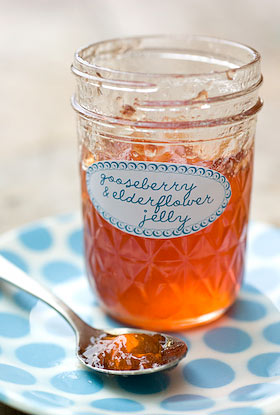
I love Ball quilted jelly jars and again you can’t buy them in the UK. My friend Chris brought me 2 back from the US a while ago and I use them repeatedly. They are so cute and worth looking out for if you are in the States.
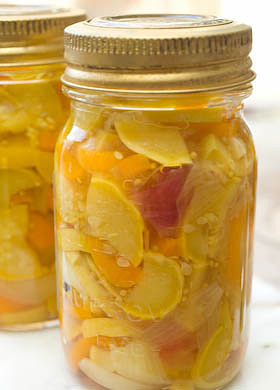
I’ve been given quite a few old Kilner jars by people. Often I’m given them because their owners think them now redundant but in fact you can still buy replacement seals for them. Peter Denyer at The Kilner Jar knows everything there is to know about Kilner jars, sells the seals and also reconditions the rusty tops. A real niche business. These Kilner Improved jars are great because they have a glass lid. For canning, there is something really satisfying about only natural materials, glass and natural rubber, being used here. Look out for old jars on your local Freecycle.
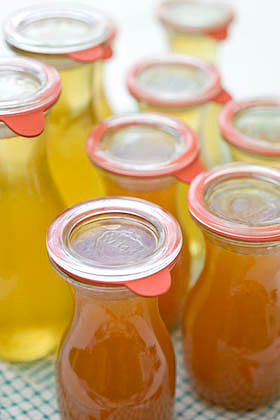
Weck jars and flasks have such simple lines and are great for the modern pantry. Again, just glass and rubber used here and they work so reliably. I’m a big fan of canning cordials and syrups and find the 1/4 and 1/2 litre size flasks most useful. Weck jars are really easy to open as you simply pull the rubber tongue to release the seal. Also seals are reusable.
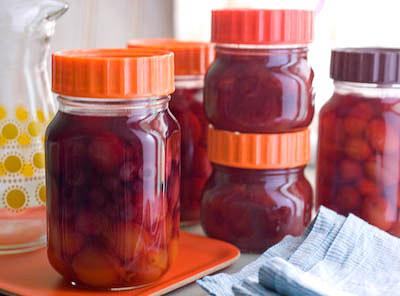
With great 70’s style, these vintage Ravenhead Kilner jars are another favourite that I use a lot. The screw bands were made in orange, red and brown plastic, and also white apparently, but I’ve never seen one of them. Again try The Kilner Jar for replacement seals. The last canned jar I tried to open was so well sealed that I had to email Peter Denyer for advice on how to prize off the lid. In true expert fashion, he told me to carefully slide a knife under the seal and gently lever. You have to be careful when doing this as chipped edges can totally ruin a canning jar and make it unusable.
Kerstin’s Jar Food supper club is one NOT to be missed. Also her book Supper Club – Recipes and Notes from The Underground Restaurant is available to pre order on Amazon and will be published at the end of March.
I PUT MANURE ON MY RHUBARB
Sunday February 13th 2011, 1:10 pm
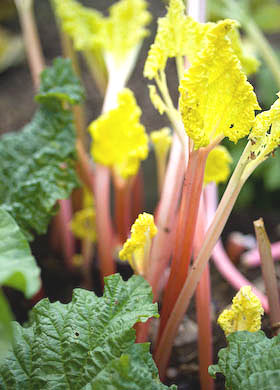
‘I prefer custard on mine’ …. I hear you reply!
Popping by the allotment, it is lovely to see the knobbly buds of rhubarb starting to push their way through. There is a rabbit nibbling problem at present, and like an arm wrestle between vegetable and animal, currently teetering in the rabbits favour, I’m confident that once the rhubarb gets a spurt on, the plants will win hands down and see off the fluffy predator.
The plot is fast beginning to resemble the national rhubarb collection, as I just can’t resist adding another variety when I come across one, conveniently forgetting that each crown will eventually take up a wacking great amount of space as it becomes established. Ho hum, who cares? All these varieties rarely mean much difference as regards taste, but for a rhubarb nerd it means you can admire the subtle variations of habit and leaf shape.
One variety I sought out especially, having grown it before on my London plot, is Livingstone, named after Red Ken. This variety is particularly useful as it has had the dormancy bred out of it, so gives a crop right through until the first frosts, unlike the others that you should stop picking in the summer months. You aren’t likely to find Livingstone for sale as it is produced under license so shouldn’t be propogated as the rights belong to the breeder, who I bought the original cultivar from, then years later tracked him down again and begged him to send me another crown (it is amazing how begging usually does the trick).
This is why there is no need to import rhubarb in the UK. We have the varieties available to harvest, virtually all year round. It always amazes me when I see rhubarb for sale in Tesco imported from New Zealand. My nearest independent greengrocers, usually sell Dutch rhubarb as the much lauded Yorkshire stuff is hard to source at the market or when found is too expensive for them. Now in my second year on the plot, I should be self sufficient in the stuff very soon, so such concerns will be for others to wrangle over.
It’s great that rhubarb is seeing a renaissance. I hadn’t eaten forced rhubarb until fairly recently, so I loved it before all the guff about not stewing it and that only the sweeter pink stems are worth having, bla-di-bla. The pinker it is the prettier it looks and you can juice it too, but for a diehard rhubarb fan brought up on stronger stuff, it is simply an hors d’oeuvres, leading the way to the main course.
Luckily, as one of my favourite flavours, when it comes to rhubarb, if you say ‘glut’ then I say ‘bring it on’. I may well become famous for my rhubarb ketchup, one day, but in the mean time here is a recipe for pink grapefuit, rhubarb and cardamom marmalade that I developed last year that usefully has a longer seasonal ‘window’ that the usual Seville orange sort and also just happens to taste great. The recipe doubles up fine if you want to make a bigger batch.
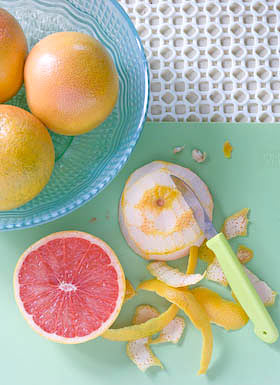
PINK GRAPEFRUIT, RHUBARB & CARDAMOM MARMALADE
Makes approx 1.3Kg (3 lbs)
0.5Kg (1.1 lb) rhubarb
1kg (2.2lbs) sugar
juice of 1 lemon
seeds from 10-13 cardamom pods, crushed
3 pink grapefruits, approx 750g (1.65 lb )
Rinse the rhubarb stems and chop into 1cm (1/2 in) evenly sized pieces. Place them in a bowl with the sugar and lemon juice. Tie the cardamom seeds in a piece of muslin and push them inbetween the rhubarb, then cover with baking paper or clingfilm and leave for a few hours or overnight, so the juices begin to soak into the sugar.
Wash the grapefruit and remove the peel with a sharp knife or potato peeler, leaving as much of the pith on the fruit as possible. Finely cut the peel into shreds. Squeeze the fruits and collect the juice and tie the remaining pulp, pith and pips together in a muslin bundle. Place the shreds, juice and bundle in a pan, add 1.4ltr (2 1/2pt) water and simmer for 1 1/2 – 2 hours until the peel is cooked through and tender. Remove the muslin bundle and, when cool enough to handle, squeeze the juice from it back into the pan, then discard. Pour the peel through a sieve and collect and measure the liquid, adding more water if necessary to make it up to 1ltr (1 3/4 pts).
Prepare the jars and canner if you plan to hot water process the marmalade, otherwise, make sure your jars and lids are clean and place them in a warm oven to heat and sterilise. Place the cooked shreds, cooking liquid and the contents of the rhubarb bowl in a preserving pan and bring slowly to the boil, stirring to make sure all the sugar is dissolved. Bring to a rolling boil and cook on a high heat until setting point is reached, that is when a small blob of the syrup on a cold plate quickly forms a skin when you run your finger across the surface. Remove the cardamom bundle.
Fill the jars, leaving the appropriate amount of headroom for canning, and seal. Hot water process for 10 minutes, then remove from the canner, leave till cold and test that the lids are sealed. Label and store. Alternatively, without canning, place waxed paper discs on the surface of the marmalade and seal. This marmalade should store safely without canning, but hot water processing will make doubly sure that your jam will keep and store without a hitch.

CULTURE CLUB – HOMEMADE YOGURT
Tuesday January 18th 2011, 6:25 pm

2010 was the year I learnt about canning, or bottling, or hot water processing stuff in jars, whatever you want to call it. Following the year through ingredients, working with the seasons and the produce that was close to hand, has given me a real feeling of connection to the food that I eat and has changed my life and my approach to preserving. Not only that, I’ve got a cupboard full of food in jars, a sort of mini pantry, as my house is too small to include a special room or larder. Granted, most people don’t have shelves of bottled comestibles in their sitting room or lined up on the sideboard! See my friend Tigress’s recent post about her pantry ( the Domestic Goddess is sooo last century, now chatelaine in the buzz word!) and Dana and Joel’s great wall of preserves, in their city apartment. So you see it isn’t necessarily about having a special room in your house or living in the country.
*From now on I am going to refer to the bottling and preservation of ingredients using a hot water bath process as ‘canning’. You’ve been told. I know that in the UK this causes some confusion as the assumption is that this infers putting food in tin cans, but I am talking about preserving food in glass jars. OK have we got that straight now?
The biggest surprise for me has been how amazing the flavours of canned food can be. I grew up thinking that only fresh was best and that bottled, tinned and stored foods were second rate and down market. What I have learnt during my first canning year has totally blown that notion out of the water.
Now the year has swung full circle and there is a feeling of beginning again, its time to take store and note the successes – the rhubarb ketchup, black grape chilli jam and lemon fig & lavender marmalade I want to always keep a stock of. But more importantly I want to plan my goals for the year ahead. Plant blueberry bushes on the allotment to produce enough fruit to preserve, thus bypassing those ridiculously expensive and tweeny-weeny cartons you get in the supermarket, and too plant an asparagus bed so that a few years hence I will be able to harvest my own crop.
It is about pacing things, their needs to be a correlation between the amount of food stored and the rate it is consumed. There will always be some experimentation going on, but as well as enjoying the satisfaction of a well stocked cupboard I love the moment the spoon scrapes the bottom of the jar, each empty jar offering the opportunity to be filled anew. In the year ahead I will be using my preserved foods as ingredients for baking and to include as part of other delicious meals.
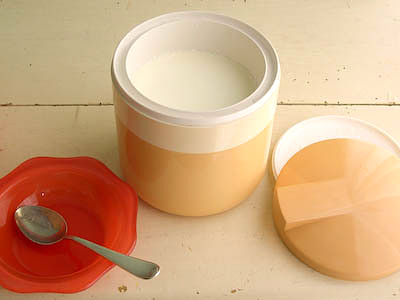
As well as jams and chutneys, I’ve got cordials, compotes and fruit purees and pickles stacked on my shelves. Today for lunch I popped open a jar of salted caramel pear butter and another of squashed Blaisdon plums. A dollop of each plus some homemade yogurt (and a tiny sprinkling of hazelnut praline on the top just to be flash) made a really delicious snack. The important thing about these preserves is that they aren’t laden with sugar in the same way that jam usually is. This is why canning makes such sense.
Sorry! This post was supposed to be about making homemade yogurt, but it has changed into something else. I’ll do the yogurt thing later as it seems a strange diversion to go there now and I’ve got other things I need to get on with. Anyone picking this up by Googling will be well annoyed.
FESTIVE APRICOTS, CRANBERRIES & BOOZE
Sunday December 05th 2010, 1:06 am
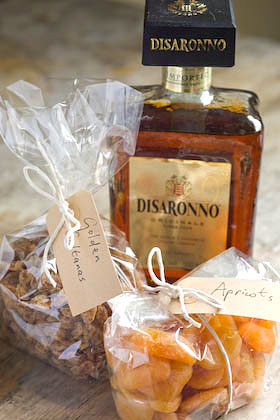
Month twelve, the very last Tigress’s can jam canning challenge and for December the ingredient chosen by the wonderous Tigress herself, who set the whole ball rolling in the first place, is dried fruits in all their jewelled and seasonal glory. Must admit, apart from chutneys, don’t think I’ve ever used dried fruits in my preserves so this is new for me.
Yet again Fancy Pantry by Helen Witty, my all time favourite book, provided the inspiration. Her dried apricot & amaretto conserve sounded just perfect to meet the criteria of this months challenge, though I’m not a fan of adding alcohol to my jams. Well I say I’m not, that should be, I wasn’t. Over the last year I have discovered how a little splash of kirsch takes sour cherries from quite nice to amazing. Likewise a spoonful of calvados added to apple butter, or some Cointreau poured over squashed plums can take mundane to magnificent, adding something not necessarily consciously alcoholic but that somehow completes the balance of flavours in a wonderful way.
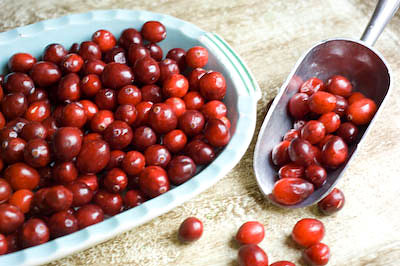
This did mean I had to shell out for a bottle of Amaretto, the down side of acquiring a stock of liqueurs, they don’t come cheap. Thankfully, this jam turned out even better than expected, really special in fact, so now I’ve got plenty of the ingredients left to make more of the same to give as presents. I added fresh cranberries to my jam which are great not only for their flavour and seasonality but for the lovely colour they bring. After I’d made the jam and started to think what it would go well with, ‘warm croissants’ absolutely shouted out to me.
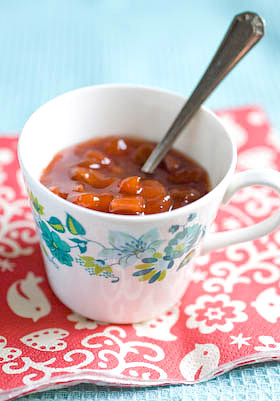
I have opted for bright orange sulphured apricots over the darker unsulphured variety for my jam because I can’t bear the thought of starting out with dark brown fruit. It doesn’t bode well in my mind, brown fruit can only get doomier as it cooks, and for a special holiday preserve you want to push the boat out a bit. This preserve could take even less sugar that I used. I did a sugar test on it using a refractrometer and found that it contained 57%. For a preserve to store well without canning, it should be nearer to 65%, so if you aren’t into canning and want to be sure this jam will store in the pantry for any length of time without worrying it will go mouldy, I’d advise you to up the sugar content from 450g to 600g, but taste wise it doesn’t benefit from it. The added alcohol will also help to act as a preservative. This jam tastes so good it most likely wont hang around long enough anyway. If you are not into canning, this should make it obvious why canning is so brilliant. You can preserve using less sugar so the overriding flavour of your jam is the fruit it contains, not sugar. Preaching over, here’s the recipe.
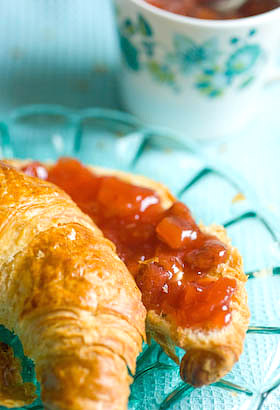
APRICOT, CRANBERRY AND AMARETTO JAM
Makes approx 1.4Kg (3 lbs) jam
225g (8oz) dried apricots
150g (5 1/2oz) golden sultanas or raisins
0.90 ltr (3 1/2 cups) water
225g (8oz) fresh cranberries
1 1/2 tsp grated orange zest
0.25ltr (1 cup) freshly squeezed orange juice
2Tbs freshly squeezed lemon juice
450g (3 cups) sugar
3Tbsp Amaretto liqueur
Chop the apricots into small evenly-shaped pieces. Place them in a bowl with the sultanas and pour over 0.75ltr (3 cups) water. Leave to soak overnight.
Next day, prepare the water bath, jars and seals ready for canning. For more info about how to hot water process, refer to the guide here. Place the cranberries in a pan with the remaining water and simmer gently for 15-20 minutes until the fruits have popped and are cooked through. Leave to cool slightly, then add all of the remaining ingredients (including soaking liquid) except the Amaretto.
Stir to dissolve the sugar and once it has, turn up the heat to a rolling boil and bring the jam to setting point (took me about 10-15 minutes), that is when a dollop on a cold plate readily forms a skin that wrinkles when you push your finger over the surface. Remove from the heat and leave to cool for a few minutes then stir in the Amaretto. Pour into hot sterilised jars, seal and process for 10 minutes. Remove from the water bath and leave till completely cold before testing the seals and labelling.
IT’S A WRAP
Well that’s it. A whole year of the Tigresscanjam completed and wow, it has been amazing. I intend to write another post soon to round up what I’ve learnt and how it has changed my approach to preserving. Thanks to dearest Tigress for taking the time to not only oversee the challenge and the monthly roundups but for asking me to take part. To think that this experience could have passed me by …. well what can I say, how foolish I would have been without that gentle nudge.
I have found all you other canjammers participating truly inspiring. Thanks to all of you for helping me learn so much. As well as introducing me to Meyer lemons, Concorde grapes and Seckel pears, ingredients I will no doubt spend the rest of my life trying to experience first hand, amongst other things, too many to mention here, I’ve got over a few hangups I had about American-isms (and Canadian-isms if there is such a thing) such as ‘canning’. We are of course divided by a common language and as the only Brit taking part, I hope that you’ve likewise picked up some of the flavour of our approach to ‘bottling’ here in the UK. – Love G x
THE GREATEST SCAPES – PLANTING GARLIC
Thursday November 25th 2010, 1:48 pm
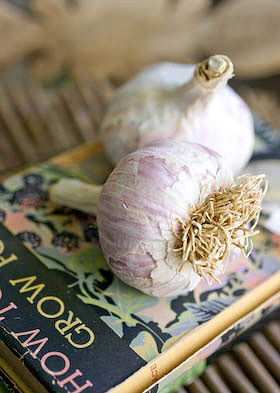
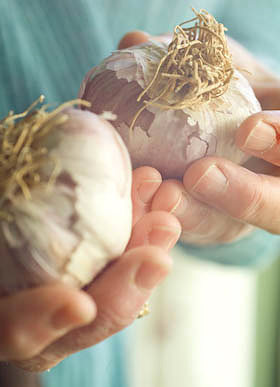
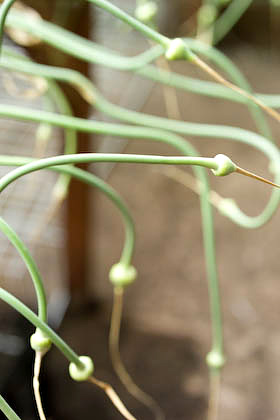
Though parts of the country have had snowfall overnight, here in the Forest of Dean, it may be crisp and cold, but the sun is shining. I really must get my garlic planted today. I bought two bulbs a month or so ago from Dobies; Garlic Vayo, a hardneck variety for Autumn planting, and was really pleased when the plump healthy bulbs arrived in the post. Hardneck garlic varieties need to be planted now so that they experience at least two months of the cold and frost they need to form their cloves. They are also the kind you need to grow if you want to be able to harvest garlic scapes, the winding flower stems they throw up that are a delicacy when pickled.
I always associate garlic scapes with Elspeth Thompson. Elspeth, in case she isn’t familiar to you, was an amazingly talented and beautiful garden writer, who tragically died earlier this year. I can’t really call her a close friend but I did get to know her to some degree over the last few years. Elspeth lived a few streets over from me in Brixton and I knew which was her house, even though I didn’t know her. When I took on my first allotment, her book The Urban Gardener, a compilation of her weekly newspaper columns in the weekend Telegraph, became my bible and as it was written in a diary format, I could dip into it and look up the features that Elspeth had written about for a particular week. She was ahead of the game, always. She started to write about her allotment well before growing your own veg in the city became the most fashionable thing to do. I knew where her allotment site was and that she walked her dog in the park that I lived alongside. I knew people who were her friends but I never actually knew her.
After I left London, one day out of the blue, she sent me an email asking me if I knew anything about pickling garlic flowers. She had eaten some at a wedding and thought they were fantastic. Wow, it is quite a thrill when someone you’ve admired from afar just happens to get in touch. Embarrassingly I knew ****all about garlic flowers but in true journalistic style I soon found out and sent her back lots of information. And so began our ongoing email correspondence.

All my research was not for nothing. The flowers, actually known as scapes, are never found for sale in the UK so growing your own is the only way to experience them. So now is the moment when you need to get planting if you are to have scapes to pickle next year. Choose a suitable hardneck garlic variety and plant the individual cloves in drills, 10cm (4in) apart with 20cm (8in) between rows. You can use a dibber to make holes to drop them in, making sure they are sitting the right way up with the root end underneath. Cover with 25mm (1in) of soil. You should have green garlic to lift next May/July and hopefully plenty of scapes to pickle as well.
Dear Elspeth, you will always be in my thoughts as I plant garlic now and in the years ahead and admire jars of pickled scapes on the pantry shelves. You were a truly amazing, inspirational and beautiful person. As a gardener I’m sure you would understand this unconventional tribute.
POACHED QUINCE ON MY PORRIDGE
Tuesday November 16th 2010, 10:36 pm
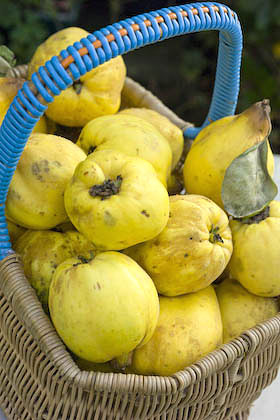
Month eleven, already the penultimate month of Tigress’s can jam canning challenge and for November the ingredient chosen by the talented artisan preserver Confituras aka blogger Cosmic Cowgirl is apples, pears and quince, a versatile selection of orchard fruits with delicious potential.
I could find a gazillion uses for each of these, but have chosen luscious quinces for this canjam contribution. A few days ago I used up the last quince of the year. I always vow to bottle plenty and never seem to achieve my ambition. Once this fruit grabs you, you are totally smitten. Considering how fab they are it surprises me that quince aren’t more popular; they are still seen as an unusual fruit. You have to seek them out and may find a supply at a farmers market, otherwise you need your own quince tree or to know someone else who has one. They take at least 5 years to produce fruit by the way if you are thinking of planting one.
They are one of the few fruits that I love so much, I’d pay real money just for a whiff of, never mind a taste of, each year, though this time was lucky enough to find a supply for free when someone kindly advertised quinces up for grabs on the local Freecycle. I moved at the speed of light to get round to that house, believe me. These Freecyclers had 2 trees heaving with fruit, that were so laden they had had to be propped up with stakes and ropes. It gave me the opportunity to see quinces growing on the tree for the first time and to notice what untidy trees they are to produce such exceptional fruits.
Of course, one of quinces magical qualities, apart from the wonderous unmistakable scent, is the way a hard unpalatable fruit turns delicious at the same time turning such a wonderful shade of deep ruby red as it cooks. I’m generally of the mind that long cooking times are of no benefit to ingredients, but quince turns this notion on its head. You need to slow cook ’em and slow cook ’em till they change colour, which can take 3 – 6 hours.
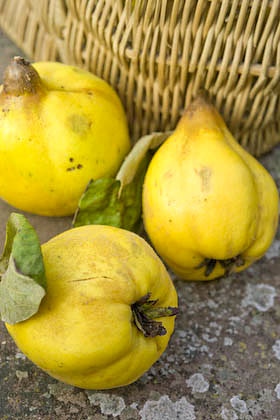
As regards the pantry, I want a supply of quince in spiced vanilla syrup, as straightforward as that. This is when canning makes such perfect sense and in theory allows you to preserve such a fabulous ingredient to last you all year round till the next time, though I haven’t managed that thus far. Preserving enough quince in jars is my ambition. A favourite way to serve them, on oatmeal porridge with Greek yogurt for breakfast. As simple as that. To prepare, they are quite hard work to peel and cut, so don’t expect elegant slices.
POACHED QUINCE IN VANILLA SYRUP
To fill 2 x 500ml (1 pint) jars
6 – 8 quinces
1 lemon
600ml (2 1/2 cups) water
250g (1 cup) sugar
1 cinnamon stick
1 vanilla pod
a few cloves
Scrub the quinces to remove the fuzzy coating. Peel, quarter and core the fruit. Cut each quince quarter into 2 or 3 slices, depending on the size of the fruit and immediately drop them into a bowl of acidulated water (water with some lemon juice added, as they discolour very quickly if you don’t).
You can put peel and cores in a pan, cover with water and simmer for 4 hours, topping up with more water if necessary, then pour into a jelly bag, collecting the juice that drips through overnight. You can use this juice to top up the syrup if you find you need more to fill your jars and use what is left to make quince jelly. I also put the pulp left in the jelly bag through a food mill to make a quince puree, so nothing goes to waste.
Preheat the oven to 110 C (225 F, Mk 1/4). Make a sugar syrup by heating the water and sugar together, stirring until the sugar has dissolved. Drain and place the quince slices in a large ovenproof casserole, adding the cinnamon stick, cloves, a few pieces of lemon peel and the vanilla pod, after splitting it lengthways and scraping and the seeds out from the middle. Pour the syrup over the fruit and spices. Put the casserole on the hob and bring to the boil then remove from heat. Place a lid on the casserole and cook in the oven for 5 – 6 hours.
Another way to cook the quinces is to use a slow cooker. Place the quince, spices and hot sugar syrup in the slow cooker casserole and cook on high for the first hour, then turn down to low and cook for 6 – 8 hours, by which time the fruit will have turned a deep red wine colour.
Prepare the water bath, jars and seals ready for canning. For more info about how to hot water process, refer to the guide here.
Fill hot jars with quince slices, distributing the spices and vanilla pod amongst the jars and top up with syrup, leaving the required headspace for your type of jars. De-bubble, to remove air pockets, wipe the jar rims clean then seal and process for 15 minutes. Remove from the water bath and leave till completely cold before testing the seals and labelling.

OATMEAL PORRIDGE
For 2 people
100g (1/2 cup) organic medium oatmeal
650ml (3 1/4 cups) water
a pinch of salt
Toast the oatmeal in a pan for a few minutes, stirring with a wooden spoon until you begin to smell the toasted oat aroma. Add the water and salt and bring to a simmer, then cook for 20-30 minutes until thickened as you like it and cooked through, adding more water if necessary. That’s all there is too it!
BLACK CHILLI JAM – WHOAH!
Sunday October 17th 2010, 9:58 am
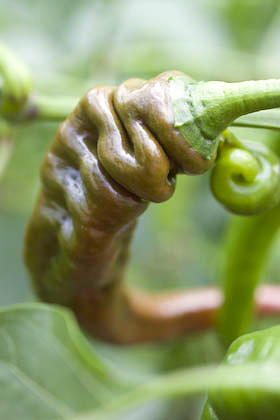
Month ten Tigress’s can jam canning challenge and for October the ingredient chosen by Kaela at Local Kitchen is chili peppers and all things capsicum. I admit, when the October ingredient was revealed, I wasn’t a gal who could tell a jalepeno from a habanero, but another month, another brilliant opportunity to explore and find out what chillis are all about and to recognise what’s hot and what’s not. As luck will have it, I didn’t have to go very far from home to do my research as growing chillis and peppers seems to be a very popular thing these days, so several friends right on my doorstep have provided the raw materials. With a greenhouse or polytunnel at your disposal, capsicums are a seemingly easy crop to cultivate. You can also grow chillis as potted plants on a windowsill.
As is always the way each month, I read every recipe I could find for inspiration. With its orangy-red transparency flecked through with tiny pieces of red pepper, chilli jam holds a dazzling attraction for me, but as Morgy, next door, had given me a big bowl full of black grapes, from the vine that scrambles over the front of his rustic shed abode, I decided to use them to form the main carrying jelly for my hotter ingredients. If you haven’t got a supply of fresh grapes you could extract the juice from apples instead or I imagine that bought grape juice would work too.
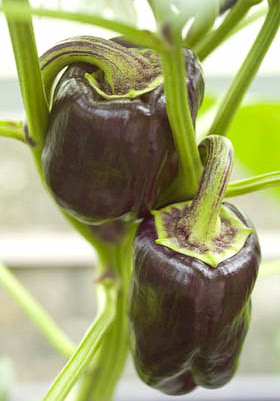
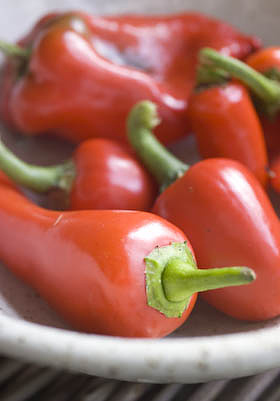
The other main ingredients came for free as well; sweet red peppers plus a purple one from my friend Shelley’s greenhouse, cayenne chilli peppers grown in the Taurus market garden. Cayenne peppers are only moderately hot, you could tell this as some little creature had been eating them in the greenhouse, chewing away at the stem end and leaving the pointy ends intact. I guess this to be a mouse called Miguel, wearing a sombrero and playing maracas. It goes to show that one end of the chilli is hotter than the other and that mice round here are made of stern stuff.
So, after extracting the black juice from the grapes this jam was starting to take a different course from the norm. I remember ‘experiencing’ a sculpture once at Tate Modern by Anish Kapoor. It wasn’t a particularly amazing looking piece, just a box painted black and slightly taller than a person. As you stepped up to a line drawn on the floor and looked within, it suddenly felt as if you were about to fall into a void or abyss and the feeling was so strong and unexpected that it made you recoil and say ‘whoah’ out loud. Anyway, that’s what this chilli jam is like, a sticky homage to that Anish Kapoor work, a jam so black when you peer into its dense glossy richness you have to hang on in case you fall through into an alternative jammy universe.
It’s not so hot it blows your socks off, but you can add more heat if you know that’s what you want. I’ve been eating it on bread with cream cheese and it’s really good. I knew immediately that it would be ideal for adding to meat stock to make a fruity gravy with a chilli kick. This is a strange instinctive feeling to have as a non meat eater of many years standing, so I have given jars away to a couple of carnivore friends to try. I’ve already had a request for 6 more jars

BLACK GRAPE CHILLI JAM
Makes approx 6 250g (1/4 pint) jars
2Kg (4.4 lbs) black grapes, whole with stems removed
350ml (1 1/2 cups) white wine vinegar
juice of 1 lemon (50ml / 1/4 cup)
1 clove of garlic, peeled and roughly chopped
300g (0.6 lbs) (approx 5) sweet red peppers, de-seeded and roughly chopped
100g (0.2 lbs) (approx 5) cayenne chilli peppers, de-seeded and roughly chopped
1 tsp salt
1Kg ( 2.2 lbs) sugar
1/4-1/2 tsp of dried chilli flakes
Place the grapes in a pan and heat gently till the juice begins to flow. Once there is plenty of juice surrounding the fruit simmer for 20 minutes, stirring from time to time to make sure it doesn’t catch on the bottom of the pan and squashing the fruit with the back of the spoon. Pour the grapes into a jelly bag suspended over a bowl and collect the juice that drips through, leaving it to drip overnight. The next day measure the juice collected. (You can also put the pulp that remains in the jelly bag through a food mill and use the de-seeded grape flesh you collect to add to another preserve.) I collected 700ml (3 cups) of juice but if your amount is different to this adjust the other ingredients accordingly.

Prepare the water bath, jars and seals ready for canning. For more info about how to hot water process, refer to the guide here. Put the peppers, chillis and garlic clove in a food processor with half of the vinegar and blitz it thoroughly to a smooth sauce consistency. Pour into a preserving pan along with the grape juice, lemon juice, salt, remaining vinegar and chilli flakes. (Another way to adjust the heat would be to include some of the fresh seeds from the chilli peppers instead of using dried flakes.) Bring to a simmer and cook through for 10 minutes then remove from the heat to cool slightly.
Add the sugar and stir over a gentle heat until the sugar is completely dissolved, then up the heat and bring to a rolling boil until it reaches setting point and a small dollop on a cold plate quickly forms a skin when you push your finger over the surface (it took me about 20 minutes). Turn off the heat and leave for 10 minutes, then stir to distribute the chilli peppers evenly through the jam. Pour into hot sterilised jars, seal and process for 10 minutes. Remove from the water bath and leave till completely cold before testing the seals and labelling.
As this is a jam with good acidity and sugar levels, it should keep well without processing so long as you follow the usual guidelines regarding care taken sterilising jars. If you do can it you are making doubly certain that your jam will be preserved safely for a year or even longer.


