LOVING A DUTCH BABY
Tuesday May 12th 2015, 12:16 pm

Keeping chickens does make me appreciate any recipe that includes eggs, and the more the merrier. I especially collect recipes that will help me conquer the mountain of eggs that regularly accumulates in my house and as first impressions are so important, find myself going straight to the egg count when reading a new recipe.
Too many eggs is always a good excuse to make a dutch baby pancake, not that excuses are needed. As well as an over-abundance of eggs, there might be no bread in the house for toast and there are always jars of preserves and compotes need emptying. A dutch baby is perfect for a late breakfast / brunch type of thing at the weekend or great at any time when a pudding is called for. If you have never experienced a dutch baby, it is basically somewhere between a big fluffed up Yorkshire pudding and a gooey egg custard, crisp along the edges but soft and luscious in the centre. I like to make mine in a cast iron skillet that goes straight from oven to table, but you can make individual ones in a Yorkshire pudding tin if you like, just adjust the cooking time and keep an eye on them.
The pancake puffs up and every time you make one you get a slightly different wild and wonderful result The down side is it will then quickly deflate, still looking pretty good but not such a show stopper. This provides an ‘ooooo’ factor to the proceedings and does require everyone to be ready at the table, to really appreciate the full experience.
I most often add my homemade vanilla essence and pop open a jar of compote to go with; nectarine and blueberry compote being my absolute favourite, then really push the boat out by serving with cream, the thicker the better! Alternatively you could add some lemon juice and zest to the batter. Maple syrup, caramelised apples …. well I wont go on, but you can serve the pancake with all manner of accompaniments, all equally delicious.
DUTCH BABY SKILLET PANCAKE
Serves 4-6
100g plain flour
3 large eggs
200ml milk
1tsp vanilla essence
50g sugar
pinch salt
50g unsalted butter
Preheat oven to 230C 450F Mk8 and place a 30cm (12in) skillet on a central shelf with plenty of room above for the pancake to puff up.
Place all of the ingredients except the butter in a blender and blend until everything is combined to make a batter. You can prepare the batter in advance if you want and keep overnight in the fridge.
Remove the skillet from the oven and quickly add the butter, which will melt and bubble immediately. To keep it good and hot, I usually place the skillet on a hot hob whilst doing this. Pour in the batter and immediately place back in the oven. Bake for 20 minutes, until the pancake has puffed up nicely and the edges are looking golden brown. Serve immediately.

FORAGING FOR BLACKBERRIES
Tuesday October 02nd 2012, 12:39 pm

For the last few years, the apple harvest in my area has been abundant and neighbours growing orchard fruits have been hard pressed to give away their surplus crops. Boxes and bags filled with bramleys and Blenheim orange apples, stacked up by garden gates with hand-written ‘apples for free’ signs are not an uncommon sight September- October time, and as an obsessive preserver I’ve been ready and waiting to take full advantage. But after this year’s early burst of spring followed by what seemed like months of summer rain, the 2012 harvest is set to be on a much more modest scale.
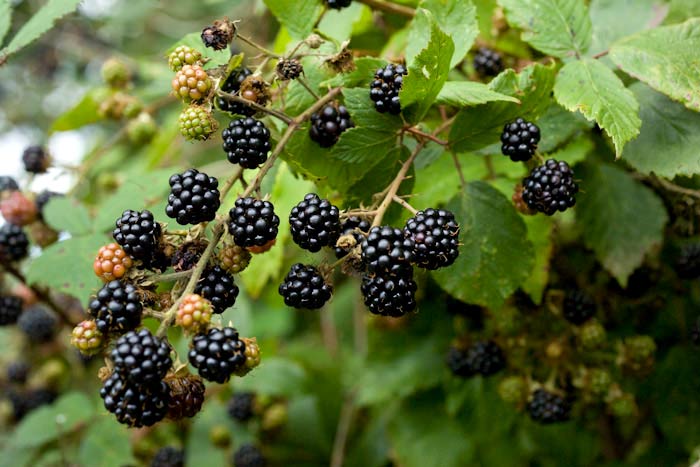
Apple and pear trees usually heaving are either bare or noticeably sparse. One neighbour, with her own orchard, told me, the bees just weren’t around at the right moment to pollinate the blossom. Thankfully there is always some crop or other that has benefited from another’s struggles and this year the blackberries in the hedgerows seem plumper and more plentiful than I’ve ever seen them before. The early foraged blackberries, usually containing more pectin, make the best jam with good setting power, whilst the later ones are more useful for cordials and chutneys. By mixing them with some of the few apples around, I’ve managed to eek out the best of both worlds. The two wild apple trees near to home still carry a few fruits that need using up.

Blackberry and apple jam is a classic that works equally brilliantly for breakfast, spooned onto scones or, as the purists serving suggestion, on bread and butter. I prefer to leave the blackberries whole and love their texture, but you can put the fruit through a food mill or sieve to make a smoother seedless jam more to your liking. I acquired a rose attar scented pelargonium earlier in the year to pair with blackcurrants, so here’s another opportunity to break off a few leaves and add them to the pot. It just adds the extra element required to make this simplest of jams into something exceptional.
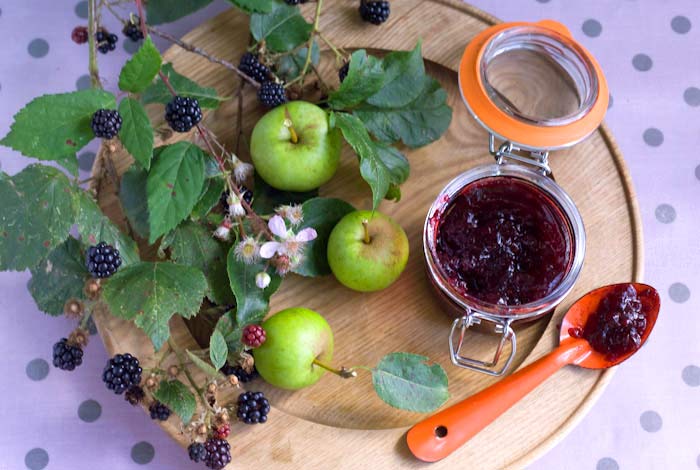
BLACKBERRY, APPLE, ROSE GERANIUM JAM
Makes approx. 1.2Kg (2 1/2 lbs) of jam
500g (1 lb) tart apples, bramleys or wild apples will do fine, peeled cored and roughly chopped
300ml (10 fl oz) water or apple juice
500g (1 lb) blackberries
juice of 1 lemon
750g (1 3/4 lbs)sugar
4 – 6 rose rose attar geranium leaves (optional)
Cook the apples with the water or apple juice until the fruit begins to break up and becomes soft. Add the blackberries and lemon juice and simmer for a further 10-15 minutes. If you prefer a seedless jam, allow the fruit to cool then run it through a food mill or push through a sieve and continue with pureed fruit.
Add the geranium leaves tied together in a bundle and the sugar to the fruit and stir over a gentle heat until the sugar has dissolved, bring to a simmer then remove from the heat and leave for the flavours to macerate for several hours or overnight.
If you plan to can (water process) your jam, prepare the water bath and jars and place jar seals in a pan of hot water on the hob. Using a preserving pan, bring everything to a rolling boil and maintain the heat until it reaches setting point and a blob of syrup readily forms a skin as it cools on a cold plate. It only took me 5 minutes to reach a set with my jam. Fish out the geranium leaves and discard them. Pour the jam into hot sterilised jars and seal. If you are canning your jam, process for 5 minutes then remove from the canner.
A FRUIT CHEESE ON THE WILD SIDE
Thursday October 14th 2010, 11:59 pm

On many afternoons recently, I’ve taken an hour or so out, to go for a walk foraging for ingredients. Some days this gives me a headache, as foraging can be a very intense activity and the level of ‘looking’ becomes a bit over the top. It is a brilliant way of discovering things though, when you look that hard you see things you would otherwise miss and find things you didn’t know where there. Foraging is not without its dangers however. I am forever getting my hair tangled in trees, ripping my legs through brambles and wacking my head on low branches when intently focused on something just out of arms reach. It is just too tantalising to go away from the path when you think there might be something to be found ‘off piste’. The other day I came across some windfall wild crab apples that required that I crouch down and crawl on all fours under low lying branches to gather them up to take home. Going forward wasn’t such a problem but backing out with my basket full and a camera round my neck wasn’t quite so easy.
A couple of weeks earlier I’d been to harvest wild damsons, from a place in the forest I’d found the year before so I already had plenty of damsons at home waiting for the jam kettle. One by one, as you clock another crop, you are able to add them to your own personal ordinance survey map of fruits and berries.
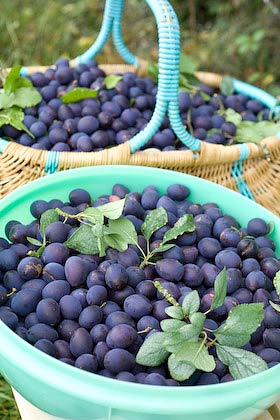
I love damsons anyway and the idea of mixing them with the crab apples, both wild fruits together, harvested on my doorstep, seemed a perfect pairing. Damsons can be quite a pain to stone and wild damsons being smaller means there’s even more stones to contend with. Making a fruit cheese is the perfect solution, as both fruits can be cooked with very little in the way of preparation and then be forced through a food mill to leave just the fruit puree and dispense with peel and pips, cores and stones. Though it does require considerable patience I like using a food mill, but last year I found a vintage attachment for my Kenwood Chef on eBay that does the same thing, so now I’m all automated.
Membrillo, made from quince, is probably the most popular fruit cheese, served with the cheese board at the end of a meal, but damsons and crab apples have a particularly appealing Englishness about them. Fruit cheeses are cooked down until they are really thick and will set solid as they cool. This means they can be turned out and served in slices as opposed to dolloped from a spoon. They need to be contained in jars or pots with slightly sloping sides that are wider at the top so they turn out easily. There are small glass jam jars around made for this purpose but I’m really lucky that Martin, in the pottery at Taurus Crafts made me some special hand-thrown stoneware jam pots, inspired by some vintage French ones I own. It is advised that in order to make it easy to turn out the cheese, you lightly oil the ‘moulds’ using ground nut oil or some glycerine if you just happen to have some handy.

CRAB APPLE AND WILD DAMSON CHEESE
Rinse and drain the crab apples. Chop them roughly and place in a pan. Add enough water to just cover the fruit, bring to the boil and simmer gently for 20-30 minutes, till cooked through. Remove from the heat, leave to cool then push through a fine seive or food mill over a bowl to remove the skins, cores and pips and leave a smooth puree.
Rinse and drain the damsons, place in a pan and add just enough water to barely cover the fruit. Bring to the boil and simmer for 30 minutes, till cooked through and the fruit has burst. Remove from the heat, leave to cool, then push through a sieve or process with a food mill to remove the skins and stones and leave a smooth damson puree.
I combined 800g (1.75lbs) damson puree with 400g (14oz) apple puree, so two thirds damsons to one third apple, but you can change the ratio to suit yourself and the quantities you have available. To every 600g (1.3lbs) fruit add 450g (1lb) sugar. Place the fruit and sugar in a pan and stir over a low heat until the sugar is completely dissolved. Turn up the heat and bring to the boil then simmer, stirring from time to time to be sure it doesn’t catch and burn on the bottom of the pan. Continue to cook until the mixture thickens considerably and when you pull the spoon across the centre it draws a line. This may take and hour or even longer to achieve and it is best to be patient and keep the heat really low under the pan. Pour the mixture into hot sterilised jars that are lightly oiled, cover with greaseproof waxed circles and seal. Leave till set and cold.

WHERE THE WILD GARLIC LIVES
Tuesday May 11th 2010, 8:32 pm
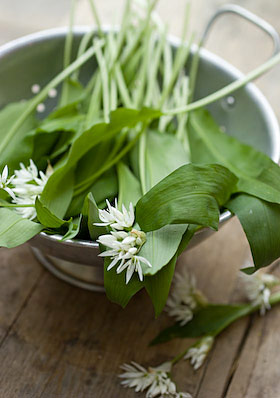
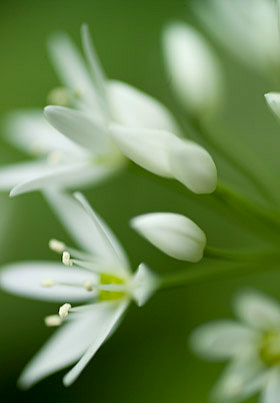
Right now, wild garlic seems to be the best thing since sliced bread. It is extraordinary that it has become such a fashionable ingredient and that people consider it somehow wacky and daring to make use if it. This poses the question, why has such a wonderful herb been overlooked for so long. Belonging to the allium family, once established in a habitat that meets its requirements, it grows prolifically forming a lush carpet of smooth pointed leaves, later topped with delicate white flowers for about 6-8 weeks in the spring. Right now, round here, it is looking just perfect and there’s loads of the stuff. It is growing in abundance all around the little chapel just a hop skip and jump from my house so I am doing my best to make the most of it.

In fact wild garlic is a really useful plant and all of its parts are edible. Someone told me today of a local ‘professional’ forager who when the flowers go over and set their seed goes round with a little portable vacuum cleaner and hoovers them up. He sells them to top restaurants for grinding as a seasoning. The flowers can be added to salads, the bulbs can be pickled and the leaves can be used to bring their delicious flavour to stir fries and of course pesto. Anyone who hasn’t tried wild garlic is missing a trick. Here is a recipe for wild garlic pesto, which might get you started on your own daring food journey. Watch out Ray Mears!
WILD GARLIC PESTO
Makes about 350g
100g wild garlic leaves
60g parmesan cheese or a similar hard cheese (I like this vegetarian one )
60g pinenuts
120ml cold pressed rapeseed oil or virgin olive oil (I’ve been using this one )
salt and pepper
Wash and dry the garlic leaves using a salad spinner or patt them dry with kitchen towel. Grate the cheese finely in a food processor then tip out into a bowl. Lightly roast the pine nuts to heighten their flavour taking great care not to overdo it or they’ll burn. Wizz the nuts in the food processor to grind them then add the cheese and half the leaves roughly torn. Blend till the leaves are finely chopped then add the rest of the leaves and blitz again. With the processor running, drizzle the oil into the pesto until it is all added and combined. Season with salt and pepper and pour into a sterilised jar for keeping in the fridge. By pouring some extra oil over the surface it should keep for a few weeks. A couple of spoonfuls stirred into linguine is just perfect and topped with a handful of chargrilled asparagus and a few Parmesan shavings makes it heaven on a plate.
You can freeze pesto, so that is the best way to extend the season for this delicious sauce. I have seen it written to leave out the cheese before freezing, but as Parmesan freezes well, I don’t think that is necessary. I have taken to freezing single portions of pesto in individual plastic containers and right now my freezer is looking well stocked.

YESTERDAYS HAUL
Wednesday August 19th 2009, 9:36 am
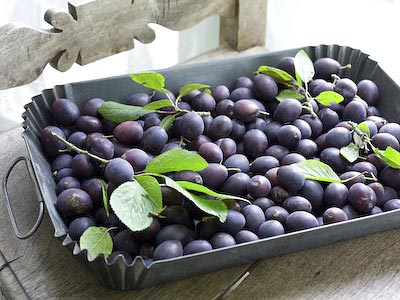
I thought I would post some pictures of the wild damsons I found growing by the roadside in the heart of the forest. I really must remember to keep a set of step ladders in the car for such eventualities, as there is always fruit just out of arms reach that you have to come to terms with giving up on.
When I got home a neighbour had left a bag of plums hanging on the door handle of the front door. I’m not sure who, but I suspect it was Helen and Steve (at the end) who two days ago passed by as I wobbled about on the top of a stone wall, picking more damsons from a tree overhanging the road. Those damsons were growing in someones garden and are larger than the wild ones I found yesterday. I hasten to add I had permission to wobble about on their wall. Helen and Steve asked me if I was scrumping (is it called scrumping for plums, or does that term only apply to apple picking?). I think I may be gaining a reputation.
I am thrilled with my damson crop as they are just about my favourite fruit for preserving and don’t need to be used in any oity-toity combination with anything. They are just perfect on their own.

IT’S SHOW TIME
Sunday August 16th 2009, 4:00 pm

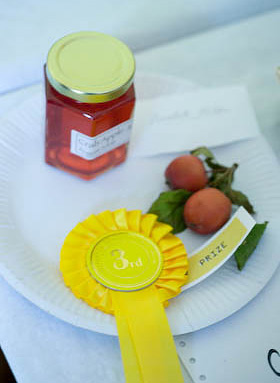
The village fruit and veg show is only 2 weeks away, so I need to get my skates on. Last year I managed a 3rd prize for my crab apple jelly and a second prize for my damson chutney and I would love to do better this time round. As my book came out earlier this year, I now feel I have my reputation as well as fruit to preserve.
The blackberries round here are particularly plump and abundant this year. Last year I did manage to gather some but each berry was small with not a lot of juice. This year it is a very different matter. Yesterday evening I went out to pick some, along with my cat Beau. He wasn’t any help but did bring a certain cute factor to the proceedings. I managed to harvest a large plastic box full in a very short time and as it is still early in the season, I know there will be lots more fruit to come over the next few weeks.
The plan, to make blackberry and nectarine jam, as I picked up some nectarines in the supermarket this week, reduced with yellow labels! (I have become the yellow label queen). I made this preserve for the book and it was a great success. In the recipe it does have added spices in the form of star anise, cloves and cinnamon, but I’m going to forgo the spiced approach and hope the fruit flavours are tasty enough to stand alone. I do love using nectarines in jams as they have a lovely acidic flavour.
There are elderberries almost ready to pick here, so blackberry and elderberry jam is the next jam I’m planning. I love the idea of using two foraged-for-free fruits together.
Plum and elderberry, again there are lots of plums up for grabs on the trees a mere hop skip and a jump from my front door so it seems a shame not to use them up pronto.
Rhubarb and apricot jam, another real star from the book and fast becoming my signature jam, if you can have such a thing. My neighbours rhubarb keeps on coming and I’ve bought some French apricots, as I don’t grow them myself or know anyone with some to spare. So that’s it for starters. Next week is going to be a busy week.
CRAB APPLE JELLY AT LAST YEARS VILLAGE SHOW


