AN OBSESSION WITH ANGELICA
Thursday April 22nd 2010, 6:12 pm
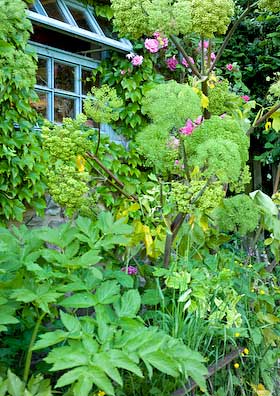
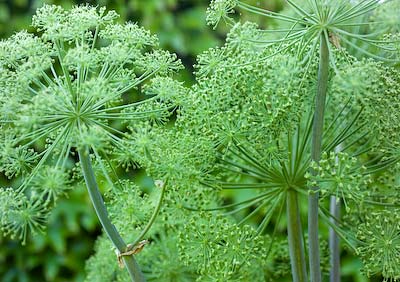
I first came across angelica, the herb, when I looked round my neighbours garden a few years ago. Jane and Les Hales’s garden is very special, so special in fact that it is open to the public a couple of days a year as part of the National Garden Scheme. Jane has planted angelica in several parts of the garden and uses this tall stately plant to form screens against the house. I was instantly impressed by the plants towering stature and amazing flowerheads that look so graphic and beautiful against blue sky.
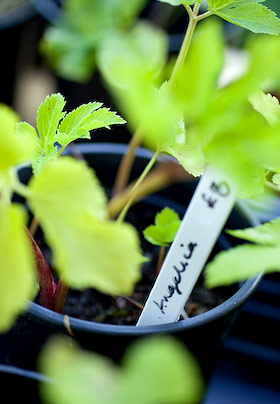
Jane usually has a few seedlings for sale at her open days. Apparently once you manage to get angelica to grow, this biennial seeds itself freely, so restocking the plant is not an issue. I have tried growing it since then. The first two years, our wet summers encouraged the slugs to decimate my young plants, so even my best efforts came to nothing. This year is looking slightly brighter, and I already have a plant doing well on my allotment and a few more small seedlings that I am cherishing a little longer before planting them out to fend for themselves.
I had a vague recollection of candied angelica from my childhood, a strikingly vibrant green confectionery used to decorate trifles, a small strip pushed into the cream top layer either side of a bright red glace cherry, and can just about recall it having a rather exquisite and unusual flavour, but that was as far as my knowledge went. I certainly had no inkling that it came from a herbal or vegetable source. This of course set me off on a quest to find out more about the culinary merit of this impressive herb and I vowed to have a go at candying my own angelica to try and rediscover the distinctive flavour remembered as a kid.
All parts of the plant are aromatic and edible. The stems are the bits you candy to make confectionery, the leaves are used for flavouring many liqueurs such as chartreuse as well as in the preparation of bitters, and with juniper berries to flavour gin, the root is blended with wormwood and other herbs to make absinthe and the seeds impart a muscat-like flavour to wine and are used in the preparation of vermouth. All impressive stuff.
Stems for candying or crystallizing need to be young. It is no good waiting too long to harvest them as by June – July time they will be far too stringy and tough to work with. You will know by now that being prepared well enough ahead is not my strongest point, but this year, for once, no doubt prompted by Tigress’s can jam canning challenge I am taking part in, which has chosen herbs for our April ingredient, I have gotten round to acquiring a handful of stems and a nice bunch of leaves from Jane which she very kindly cut for me. The plan, to use angelica as my canjam ingredient (post to follow this one), but also to candy some stems at the same time.
What is interesting is the point at which the angelica turns from a herby savoury scent and flavour to a sweet unctious syrupy one. The stems need first to be boiled and scraped, which is a bit fiddly, before layering them with sugar to begin the transformation. As I had very few stems to play with, I used some of the thicker leaf stalks as well. Apart from the peeling process, it was merely a matter of 5 or 10 minutes of activity followed by a day or so of leaving well alone, so it is hardly taxing. As soon as a syrup started to form, the angelica took on the magical taste I remembered and I felt as though I had captured the essence of this wonderous herb. It is worth having a go, even if you only candy angelica once in your life. The basic recipe I followed comes from Bee Nilson’s Herb Cookery, published in 1974. She is one of my favourite cookery writers for allsorts of reasons. Scale the recipe down if you don’t have enough stems.
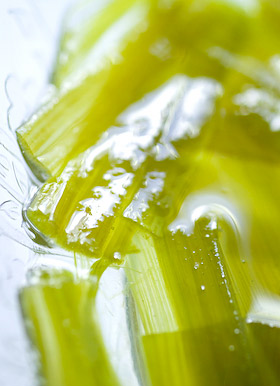
HOW TO CRYSTALLIZE ANGELICA
1/2kg (1lb) angelica stems
Wash the stems and cut into 8-15cm (3-6in) lengths. Boil them in enough water to cover until the stems are tender. For young stems this should only take about 10 minutes. Drain well, rinse with cold water and drain again. Scrape the outer skin from each piece. I found it easiest to slit down the side of each hollow tub and lay them flat on the surface. The skin comes off really easily but you need a lightness of touch so what remains isn’t damaged. Place them in a shallow dish.
1/2kg (1lb) caster sugar
Sprinkle the sugar evenly over the stems. Cover the dish and leave it for 2 days by which time the sugar will have dissolved and become syrupy.
250ml (1/2pt) water
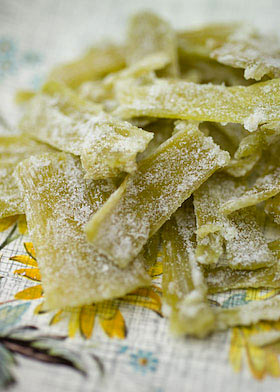
Put the angelica, sugar syrup and water in a pan and heat whilst stirring until the syrup boils. Simmer gently until nearly all the syrup is absorbed and the angelica is clear. Add more water if the syrup has all gone but the stems aren’t looking transparent. Drain the angelica and leave till cool enough to handle, then roll them in more caster sugar to coat them generously. Spread the pieces on a wire cooling rack and finish drying them in a warm place or a very cool oven. When cold wrap the angelica in waxed paper to store.
This year, Ramblers, Jane and Les Hale’s garden at Aylburton Common in the Forest of Dean, is open as part of the National Garden Scheme on two Sundays; 2nd May and 13th June 2-6 pm, and also by special appointment during May and June only. You can find more information on the National Garden Scheme website here.

ONIONS WITHOUT TEARS
Thursday March 18th 2010, 12:11 am
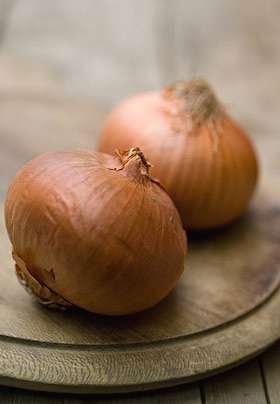
Month three Tigress’s can jam canning challenge and the chosen ingredient covers a multitude of choices, as anything classed as an allium fits the bill. I intended to post about pickled wild garlic but with the deadline looming and this post ready to roll, I’m running with pickled onions instead. The wild garlic, almost completed, will follow after.
I’m really more of a jam and chutney person but the Tigresscanjam challenge is giving me reasons to explore things I want to know more about. Pickles aren’t something I’ve developed much of a taste for and I hadn’t thought that they figured much in my upbringing. Then I remembered an onion and vinegar condiment, served at my grandparents house when I was little, as an accompaniment to Lancashire hotpot. It was made very simply of chopped raw onions marinated in malt vinegar, simple as. Never a great meat eater, I recall especially looking forward to this onion relish, eaten with the delicious sliced potatoes that were part of the hotpot.
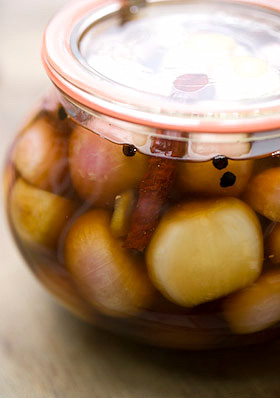
My cousin Jackie, an ex-Blackpool landlady who can rustle up a mean Lancashire hotpot, told me that this onion relish is the traditional companion to this regional speciality along with pickled red cabbage. Though I have no recollection of ever being served pickled cabbage as a kid, knowing this makes me pleased that pickling is part of my own heritage too, something I’d managed to forget about until the canjam challenge got me thinking. Then last week I found this onion-shaped Weck preserving jar in a charity shop, so filling it with pickled onions seemed perfectly appropriate.
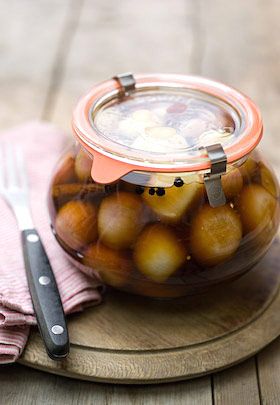
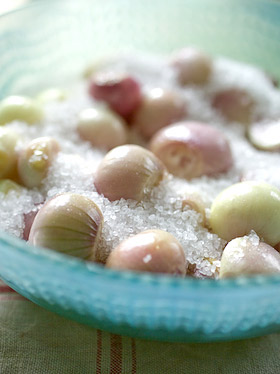
Pickling has to be one of the easiest things ever. I’ve chosen to make a sweet pickling vinegar using traditional malt vinegar with added brown sugar, honey plus a few spices. Pickling vinegars are really delicious and give plenty of scope for experimentation. Any leftover vinegar can be turned into salad dressings or be drizzled on your chips. The shallots need to be salted at the beginning to draw out excess liquid, which will help the onions to retain their crunch. I have hot water processed my jar of pickles to meet the criteria of the challenge, give myself more practice at canning and to use the jar in the way it was intended, but pickled onions are a pretty safe bet without that palaver. The processing makes them extra safe.
SWEET PICKLED ONIONS
Fills a litre (quart) sized jar
750g (1 1/2lbs) shallots
50g (2oz) salt
.5ltr (1pint) malt vinegar
100g (4oz) soft brown sugar
100g (4oz) honey
1 tsp peppercorns
1 dried red chilli
1/2 tsp mustard seeds
5cm (2in) piece of cinnamon stick
2cm (1in) cube of fresh ginger sliced
Pour boiling water over the shallots, leave them for a few minutes, then drain and rinse with cold water. Remove the skins and place in a glass bowl, sprinkling the salt in layers over them. Leave overnight, then rinse and drain them before packing into the hot sterilised jar.
Place the vinegar and the remaining ingredients in a pan, stir over a medium heat to dissolve the sugar and honey, then bring to the boil. Pour over the onions to cover, pushing the chilli and cinnamon stick between the shallots on the outside of the jar, leaving 1 – 2cm (1/2 – 3/4in) headspace. Seal with the lid and process for 15 minutes in a hot water bath. For more info about how to hot water process, refer to the guide here. You could use 2 500ml (1 pint) sized jars instead, in which case you only need to process them for 10 minutes. Once cooled store the pickled onions for 4-8 weeks before eating.
WHAT DOES A SHAPE TASTE LIKE ?
Tuesday March 09th 2010, 11:43 am
Yesterday was my day off, which just means that I have a list of jobs need doing that call for being away from the shop. With a list as long as my arm it is business almost as usual, but somehow calling it ‘my day off’ creates a whole different vibe, so long as I tackle the list, I can do what I like and pretend I’m on holiday. Even better, the sun was shining, as if spring was really here.
With no bread in for making toast I decided to rustle up some muffins or perhaps blueberry griddle scones to have with my a.m cappuccino. I opened the cupboard where the tins live and didn’t relish pulling everything out to locate the muffin tin at the back and then the friand tin fell out all of its own accord. So friands it was to be.
I have written about friands before here, and I know from the daily stats how many readers find my blog by googling friand related keywords. And no, I don’t know where you can buy a friand tin in the UK! Someone was selling them for a while, but sadly no longer and I regularly trawl the web trying to find them to sell at The Laundry as I’m sure that I could sell perhaps one a month (shopkeepers irony).
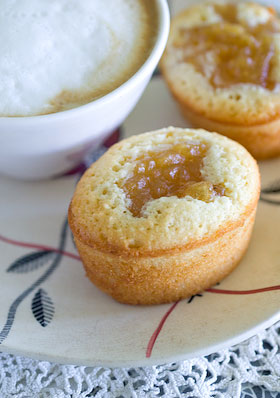
Friands are supposed to be oval shaped. Why the shape of a cake should be so important, I don’t know and I am sure that they will taste just as good baked in regular round shaped muffin moulds. Feel free to make them any shape you like. So for my day off I looked at the ingredients to hand; some whole blanched almonds left over from Christmas baking (which I ground to a rough meal in my old Magimix for this recipe), 1 bramley apple and a little bag of fresh bantam eggs, my neighbour leaves me each week, and decided to rustle up some tart bramley friands. The ground almonds make a lovely moist precious cake and this recipe is tangy, fruity but not overly sweet. Don’t forget, a friand is not just for breakfast, it isn’t really for breakfast at all, but hey, it’s my day off.
TART BRAMLEY FRIANDS
Makes about 10
1 medium sized Bramley apple or other tart variety
1 1/2 Tbsp soft brown sugar
1 1/2 Tbsp maple syrup
2 tsp vanilla extract
5 egg whites
125g ( 4oz) butter, melted
100g (1 cup) ground almonds
100g (3/4 cup) icing sugar or caster will do
60g 1/2 cup plain flour
Preheat the oven to Mk5, 190C, 375F and prepare a muffin tin by buttering the moulds.
Peel and core the apple and chop into small evenly sized pieces, then place in a small pan, sprinkling 2-3 teaspoons of water over it. Bring to a simmer and cook until it is soft and mushy, which only takes 3-5 minutes. Add the brown sugar, maple syrup and 1 tsp vanilla extact, stir and cook for another minute or 2. Add more sugar if you want it sweeter but a tart hit is what you are aiming for. Leave to cool.
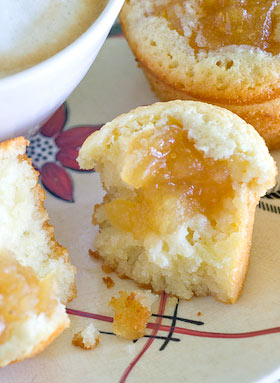
In a large bowl, whisk the egg whites till just frothy. Add all the remaining ingredients and combine quickly to make a batter. Pour the mixture into the moulds, half filling them. Drop a heaped teaspoonful of the stewed apple into the centre of each friand. Bake for 20-25 minutes till risen and set and just starting to turn golden. Remove from the oven and leave to cool for 5 minutes before turning them out onto a rack to cool.
AND YOUR POINT IS….?
Friday February 19th 2010, 4:22 pm
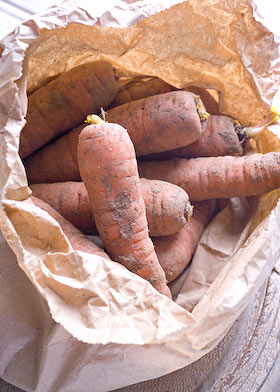
Month two, Tigress’s can jam canning challenge, and the ingredient to grapple with is ‘carrots’. They aren’t in season in the UK, not as a freshly pulled from the ground seasonal veg at any rate, otherwise I would have found some of those trendy purple ones to work with, or a nice bunch with their greenery attached that would have made a lovely picture tied in a bundle with garden twine. So a brown paper bagful of locally-grown and stored organic specimens is my starting point.
There is one good thing about it, I’ve learnt a lot since ‘carrots’ was announced. I wanted to find a recipe suitable for canning that needs carrots instead of just includes them, so I trawled through my extensive collection of books on preserving. I felt sure I would unearth a war time gem, thinking carrots would have been used more as a sweetener in times when sugar was scarce, but nothing turned up. I didn’t want to simply bottle carrots for the sake of it, couldn’t find a suitable pickle recipe, was about to adapt a Madhur Jaffrey recipe for quince and lemon chutney (by adding carrots) then forgot and cooked my last quinces. I was tempted by my trusted and much loved ‘Let’s Preserve It’ by Beryl Wood, a little jewel of a paperback from 1970 which contains 579! recipes, including a carrot chutney, a jam, 2 marmalades as well as a recipe for spiced carrots. but eventually settled on combining carrots with rhubarb in a jam.

British forced rhubarb is just starting to appear for sale. The season for forced rhubarb, grown in the ‘Yorkshire triangle’ begins January through to April, when field grown takes over. My head has been full of rhubarb all month as I am sorting out which varieties to plant on my allotment. Rhubarb alone is fantastic, so I just hoped that the inclusion of carrots in the recipe would be a wonderful addition rather than just meeting the canjam deadline. I’ve also added some chopped stem ginger and candied peel as I have some candied melon slices left over from baking at Christmas, so it has been a good opportunity to use some up. I recommend you use good quality candied peel for this, usually sold in chunky pieces from a deli or health food shop, rather than that ready chopped stuff in tubs surrounded by gloopy syrup you find in supermarkets.
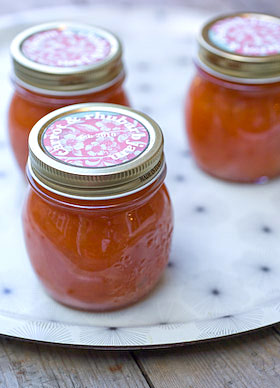
I did have to watch that the jam didn’t burn whilst I was boiling it to a set. As it cooked it turned to a beautiful deep orangy-red gelatinous consistency but it spat as it boiled. As both carrots and rhubarb are lacking in pectin, it is probably advisable to use jam sugar with pectin added or add extra pectin if you want a good set. I used half ordinary white sugar and half jam sugar, because I had some needed using up. What I have ended up with is quite a soft set but the taste is amazingly good. The recipe uses enough carrots to be ‘useful’ from the ‘using up a glut’ perspective and the jam isn’t overly sweet, so it makes perfect sense for canning. It would be ideal as a filling for jam tarts or Tigress’s thumbprint cookies or to fill a larger pastry case with the addition of an egg beaten into it then baked in the oven to set. A slice served with cream or mascarpone flavoured lightly with some ginger syrup from the stem ginger jar would work perfectly. All in all, it has been an unexpected success.
CARROT & RHUBARB JAM
Makes approx 1.5Kg (3lbs 5oz)
500g (1lb 2oz) carrots, peeled, topped and tailed
500g (1lb 2oz) rhubarb, washed and trimmed
1 unwaxed lemon
800g (1 3/4lbs) sugar (use jam sugar with added pectin for a stronger set)
60g (2oz) stem ginger (approx 4 balls)
150g (5oz) candied peel (any citrus or melon will do)
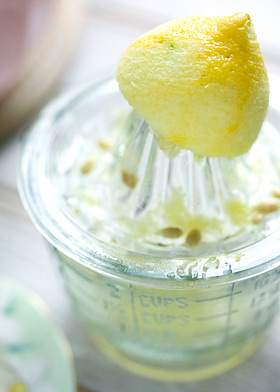
Finely grate the carrots and place in a pan with 500ml (3/4pt) of water. Finely grate the zest from the lemon, squeeze out the juice and place to one side. Chop the lemon halves, pith and all, into chunks and place them and any pips in a muslin bag tied closed with string or a knot and add them to the carrots. Bring to a simmer and cook with the lid on for 20 minutes, then remove from the heat.
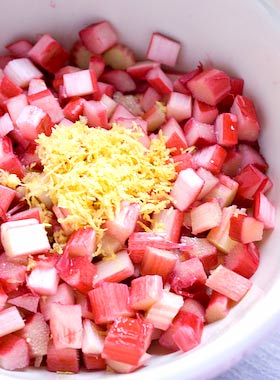
Chop the rhubarb into 1cm (1/2in) sized cube pieces. If the sticks are thick I slice them lengthways once or sometimes twice before chopping into equally sized small chunks. Place the rhubarb in a bowl, add the lemon zest and juice and pour the sugar over it. Cover and leave for an hour or two until the juice starts to run from the rhubarb.
Tip the contents of the rhubarb bowl into a preserving pan and add the cooked carrots, cooking liquid and muslin bundle. Add the finely chopped stem ginger and candied peel cut into thin slivers. Heat slowly, stirring all the time until the sugar is completely dissolved, then turn up the heat bring to a rolling boil and cook until setting point is reached (this took me around 25 minutes). (Test for a set on a cold plate or use a jam thermometer.) Discard the muslin bag.
Pour into hot sterilised jars, leaving 1 – 2cm (1/2 – 3/4in) headspace, screw on the lids to fingertip tight and process for 10 minutes in a hot water bath. For more info about how to hot water process your preserves, refer to the guide here. Leave your jars until cold and don’t forget to label and date them.
LOST IN TRANSLATION
Friday January 22nd 2010, 6:15 pm
When I was a kid, my friends aunt, who was some sort of food scientist, told me that if you looked at an apple with a bad patch on it, under a microscope, you would see that the badness goes far beyond the brown bit, like spreading mycelium or the roots of a plant. This information was told as a warning, to not think it enough to just cut away the bad part and eat the rest, as what lurks beneath unseen might kill you! As I say, I am recalling a childhood memory here to dramatic effect.
Needless to say, I have always remembered this advice yet always chosen to ignore it. I was brought up to be made of sterner stuff. I follow a scale of food offness of my own design and ‘it hasn’t done me any harm’. I know that there are others whose standards in this regard are much higher than mine and just in case you are by now doubting my credentials and casting aspersions on my forthcoming artisan preserve venture, I do have an official food hygiene certificate.
For 2010, I, along with around 130 others, am taking part in Tigress’ Can Jam Challenge, an idea devised by fellow US based blogger tigressinajam, (see also tigressinapickle). The idea, to choose a different seasonal ingredient each month that can be canned. You can read the challenge outline here. It is all about ‘canning’. In the UK we don’t ‘can’ anyway, we ‘bottle’ and even that is a niche activity. Bottling, in case you don’t know, is a way of preserving food in special glass jars by employing either a hot water bath on the cooker hob or an oven method so the foodstuff is rendered sterile and will thus store in your larder for ever more. Bottling was once popular in the UK, especially during the wartime ‘make do and mend’ era. It went right out of fashion with the advent of the freezer but now seems to be making a come back with the move back to home grown fruit and veg and other eco considerations. As I am keen to know all about it, even though I am generally of the ‘scrape any mould off the top then eat the jam beneath’ school of thought, I intend to embrace the challenge and run with it.
As regular readers will already know, I am a passionate jam, chutney and pickle maker, all activities which in the US seem to come under the canning umbrella but that here somehow don’t. Basically putting your preserves through this canning process will make doubly certain that they will keep and not become contaminated. Canning requires the use of special Kilner jars (or Mason Ball jars in the US) which need new seals every time you use them. These traditional style jars, invented in 1842, have recently been reintroduced and I sell them in my shop. Unlike in the US, you can’t buy complete canning kits here with all the bits and bobs you need to get started, but you can buy some of the equipment, the rest you have to improvise. Anyhow, as the year unfolds I will be able to write about what I discover.
In order to meet the criteria of the challenge, it does mean that any preserves I make must be processed in a hot water bath, or at least I must say they are! Have you lot in the States not heard of the cellophane circle and elastic band method of sealing your jam?
January has a citrus theme. It must be wonderful to pick your ingredient straight from the tree, as some of the other challenge participants are able to do. I had to buy my fruit as none is grown here. Here is my first recipe for the 2010 Tigress’ Can Jam Challenge.
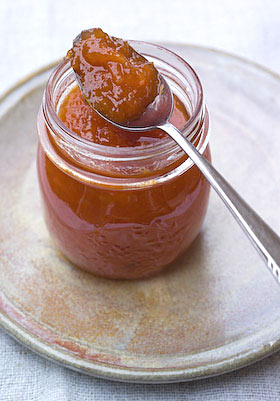
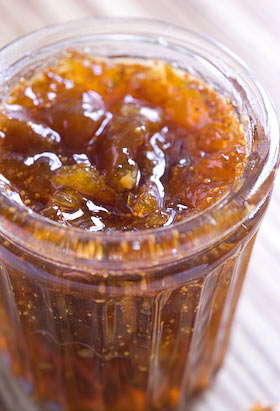
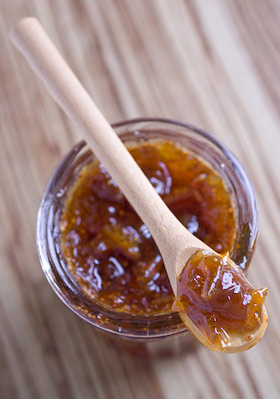
LEMON, FIG & LAVENDER MARMALADE
I am a massive fan of traditional bitter seville orange marmalade and this marmalade is just as tangy and fabulous. The lavender note adds an unusual flavour but isn’t at all over powering or over flowery. A few words first on ingredients; choose lemons that are organic where possible and unwaxed always, for this preserve. I had trouble finding dried figs without a load of gloop surrounding them, as they seem to be sold like this in supermarkets for ready-eating. Eventually I found some really nice dried Lerida figs in the health food shop. Dried lavender can vary a lot. I sell Snowshill lavender, grown in Worcestershire, sold by the scoopful in my shop and it is highly scented and natural. If you can’t find one with a good fresh scent, then please just leave it out; if you use it, it wont bring anything useful to the party.
Makes 1.3kg (3lb)
5 unwaxed lemons, approx 600g (1lb 5oz) plus 1 other lemon
400g (14oz) dried figs
25g (1oz) dried lavender
1kg (2lbs 4oz) sugar
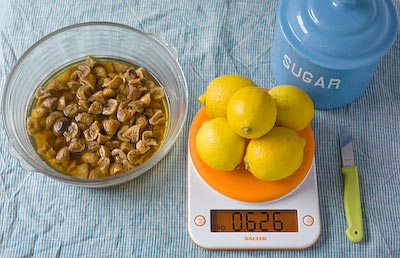
Heat the oven to 180C/ 350F/ Mk 4. Wash the 5 lemons and place in a lidded heat-proof casserole with 650ml (1 1/8pts) water, so the fruits just begin to float. Bring to a simmer, put the lid on and place in the oven to slow cook for 2 1/2 to 3 hours.
Remove the stalks from the figs and chop them into 1cm (3/8in) sized pieces (or smaller or bigger as you like, remembering they swell up as they reconstitute). Place in a preserving pan with 650ml (1 1/8pts) of water and leave them to soak while the lemons are poaching.
Remove the casserole from the oven and lift the lemons carefully with a slotted spoon out of the liquid into a sieve placed over a bowl to catch any drips. Leave them till cool enough to handle then cut each lemon in half and scoop out all the innards, collecting all the pulp and pips in a piece of muslin. Tie the muslin into a bundle and add to the preserving pan along with the poaching liquid and any liquid collected in the bowl. Chop the lemon skins finely into strips and keep on one side. Tie the dried lavender in another piece of muslin to make a bundle and add that also to the pan. Bring to the boil and simmer for 20 minutes.

Take off the heat. Remove the pulp and pip bundle and add the chopped lemon peel as well as the juice from the remaining lemon, passing it through a sieve to remove any pips if necessary. Add the warmed sugar and stir until completely dissolved then heat, bringing the pans contents to a rolling boil and test for a set after about 10 minutes and every 3-5minutes after that until setting point is reached. If you haven’t ever done this before this means that a blob of the syrup on a cold plate will readily form a skin that wrinkles when you push your finger across it. Take the pan off the heat whilst testing.
Turn off the heat, remove the lavender bundle and leave the jam to rest for 15 minutes then stir to distribute the pieces evenly before pouring into hot, clean, sterilised jars. Seal with either waxed paper discs and jam pot lids or the bottle seals and screw tops if intending to hot water process, in which case place the jars in the water bath and process for 10 minutes. For more info about how to hot water process your preserves, refer to the guide here. Leave your jars until cold and don’t forget to label and date them.
JUSTA WALKIN THE DOG
Saturday October 03rd 2009, 12:06 am

I’ve been up north for a while, celebrating my Mum’s birthday. We organised a surprise party for her and it seems it really was a total surprise. I especially enjoy walking my brother’s dogs when I’m up there, early mornings, along the banks of the River Ribble. His two Sharpei dogs bound along but do tend to scare the other dog walkers they come face to face with. They are really gentle creatures but look quite fearsome. I was suddenly aware of the changing season as the autumn tints on the trees were starting to become apparent. Yes Autumn is definitely here.
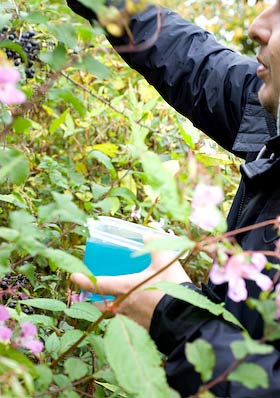
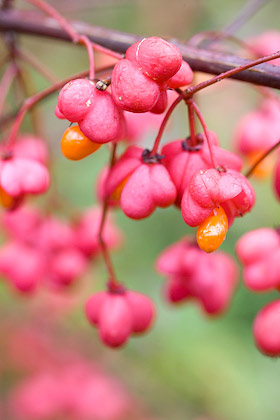
I noticed some sloes on our first walk, so on the second day we remembered to take a container so we could gather some. My brother, Chris, waded through the surrounding himalayan balsam to get up close to the bushes and triggered off a volley of exploding seed heads in the process. You could hear them popping all around us. Growing nearby, there were lots of spindle trees with shocking pink flower clusters showing bright flashes of their orange seeds beneath.
The sloes were almost over but there was still some plump fruits to be had. We ended up with a container full, just enough to start off a couple of bottles of sloe gin. Sloes are meant to be best picked after a first frost but I don’t really understand the timing for this to work right, as the sloes were nearly finished but it is still too early for a frost. You can put the sloes in the freezer to mimic these conditions if you like but I haven’t bothered. This seems like a mere detail.
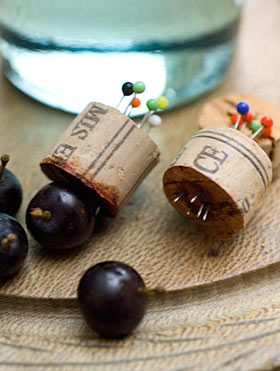
I always like the opportunity of using my special ‘sloe pricking doofer’. I have already used it this year as a ‘damson pricking doofer’ so it could be classed as a multi-tool. This handy little homemade gadget was copied from one lent to me years ago by a neighbour. It is simply made from an old wine cork, cut into three sections, with clusters of pins pushed through both end bits. It makes pricking the berries a speedier operation and for the rest of the year the spikey ends push into the middle section of cork, to store away safely till next time.
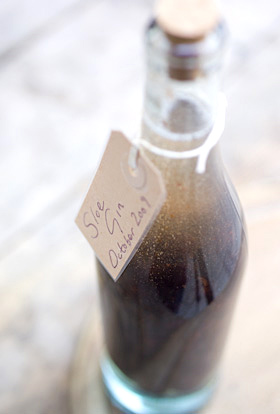
You don’t really need a recipe for sloe gin as such. I have spent endless time past looking up the ratio of sloes to gin to sugar, but all you need to know is to choose a bottle with a top wide enough to take the fruits. Prick them with a toothpick, bodkin or if you are lucky enough to own one, a special ‘doofer’, and half to two third fill the bottle with fruit. Add some sugar, just two or three tablespoons to a 500ml size bottle, you can always add more later if you want a sweeter liqueur. Then fill up the bottle with gin and seal with a cap or cork. Store the gin in a dark place for three months or more, giving the bottle a shake every now and again until the sugar is completely dissolved. It will be ready to drink by Christmas and makes a great present.
EVERYBODY MUST GET STONED
Friday September 11th 2009, 4:55 pm
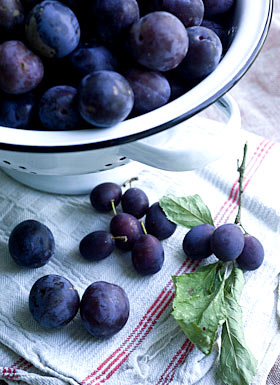
I’m down to my last colander full of damsons. They need using up in the next day or two, otherwise they’ll be over and done with and I hate to waste any of this glorious fruit. I’ve made half a dozen jars of damson chutney, which is already pretty fantastic (if I say so myself) even without its mellowing off period of at least 6 weeks and there’s now several containers full of fruit in the freezer, cooked and stoned to use later.
I always remove the stones from damsons even though it very quickly becomes an arduous job, but it is so worth it after the event. I’ve had several evening sessions of filching these tiny stones out of the cooked fruit by hand, with the pan on my lap whilst watching tv. Here’s a tip; before you plunge your scrupulously clean hands into the pan of squidgy fruity mush, be sure you have chosen your tv channel. The other night I had to decide whether to abandon the stoning in order to get cleaned up to switch channels, or to watch Rambo. I ended up watching an hour of Rambo.
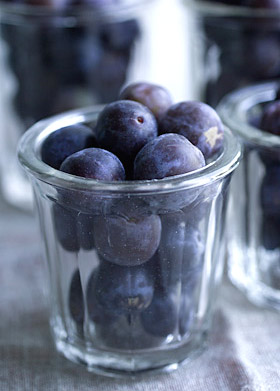
I need to start some damson gin, so some of the remaining damsons are designated for that. The other day I donated some 2 year old damson gin to my neighbour Steve, to include as part of a hamper he was making up for a friend’s wedding gift. I love to make these things, then don’t get round to drinking them. The deal was that he’d replace the gin so I could start off another batch.
I never bother straining the matured gin off the fruit so wasn’t sure whether this would have had a detrimental effect on the taste. We decided we had better sample it first to be on the safe side, so the two of us stood in his kitchen, sipping and savouring, to see if it would pass muster and discussing the finer points of the flavour. It was like a heavenly nectar with just the slightest hint of almond, which was very lovely indeed. As is the way with fruit containing stones, such as apricots, peaches, cherries and plums, the kernels do have this almondy vibe, and damson stones left to steep in gin for any length of time will likewise imbue this flavour.
In Jane Grigson’s Fruit Book she includes a recipe for Plum Stone Noyeau, a flavouring to use for puddings and cakes made before the advent of almond essence. Basically you steep cracked plum kernels in eau de vie or vodka for several months. I intend to give this a go using my discarded damson stones, though bruising and cracking them with a hammer could prove a particularly dangerous occupation.
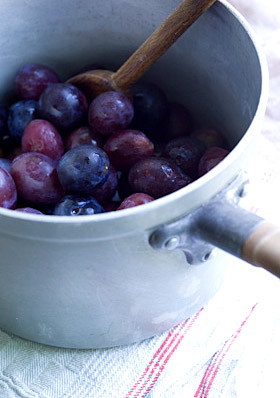
A GLUT OF FIGS
Wednesday September 09th 2009, 4:33 pm
The other day someone twittered something about how in this country we never have enough fresh figs to warrant cooking them and that it is a waste to use them any other way than fresh. When I was writing my jam making book last year, I made fig jam for the very first time. At first I didn’t think that the taste was much to write home about and it did take me a while to key into the subtlety of the flavour, but once I had, I became totally hooked. Fresh figs are really lovely and fig jam is very different but just as lovely, with a slightly earthy, flat but fruity taste. The colour when made into jam is really superb, a rich raspberry pink shade dotted through with tiny seeds. I now only have to think about fig jam and I positively yearn for it.
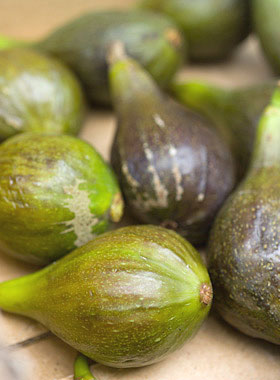
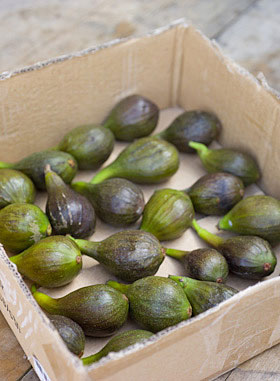
Possibly this year is an especially good year for them here in the UK. I read something in the local paper about a man in Cheltenham who has had a bumper crop and here at Taurus, Georgie in the pottery presented me with a lovely shallow box full of ripe figs picked from a tree in her garden, which I was thrilled to accept. Two or three of them were overly squidgey so I of course had to eat them immediately, but the rest I have made into jam. As a glut refers to a large quantity, a sea of something that it is almost impossible to cope with and use up before it goes off and is wasted, I have to disagree with the twitterer’s statement, as there is definitely a limit to how many figs can be eaten in time, in their fresh state.
Today, I took a jar of jam to give to Georgie, as a thank you for her gift. She said she had some more figs for me if I want them as they will only rot on the tree otherwise. What a treat.
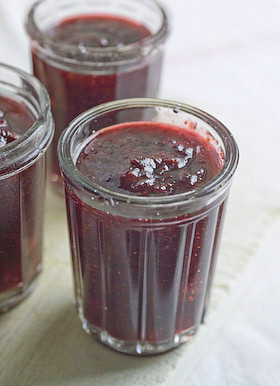
Figs are low in pectin, so need a little help to make into jam with a decent set. I prefer a jam with a softish set anyway and I’m not expecting my fig jam to hang around for months in the larder, so the addition of some lemon juice is all that is required. You can use preserving sugar, which has pectin added to it, instead of the regular variety for a thicker set if you prefer.
Fig Jam
Makes 1.5kg (3 1/4lbs)
1kg (2lb 4oz) figs, stalks removed and chopped into 1cm size bits
800g (1lb 12oz) sugar, warmed
juice of 2 lemons
Place the figs in a pan with 4 tablespoons of water and heat gently to release the juices, adding more water if necessary to prevent the fruit catching on the pan. Bring to a simmer and cook through until pink and juicy with the skins soft. Remove from the heat and leave to cool slightly.
Add the sugar and the lemon juice and stir through to help dissolve the sugar, then leave in a covered bowl in a cool place for 12-24 hours.
Prepare your jars (and lids), making sure they are squeaky clean and dry before placing them on their sides in a cool oven for 20 minutes or so before they are required. It is a good idea to place your jam funnel and ladle in the oven as well, so everything you use is hot and sterilised.
Pour the contents of the bowl into a preserving pan and warm through, stirring to make sure the sugar is completely dissolved, before allowing it to reach boiling point. Boil gently to setting point; you can turn up the heat only so long as you watch it very carefully to be sure your precious jam doesn’t burn. Pour into hot jars, cover and seal. Remember to label (not my strong point!).
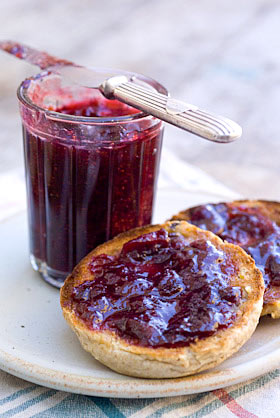
One of my favourite ways of serving fig jam is on toasted cinnamon and raisin bagels. For some reason this combo is superb. I have photographed it here dolloped onto toasted teacakes. The teacakes served in the cafe, here at Taurus, are always handmade, so they come a pretty close second choice.
WILD GREENGAGE AND VANILLA JAM
Sunday August 23rd 2009, 9:31 pm
Greengages have always been a mystery to me, my only experience of them being when I was at primary school and for a fleeting moment you could get Penny Arrows in greengage flavour. For anyone unfamiliar with this retro confection, it was a strap of flavoured toffee available from the ‘penny tray’ in the sweet shop on the way home. Plain toffee was the regular flavour but they introduced others from time to time for short runs. I could just about cope with butterscotch, or even banana flavoured Penny Arrows but greengage was a step too far, quite weird and highly scented. That was my first taste of what I thought was the flavour of greengage and it very nearly scarred me for life.
The other day, Irene, my neighbour, asked me if I could take some greengages off her hands, as she wasn’t able to use all the ones she had been given. Of course, I jumped at the opportunity and promptly received a small bag full of washed and sorted fruit. With the Aylburton village horticultural show now only a week away I’ve been busy all week trying to cook up what will hopefully be a prize winner for the show.
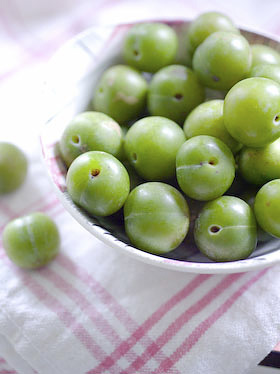
These greengages, apparently a wild cultivar, were very small and round, each fruit no bigger than 3cm in diameter and there was 650g of fruit. I decided to add just vanilla and sugar. I sniffed the fruits to see if they bore any resemblance to the Penny Arrows of my youth and thankfully they didn’t. This wasn’t a lot of fruit to play with and I could have done with using a smaller pan than my preserving pan, as the bubbling syrup almost burnt during the rolling boil stage, so the recipe that follows has been doubled up to a more manageable quantity.
Cooked greengages are rather odd, the flesh an unattractive shade of slimy yellowish green and the skins go brown as they cook. Wanting the jam to have a good appearance for the village show, I made the decision to put the cooked fruit through my trusty and much loved food mill to give a better looking result. Jam made this way does still have some texture but the overall appearance is even and foamy. It makes a jam that is very easy to eat but you can leave the stones and skins in if you prefer for a more textured whole fruit in syrup finish.
I have to say, the finished product is absolutely wow, still slightly tart, zingy, sherberty and packed with flavour. I don’t know whether larger cultivated fruits would make a jam quite this fabulous, I’m on the look out for some to compare. If you can find the fruit, do give this recipe a go.
Wild Greengage & Vanilla Jam Makes approx 1.3Kg (3 lbs)
1.3Kg greengages
2 vanilla pods
approximately 800g sugar
Choose ripe to slightly underripe fruit, washed and sorted and place in a pan with the vanilla pods and 3 tablespoons of water. Cook gently to start the juices flowing, adding more water if necessary to stop the fruit catching on the bottom of the pan. Simmer gently until the fruit is cooked through and juicy, approximately 10 – 15 minutes. Remove from the heat, cover the pan and set aside in a cool place for between 12-24 hours.
The fruits will have split during cooking. With clean, washed hands fish around amongst the fruit and remove all the stones and the vanilla pods. Force the fruit through a food mill or a sieve so the skins are left in the food mill and you end up with a bowl of funny looking puree! Weigh it. You should have approximately 870g. You can match this amount with sugar but I prefer to use less, so I used 85-90% sugar to fruit = 780g sugar. Put the sugar in a bowl in the oven to warm along with the clean dry jars.
Split the vanilla pods and scrape out the seeds. Place them and the pods back in the puree and warm through before adding the sugar. Keep stirring until the sugar has completely dissolved, then turn up the heat and boil until the jam reaches setting point, keeping an eye on it to be sure it doesn’t burn. (Test a splodge of jam on a cold plate or use a jam thermometer for this. Refer to my book if you haven’t done this before.) It only took about 5 minutes to boil the syrup to a softish set, so do watch that you don’t cook too fiercely or the jam will burn. If you cook it on further you will be able to achieve a thicker set more like a fruit butter or cheese. Take care removing the pods then pour into jars and seal. Label when cold.
YESTERDAYS HAUL
Wednesday August 19th 2009, 9:36 am
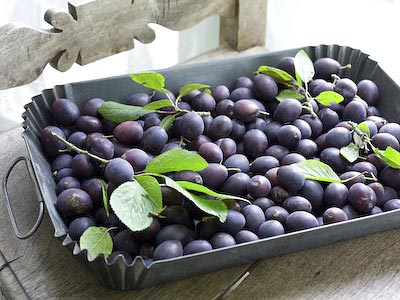
I thought I would post some pictures of the wild damsons I found growing by the roadside in the heart of the forest. I really must remember to keep a set of step ladders in the car for such eventualities, as there is always fruit just out of arms reach that you have to come to terms with giving up on.
When I got home a neighbour had left a bag of plums hanging on the door handle of the front door. I’m not sure who, but I suspect it was Helen and Steve (at the end) who two days ago passed by as I wobbled about on the top of a stone wall, picking more damsons from a tree overhanging the road. Those damsons were growing in someones garden and are larger than the wild ones I found yesterday. I hasten to add I had permission to wobble about on their wall. Helen and Steve asked me if I was scrumping (is it called scrumping for plums, or does that term only apply to apple picking?). I think I may be gaining a reputation.
I am thrilled with my damson crop as they are just about my favourite fruit for preserving and don’t need to be used in any oity-toity combination with anything. They are just perfect on their own.


