THE START OF A BERRY ENGLISH SUMMER
Sunday June 20th 2010, 12:02 am
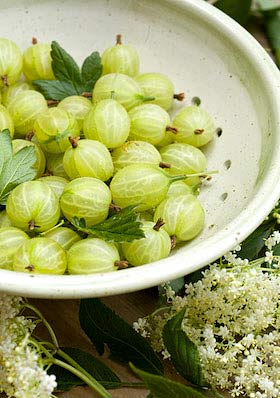
Month six Tigress’s can jam canning challenge and for June the choice of ingredients is positively bountiful with anything ending in ‘..erries’. As if that wasn’t enough, after other can jammers queried what that meant, the category was widened even further to include anything ending in ‘..urrants’ as well. I am just hoping that we haven’t covered the whole soft fruit spectrum in one fell swoop. With summer officially about to begin, at last the preserving year is shifting up a gear and a dearth is just starting to resemble a glut. After last months project, my rhubarb ketchup, that was a success but in a brown kind of way, I’ve been yearning for something colourful and British, something that sings a song of summer, con brio, whilst at the same time celebrating the beginning of the soft fruit season. So gooseberries it is.
I have cooked with gooseberries before but not to any great extent. Gooseberries are another fruit that seem to grow easily and yet are underused and under appreciated, an old fashioned country berry with an unfashionable reputation. This is another one of those puzzling fruits that is everywhere but at the same time hard to find. You either have to grow your own or know someone else who does. I’ve recently planted a few bushes on my newly acquired allotment, and though there wont be any crops to harvest this year, hopefully they will bear fruit-a-plenty in the years ahead. Varieties come with down to earth names, like Leveller, Invicta and Pax, very much old-school allotment sounding. More recently food writers have started to feature gooseberries, so perhaps they are on the cusp of a renaissance.
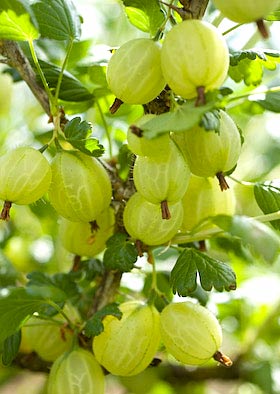
For the canjam I have chosen to make a gooseberry and elderflower jelly. There is something so pure and delicious looking about jellies and in this instance the end colour, though a glorious pinkish amber is nothing like the fresh green that the fruit starts out as. I have read that if you cook gooseberries in a copper pan they retain their green colour, but as I have no direct experience of this, I am loath to pass on the information parrot fashion. In my stainless steel jam pan, green gooseberries tend to turn an unappealing khaki colour as they cook but once the extracted juice and sugar begin to work together, an altogether more magical hue develops. Elderflowers make a classic partnership with gooseberries and should be ready for picking at the same time, though the flowers are much more fleeting. Here, in the Forest of Dean, the flowers have been in bloom for about two weeks but the berries are only just starting to ripen. I’ve used fresh elderflowers but you could use elderflower cordial instead if the only flowers to hand are past their best.
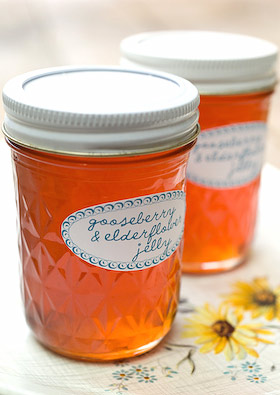
GOOSEBERRY AND ELDERFLOWER JELLY
Makes approx 1.3kg (3lbs)
2Kg (4lbs 8oz) gooseberries, rinsed and drained
approx 20 freshly picked elderflower heads
1 lemon
sugar
There’s no need to top and tail the fruit. Place fruit in a pan with 1 litre (1 3/4 pints) of water. Add the elderflowers and heat the pan, bringing to a simmer, then cook gently until the berries are soft and start to burst. Pour into a jelly bag (that has been sterilised by boiling for 5 minutes beforehand) suspended over a bowl, add the juice of the lemon and leave to drip overnight to collect all the juice. Discard the pulp remaining in the bag and measure the juice. Pour into a preserving pan and add 450g (1lb) of sugar to every 600ml (1 pint) of juice.
Prepare the water bath, jars and seals ready for canning. For more info about how to hot water process, refer to the guide here. Stir the syrup over a low heat until the sugar is completely dissolved then turn up the heat and boil rapidly to reach setting point. To test for a set, drip some syrup onto a cold plate and see if it quickly forms a skin that will wrinkle when you push your finger across the surface. Alternatively, use a jam thermometer and when it shows 105C (220F) you know setting point has been reached. (I usually employ both methods at the same time to be on the safe side!) Pour into the jars leaving required headroom for your type of jars, seal and hot water process for 10 minutes. Remove the jars from the water bath and leave them till completely cold before testing the seals are vacuum fixed. Label and store.
You can omit hot water processing if you wish as a jelly of this type should store well without, but processing makes it extra safe and will mean the jelly should keep for a year or longer.

POPCORN – PLANTING, POPPING, EATING
Monday May 17th 2010, 7:39 pm
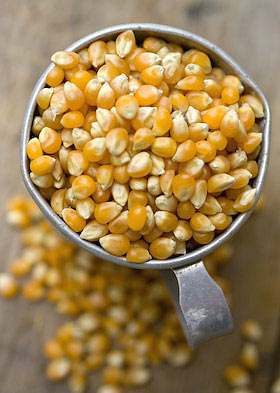
All these reality TV programmes on Saturday nights claim to have brought about a revival of shared family time with parents and siblings enjoying time together gathered around the box. It was whilst I was watching the X Factor last year that I had a yearning for some sweet treat to eat mindlessly whilst listening to the contestants ‘back stories’. I rushed into the kitchen and in a neurotic frantic fashion, threw some popping corn and sugar into a pan to rustle up an impromptu snack. I did end up with something vaguely edible that did the job required, but in the process I burnt the corn, much of which hadn’t popped properly and was left with a pan coated with black burnt caramel that took some elbow grease to put right. If it had been a contest I would definitely have been voted off that night. I decided to find out how to go about it properly and since then popcorn has become one of my favourite things.
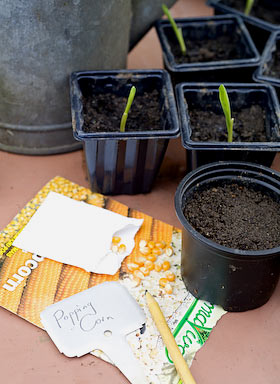
I thought I would have a go at growing popping corn this year. There is still some time to plant some if you are quick about it. I found the seeds here. As per usual, I’m lagging behind with my planting. Last week I visited my friend Shelley and her seedlings were looking positively joyous compared to mine. Her sweetcorn seedlings reminded me of rhythmic gymnasts dancing with streamer ribbons whereas mine have only a short pointy bit showing, as if gesturing ‘up yours’. Oh well, hopefully they will catch up in time. As corn is wind pollinated, once the seedlings get going, you need to plant them out in a grid formation (like Cheryl Cole’s backing dancers) 20-30cm apart. You can grow squashes beneath them and use their tall stick like habit as supports for climbing beans as well, to make good use of the space.
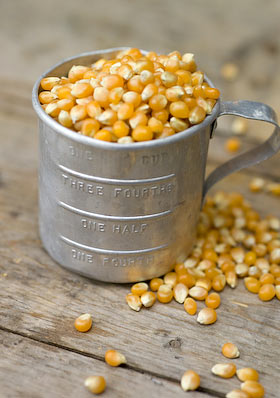
Popcorn is different from sweetcorn, as the outer skin of the kernels is tougher and you leave the ears of corn on the plant to dry out. It is this tough skin that helps the corn to build up pressure when heated in the pan and that eventually explodes, as the expanding fluffy middles turn inside out. Different types of corn also need to be planted at least 250ft apart, otherwise they will cross pollinate and wont grow true.

Here are a couple of ways to make popcorn that I have tried and tested and recommend that you copy. I guarantee that a bowlful at a summer party will be wolfed down no problem. The first recipe is for a classic kettle corn which is slightly sweet but salted at the same time. Made properly, it is rather too easy to eat and I do find it hard to put on the brakes if I have a bowl to myself, so be warned. I’ve now got the method down to a fine art so don’t ever burn the pan and end up with hardly any unpopped kernels (called old maids).
I have used Halen Môn sea salt with vanilla for the final seasoning and it is heavenly. You can of course use plain sea salt instead but do seek out Halen Môn if you can. They make other flavoured sea salts which I intend to try on popped corn drizzled with melted butter, as well. The salt is in softish flakes so needs to be ground in a mill, bashed in a pestle and mortar or squashed under a spoon.
The second recipe makes a luxurious sweet caramel popcorn which requires cooking in the oven. This bit is the clincher as it turns out a lovely crunchy toffee coated popcorn with nuts unlike anything you’ll find in the shops.
KETTLE CORN WITH VANILLA SEA SALT
Makes a large bowl full
2 Tbsp oil (sunflower, coconut or corn oil will do fine)
80g popping corn
60g caster sugar
Halen Môn sea salt with vanilla (or plain sea salt will do)
Have the corn and sugar ready within arms reach. Pour the oil into a large pan with a lid and place on a moderate heat. Throw in 4 corn kernels and replace the lid. Wait for the kernels to pop and when all 4 have popped tip in the corn and the sugar, replace the lid and immediately remove the pan from the heat. Count from 1 to 30 outloud (this is compulsory) then place the pan back on the heat. The kernels will begin to pop. Give the pan a shake now and again and once the frantic popping seems to be subsiding remove from the heat altogether, leave covered until the popping stops then immediately tip the popped corn into a large bowl. Turn the popcorn over with a spatula to separate any sticky bits and sprinkle with sea salt, coating lightly to taste. The popcorn crisps up as it cools.
BAKED CARAMEL & NUT POPCORN
Makes a large bowl full
2Tbsp oil (see above)
80g popping corn
110g soft brown sugar
50g unsalted butter
3Tbsp golden syrup
2tsp vanilla extract
120g nuts roughly chopped (I used half cashews / pecans and salted peanuts are good too)
Pop the corn following the technique given above, but omit the sugar. Pour the popped corn into a bowl and leave to cool. Heat the oven to 130C (250F Mk2).
To make the caramel, place the sugar, butter, syrup and 2 Tbsp water in a pan. Heat till melted and combined then bring to the boil and cook until the syrup reaches the hard ball stage 120C (250F) on a sugar thermometer or a drop of syrup when placed in cold water holds its shape when pushed with your finger. Remove from the heat, whisk in the vanilla extract and pour the caramel over the popcorn, turning the corn with a spatula and adding the chopped nuts at the same time. You want the corn to be evenly coated and the nuts to be evenly distributed throughout.
Lightly grease 2 deep baking trays or line with baking parchment and divide the corn between them. Bake in the oven for 1 hour, turning the corn 2 or 3 times during the cooking time. Remove from the oven and leave to cool, turning the corn now and again till it is cold, crisp and the kernels are separated.

RHUBARB AND ANGELICA CORDIALIZED
Friday April 23rd 2010, 1:54 pm
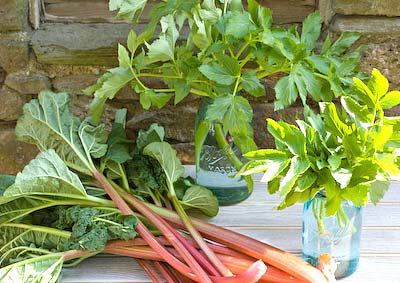
Month four Tigress’s can jam canning challenge and the chosen ingredient is herbs. This is a funny one, as herbs are a flavouring and sidekick rather than a main player ingredient so thinking cap required. Ingredient wise, this is where everybody needs good neighbours. Helen and Steve a few doors one side have a thriving patch of rhubarb but noone in the house enjoys rhubarb enough to make use of it. As explained in my last post (just yesterday) Jane’s garden, a few doors down on the other side, has angelica growing so can provide the herbal element needed to meet the can jam criteria. So both my ingredients couldn’t be more local, more seasonal or more freely available. Angelica can be used to offset the tartness of fruits such as currants, gooseberries and rhubarb so it is an ideal pairing.
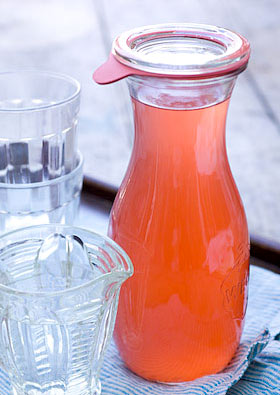
With the sun at last making an appearance and the need to get to grips with horticultural tasks, naturally my thoughts have turned to the need for cordial as a suitable refreshment whilst I work. I started looking for inspiration and found it in Fancy Pantry by Helen Witty. I’m liking the look and feel of this book, published in the US in 1986, found a while ago on Amazon. It is full of recipes for stocking your pantry, including some preserves, pickles and relishes, and for me, someone in the UK not so familiar with canning, it includes reassuring processing information where relevant. Since it arrived in the post I have spent many hours enjoying this book and there in the ‘sippin’ substances’ chapter a recipe for rhubarb nectar caught my eye and seemed a good starting point for my April Can Jam project. Cordials are really easy to make, like the first process of jelly making without the worry of achieving a set at the end.
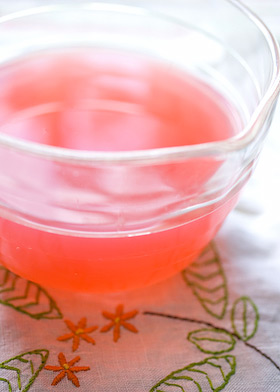
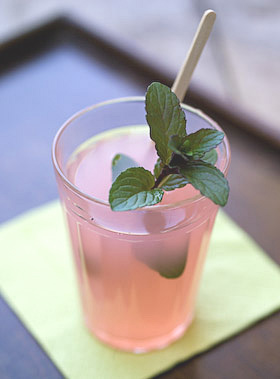
I am really pleased with the result. I used the angelica leaves and at my first attempt layered them with the rhubarb to let the flavours infuse. I didn’t feel that the angelica made its presence felt strongly enough so have devised another method to make an angelica syrup which is then added to the rhubarb. I’m going to be making lots more of this cordial, with and without the herbal note, as the resulting drink is supremely versatile and quite delicious. Simply serve as a refreshing drink diluted with still or fizzy water or as part of a more grown up cocktail, such as a pink gin fizz, made by mixing equal measures with gin over ice and topped up with soda and a sprig of mint. There is plenty of room for experimentation, you just have to watch that nothing you add overpowers the exquisite rhubarb flavour. The cordial is also a fabulous colour.
RHUBARB AND ANGELICA CORDIAL
Makes approx 1.7 litres (3 pints)
100g (3 1/2 oz) angelica fresh leaves
450g (1 lb) caster sugar
2kg (4 lbs) rhubarb
1.2ltrs (2 pints) water
Wash and drain the angelica and shake dry, then chop roughly and place in a dish in layers with half of the sugar sprinkled in between and over top to cover. Leave for 24 hours until the sugar has turned to syrup. Put into a pan and heat gently, stirring to be sure all the sugar has dissolved. Bring to the boil then remove from the heat, pour back in the dish and leave overnight. Return to the pan, bring to a simmer and cook gently until the leaves begin to look transparent, which should only take 5 minutes or so. Pour through a sieve to leave a clear syrup. This method should extract as much of the angelica flavour as possible. Cut the macerating time down as required if you are in a hurry.
Wash and drain the rhubarb, removing leaves and trimming the ends. Cut thicker stalks in half down the middle then chop into 1cm sized pieces. Place in a pan with the water, bring to the boil and simmer gently for 10 – 15 minutes until cooked through. Pour into a suspended jelly bag and leave overnight to drip through, catching the juice in a jug.
Prepare the canning bath and sterilised bottles. Place the rhubarb juice, angelica syrup and remaining sugar in a pan and heat gently, stirring all the time until the sugar is dissolved. Bring to the boil then remove from the heat, pour into your hot bottles, leaving the required headroom for your bottle type (mine shown in the picture looks like it has a bit too much headroom! I’ll do better next time) seal and process for 10 minutes. Leave till cold and label. For more info about how to hot water process, refer to the guide here.
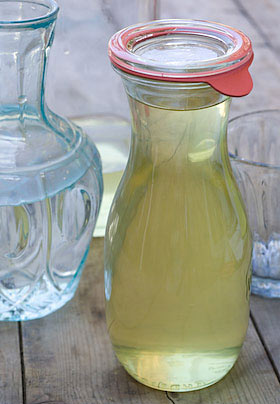
After candying the small quantity of angelica stems I had and using some of the leaves to make my rhubarb and angelica cordial, I still had some leaves left over. Hating the thought of wasting them I decided to make a second cordial. As the intention was to ‘can’ the cordial and I was worried whether it would be acidic enough to safely do this way, it seemed like a good idea to make it following a similar method you might use when making elderflower cordial. For this you include some lemon juice as well as a small amount of citric acid to help its keeping qualities. I have a stock of citric acid, bought a while back at my local chemist. I know some people find it difficult to get hold of but it can be found at home brew shops and on ebay as well if your pharmacy is unable to supply.
I wasn’t at first sure whether the lemon and citric acid rather overpowered the more subtle angelica flavour but I’ve just drunk a glass diluted down with sparkling mineral water and the flavour came through in a lovely distinctive way which sets it apart from the elderflower version.
ANGELICA CORDIAL
Makes approx 1.7 litres (3 pints)
1.2 litres (2 pts) water
900g (1 lb) caster sugar
200g (8 oz) angelica leaves, chopped
3 tsp citric acid
juice and zest of 2 lemons
Make a sugar syrup with the sugar and water by heating them together in a pan, stirring until all the sugar is dissolved and bringing to the boil. Remove from heat and add the citric acid. Put the angelica, lemon juice and zest in a bowl and pour the syrup over them. Cover the bowl and leave for 24 hours to macerate and infuse.
Strain through muslin and collect the liquid in a pan. If you are planning to can the cordial so it can be stored, prepare the canning bath and sterilise the bottles. Bring the cordial just to the boil then remove from the heat, pour into your hot bottles, leaving the required headroom for your bottle type, seal and process for 10 minutes. Remove from water bath and leave till cold then label. For more info about how to hot water process, refer to the guide here. This cordial will keep for several weeks unprocessed in the fridge but will store for up to a year unopened after processing.
AN OBSESSION WITH ANGELICA
Thursday April 22nd 2010, 6:12 pm
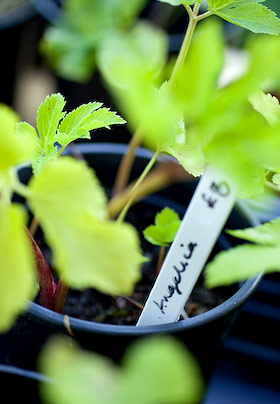
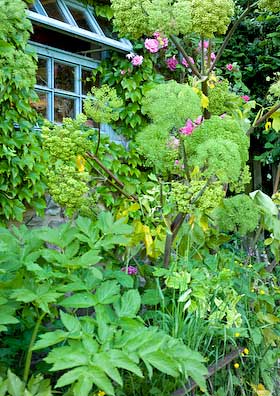
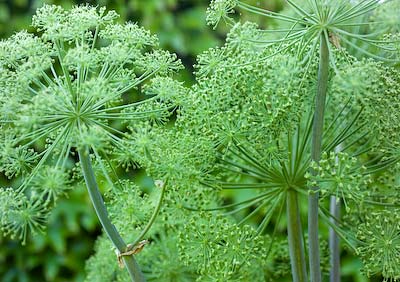
I first came across angelica, the herb, when I looked round my neighbours garden a few years ago. Jane and Les Hales’s garden is very special, so special in fact that it is open to the public a couple of days a year as part of the National Garden Scheme. Jane has planted angelica in several parts of the garden and uses this tall stately plant to form screens against the house. I was instantly impressed by the plants towering stature and amazing flowerheads that look so graphic and beautiful against blue sky.
Jane usually has a few seedlings for sale at her open days. Apparently once you manage to get angelica to grow, this biennial seeds itself freely, so restocking the plant is not an issue. I have tried growing it since then. The first two years, our wet summers encouraged the slugs to decimate my young plants, so even my best efforts came to nothing. This year is looking slightly brighter, and I already have a plant doing well on my allotment and a few more small seedlings that I am cherishing a little longer before planting them out to fend for themselves.
I had a vague recollection of candied angelica from my childhood, a strikingly vibrant green confectionery used to decorate trifles, a small strip pushed into the cream top layer either side of a bright red glace cherry, and can just about recall it having a rather exquisite and unusual flavour, but that was as far as my knowledge went. I certainly had no inkling that it came from a herbal or vegetable source. This of course set me off on a quest to find out more about the culinary merit of this impressive herb and I vowed to have a go at candying my own angelica to try and rediscover the distinctive flavour remembered as a kid.
All parts of the plant are aromatic and edible. The stems are the bits you candy to make confectionery, the leaves are used for flavouring many liqueurs such as chartreuse as well as in the preparation of bitters, and with juniper berries to flavour gin, the root is blended with wormwood and other herbs to make absinthe and the seeds impart a muscat-like flavour to wine and are used in the preparation of vermouth. All impressive stuff.
Stems for candying or crystallizing need to be young. It is no good waiting too long to harvest them as by June – July time they will be far too stringy and tough to work with. You will know by now that being prepared well enough ahead is not my strongest point, but this year, for once, no doubt prompted by Tigress’s can jam canning challenge I am taking part in, which has chosen herbs for our April ingredient, I have gotten round to acquiring a handful of stems and a nice bunch of leaves from Jane which she very kindly cut for me. The plan, to use angelica as my canjam ingredient (post to follow this one), but also to candy some stems at the same time.
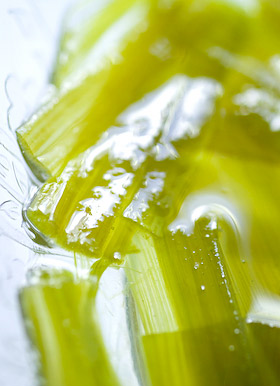
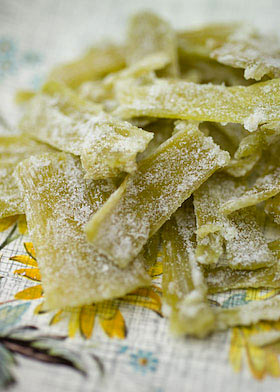
What is interesting is the point at which the angelica turns from a herby savoury scent and flavour to a sweet unctious syrupy one. The stems need first to be boiled and scraped, which is a bit fiddly, before layering them with sugar to begin the transformation. As I had very few stems to play with, I used some of the thicker leaf stalks as well. Apart from the peeling process, it was merely a matter of 5 or 10 minutes of activity followed by a day or so of leaving well alone, so it is hardly taxing. As soon as a syrup started to form, the angelica took on the magical taste I remembered and I felt as though I had captured the essence of this wonderous herb. It is worth having a go, even if you only candy angelica once in your life. The basic recipe I followed comes from Bee Nilson’s Herb Cookery, published in 1974. She is one of my favourite cookery writers for allsorts of reasons. Scale the recipe down if you don’t have enough stems.
HOW TO CRYSTALLIZE ANGELICA
1/2kg (1lb) angelica stems
Wash the stems and cut into 8-15cm (3-6in) lengths. Boil them in enough water to cover until the stems are tender. For young stems this should only take about 10 minutes. Drain well, rinse with cold water and drain again. Scrape the outer skin from each piece. I found it easiest to slit down the side of each hollow tub and lay them flat on the surface. The skin comes off really easily but you need a lightness of touch so what remains isn’t damaged. Place them in a shallow dish.
1/2kg (1lb) caster sugar
Sprinkle the sugar evenly over the stems. Cover the dish and leave it for 2 days by which time the sugar will have dissolved and become syrupy.
250ml (1/2pt) water
Put the angelica, sugar syrup and water in a pan and heat whilst stirring until the syrup boils. Simmer gently until nearly all the syrup is absorbed and the angelica is clear. Add more water if the syrup has all gone but the stems aren’t looking transparent. Drain the angelica and leave till cool enough to handle, then roll them in more caster sugar to coat them generously. Spread the pieces on a wire cooling rack and finish drying them in a warm place or a very cool oven. When cold wrap the angelica in waxed paper to store.
This year, Ramblers, Jane and Les Hale’s garden at Aylburton Common in the Forest of Dean, is open as part of the National Garden Scheme on two Sundays; 2nd May and 13th June 2-6 pm, and also by special appointment during May and June only. You can find more information on the National Garden Scheme website here.

A (LAUNDRY RELATED) PHOTO OPPORTUNITY
Thursday March 11th 2010, 9:04 am

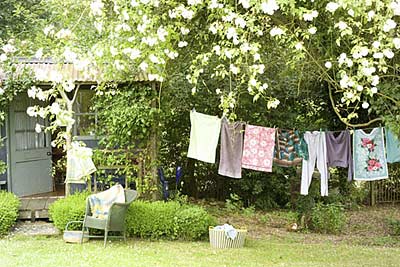
I am always on the look out for the perfect washing line to photograph and have a list of locations lined up. A bit like a bus tour of celebrities homes in Hollywood, I could take you on a tour of the Forest of Dean to show you my favourite washing lines. There’s the one that is tied directly onto the front of a Georgian house, that in spring is completely covered with wisteria. There is another strung across a well tended small holding; as the year progresses the laundry blows in the breeze above a carpet of cabbages and kale. Another favourite, is in the dip of a valley, so I’m sure that I will one day be able to aim and focus my camera and capture the washing line surrounded by the rising valley beyond. For that location I am looking for a Walton’s style (as in John Boy Walton) pick up truck to be parked in a particular spot and the yellow climbing rose that grows against a little greenhouse at one end of the washing line needs to be in flower.
You see the essence of this is that you really do have to be ready to capture the moment. Great landscape photographs are sometimes taken at a lucky moment, the photographer just happened to be there, see the picture and shoot. But more often than not, the image was the result of a well planned operation. The photographer saw the location and over time planned how to get the perfect shot, studied the way the light moves across the terrain, worked out the exact place to set up the tripod, what time in the morning they would need to set off to get there before the sun comes up etc. Sometimes the opportunity will be a one and only.
I’ve had a few that have got away through my own inability to get up and go. Like the wisteria clad house that year after year gave us locals a spectacular display. It was always in my mind to knock on their door and get myself ready to take the definitive washing line shot, but other events were more pressing so it would be left for another year. Then they flippin-well repointed and renovated the house which meant the wisteria was torn down. I feel sick just thinking about it, even now.
I often point out these locations to friends as we drive around. For some reason they are never as excited as me and sometimes completely ignore me, so perhaps the bus trip for tourists idea wont have many takers. The jist of this story, told in a laundry themed way, is carpe diem; sieze the pleasures of the moment without concern for the future. If you don’t get of your fat arse now they’ll rip down the wisteria and you’ll be left with regrets.
AND YOUR POINT IS….?
Friday February 19th 2010, 4:22 pm
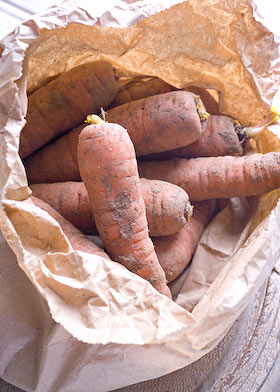
Month two, Tigress’s can jam canning challenge, and the ingredient to grapple with is ‘carrots’. They aren’t in season in the UK, not as a freshly pulled from the ground seasonal veg at any rate, otherwise I would have found some of those trendy purple ones to work with, or a nice bunch with their greenery attached that would have made a lovely picture tied in a bundle with garden twine. So a brown paper bagful of locally-grown and stored organic specimens is my starting point.
There is one good thing about it, I’ve learnt a lot since ‘carrots’ was announced. I wanted to find a recipe suitable for canning that needs carrots instead of just includes them, so I trawled through my extensive collection of books on preserving. I felt sure I would unearth a war time gem, thinking carrots would have been used more as a sweetener in times when sugar was scarce, but nothing turned up. I didn’t want to simply bottle carrots for the sake of it, couldn’t find a suitable pickle recipe, was about to adapt a Madhur Jaffrey recipe for quince and lemon chutney (by adding carrots) then forgot and cooked my last quinces. I was tempted by my trusted and much loved ‘Let’s Preserve It’ by Beryl Wood, a little jewel of a paperback from 1970 which contains 579! recipes, including a carrot chutney, a jam, 2 marmalades as well as a recipe for spiced carrots. but eventually settled on combining carrots with rhubarb in a jam.

British forced rhubarb is just starting to appear for sale. The season for forced rhubarb, grown in the ‘Yorkshire triangle’ begins January through to April, when field grown takes over. My head has been full of rhubarb all month as I am sorting out which varieties to plant on my allotment. Rhubarb alone is fantastic, so I just hoped that the inclusion of carrots in the recipe would be a wonderful addition rather than just meeting the canjam deadline. I’ve also added some chopped stem ginger and candied peel as I have some candied melon slices left over from baking at Christmas, so it has been a good opportunity to use some up. I recommend you use good quality candied peel for this, usually sold in chunky pieces from a deli or health food shop, rather than that ready chopped stuff in tubs surrounded by gloopy syrup you find in supermarkets.
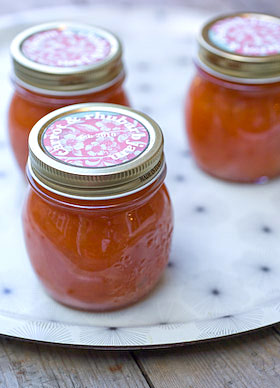
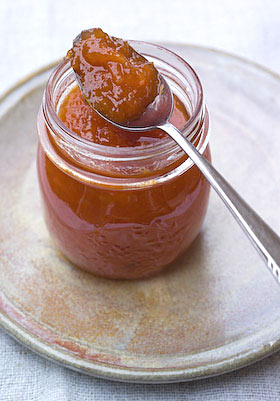
I did have to watch that the jam didn’t burn whilst I was boiling it to a set. As it cooked it turned to a beautiful deep orangy-red gelatinous consistency but it spat as it boiled. As both carrots and rhubarb are lacking in pectin, it is probably advisable to use jam sugar with pectin added or add extra pectin if you want a good set. I used half ordinary white sugar and half jam sugar, because I had some needed using up. What I have ended up with is quite a soft set but the taste is amazingly good. The recipe uses enough carrots to be ‘useful’ from the ‘using up a glut’ perspective and the jam isn’t overly sweet, so it makes perfect sense for canning. It would be ideal as a filling for jam tarts or Tigress’s thumbprint cookies or to fill a larger pastry case with the addition of an egg beaten into it then baked in the oven to set. A slice served with cream or mascarpone flavoured lightly with some ginger syrup from the stem ginger jar would work perfectly. All in all, it has been an unexpected success.
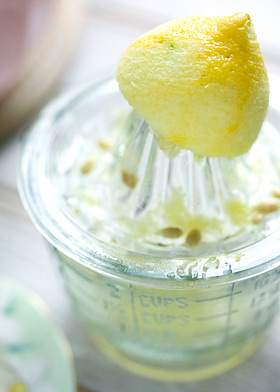
CARROT & RHUBARB JAM
Makes approx 1.5Kg (3lbs 5oz)
500g (1lb 2oz) carrots, peeled, topped and tailed
500g (1lb 2oz) rhubarb, washed and trimmed
1 unwaxed lemon
800g (1 3/4lbs) sugar (use jam sugar with added pectin for a stronger set)
60g (2oz) stem ginger (approx 4 balls)
150g (5oz) candied peel (any citrus or melon will do)
Finely grate the carrots and place in a pan with 500ml (3/4pt) of water. Finely grate the zest from the lemon, squeeze out the juice and place to one side. Chop the lemon halves, pith and all, into chunks and place them and any pips in a muslin bag tied closed with string or a knot and add them to the carrots. Bring to a simmer and cook with the lid on for 20 minutes, then remove from the heat.
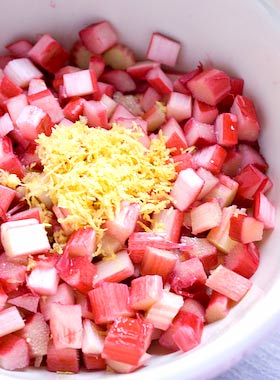
Chop the rhubarb into 1cm (1/2in) sized cube pieces. If the sticks are thick I slice them lengthways once or sometimes twice before chopping into equally sized small chunks. Place the rhubarb in a bowl, add the lemon zest and juice and pour the sugar over it. Cover and leave for an hour or two until the juice starts to run from the rhubarb.
Tip the contents of the rhubarb bowl into a preserving pan and add the cooked carrots, cooking liquid and muslin bundle. Add the finely chopped stem ginger and candied peel cut into thin slivers. Heat slowly, stirring all the time until the sugar is completely dissolved, then turn up the heat bring to a rolling boil and cook until setting point is reached (this took me around 25 minutes). (Test for a set on a cold plate or use a jam thermometer.) Discard the muslin bag.
Pour into hot sterilised jars, leaving 1 – 2cm (1/2 – 3/4in) headspace, screw on the lids to fingertip tight and process for 10 minutes in a hot water bath. For more info about how to hot water process your preserves, refer to the guide here. Leave your jars until cold and don’t forget to label and date them.
A GLUT OF FIGS
Wednesday September 09th 2009, 4:33 pm
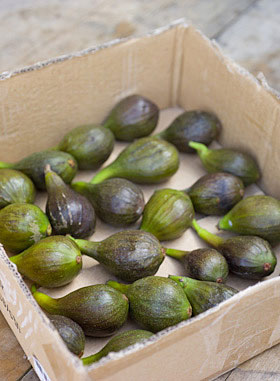
The other day someone twittered something about how in this country we never have enough fresh figs to warrant cooking them and that it is a waste to use them any other way than fresh. When I was writing my jam making book last year, I made fig jam for the very first time. At first I didn’t think that the taste was much to write home about and it did take me a while to key into the subtlety of the flavour, but once I had, I became totally hooked. Fresh figs are really lovely and fig jam is very different but just as lovely, with a slightly earthy, flat but fruity taste. The colour when made into jam is really superb, a rich raspberry pink shade dotted through with tiny seeds. I now only have to think about fig jam and I positively yearn for it.
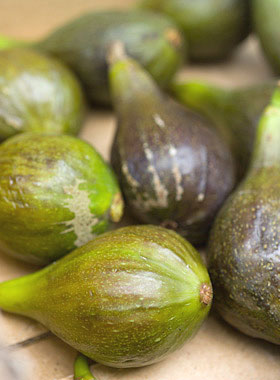
Possibly this year is an especially good year for them here in the UK. I read something in the local paper about a man in Cheltenham who has had a bumper crop and here at Taurus, Georgie in the pottery presented me with a lovely shallow box full of ripe figs picked from a tree in her garden, which I was thrilled to accept. Two or three of them were overly squidgey so I of course had to eat them immediately, but the rest I have made into jam. As a glut refers to a large quantity, a sea of something that it is almost impossible to cope with and use up before it goes off and is wasted, I have to disagree with the twitterer’s statement, as there is definitely a limit to how many figs can be eaten in time, in their fresh state.
Today, I took a jar of jam to give to Georgie, as a thank you for her gift. She said she had some more figs for me if I want them as they will only rot on the tree otherwise. What a treat.
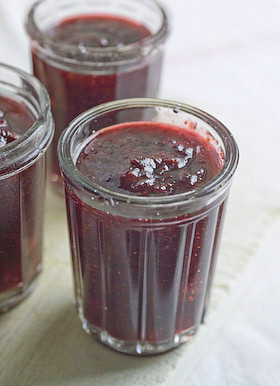
Figs are low in pectin, so need a little help to make into jam with a decent set. I prefer a jam with a softish set anyway and I’m not expecting my fig jam to hang around for months in the larder, so the addition of some lemon juice is all that is required. You can use preserving sugar, which has pectin added to it, instead of the regular variety for a thicker set if you prefer.
Fig Jam
Makes 1.5kg (3 1/4lbs)
1kg (2lb 4oz) figs, stalks removed and chopped into 1cm size bits
800g (1lb 12oz) sugar, warmed
juice of 2 lemons
Place the figs in a pan with 4 tablespoons of water and heat gently to release the juices, adding more water if necessary to prevent the fruit catching on the pan. Bring to a simmer and cook through until pink and juicy with the skins soft. Remove from the heat and leave to cool slightly.
Add the sugar and the lemon juice and stir through to help dissolve the sugar, then leave in a covered bowl in a cool place for 12-24 hours.
Prepare your jars (and lids), making sure they are squeaky clean and dry before placing them on their sides in a cool oven for 20 minutes or so before they are required. It is a good idea to place your jam funnel and ladle in the oven as well, so everything you use is hot and sterilised.
Pour the contents of the bowl into a preserving pan and warm through, stirring to make sure the sugar is completely dissolved, before allowing it to reach boiling point. Boil gently to setting point; you can turn up the heat only so long as you watch it very carefully to be sure your precious jam doesn’t burn. Pour into hot jars, cover and seal. Remember to label (not my strong point!).
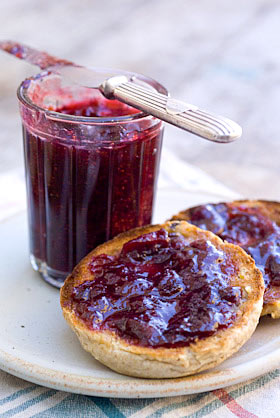
One of my favourite ways of serving fig jam is on toasted cinnamon and raisin bagels. For some reason this combo is superb. I have photographed it here dolloped onto toasted teacakes. The teacakes served in the cafe, here at Taurus, are always handmade, so they come a pretty close second choice.
ONE SMALL STEP FOR…THE HUMAN CANNONBALL
Wednesday August 26th 2009, 4:06 pm

Here at Taurus, an annual fire sculpture event has become a much anticipated part of the events calendar. Each summer for the last 10 years, a giant wooden sculpture has been constructed on the front lawn, following a chosen theme and culminating in an evening of ritualistic revellery and the sculpture being set alight. Last year the theme was the Severn Boar, which referred not only to the wild boars that are sighted from time to time in the Forest of Dean but also the famous River Severn tidal wave (spelt Bore) that keen surfers like to ride and that runs close to Taurus. Round here, never a week goes by without a report in the local paper to the effect that someone’s dog has been chased by a boar or someone’s child was chased by a boar or someone was scared out of their skin by a boar.
This years event, Shoot The Moon, is celebrating the 40th anniversary of the moon landing, when man first stepped foot on the moon. I know it may be sounding more than a little ambitious, but the intention is to send someone to walk in Neil Armstrong’s footprints. A sixteen foot high wooden circus cannon is being built as we speak and on Saturday night the foolhardy crew plan to climb inside it, the fuse will be lit, and said crew will be propelled out of the stratosphere.

In true circus style there will be a big circus build up and considerable razamatazz helped by musicians, pyrotechnicians and projectionists. Steve Hyslop is building the sculpture and can add ‘human cannonball’ to his CV. ‘I like the mechanical, rather kitch image of the fat circus cannon. It’s comic rather than threatening, with an element of anarchy,’ says Steve. He and co-conspirator Damon Bramley will thankfully be donning safety gear for their heavenly mission.
All in all, it looks like being a spectacular and memorable evening and everyone is welcome to come along this Saturday 29th August, 6 – 11 pm. You’ll find more information how to find Taurus Crafts here. There is lots of on-site parking (£2 donations welcomed for parking) and you are advised to bring a torch and suitable clothing. For more information phone 01594 844841

A VERY FINE JAR
Sunday August 16th 2009, 12:31 pm
If you find an empty jam jar exciting, you are a very lucky person indeed. It surely means that you can appreciate the simple things in life that make just living a rich experience. Well that’s my theory anyway.
A recent editorial in the Telegraph for The Laundry showed an image of the vintage French Jam jars that I stock in the shop. When you get a bit of publicity like that you realise that you are not alone in your appreciation of the glass jar, as lots of people got in contact keen to get hold of some. (By the way, I sold the ones I had really fast but more are on their way from my French jar hunter, so I’ll be in touch again very soon.)
I’ve been working on how I want my own range of preserves to look, that I intend to sell here at The Laundry. The range will be called Glut Kitchen and I’ve been looking for the right jars and lids to use as well as thinking about the feel that I want the branding to create. This is all before any jam gets made. Once you start thinking in this way you realise the limitations. It isn’t a matter of finding the loveliest jar you can, as you can bet your life it will be far to expensive and impractical to use, making the end price for a jar of jam way over the top.
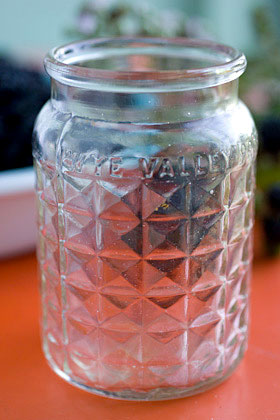
I thought you might like to see this vintage jar I recently acquired. It isn’t French this time, it’s British. Yes once upon a time we made such things and did a great job of it. Not only does it have a nice faceted pattern around the sides but it says ‘Wye Valley Preserves’ around the rim. The jars I choose for my own range wont be anything like as fancy as this and I doubt that in years to come someone will be waxing lyrical about an old Glut Kitchen jar, but fingers crossed they will remember the taste of the jam it contained.

THE FLORIBUNDANT LAUNDRY
Friday June 19th 2009, 2:07 pm

The countryside in June is utterly lush. Before leaving home for work this morning I took the opportunity to pick a bunch of flowers from the garden for the shop. I simply cut single stems of one thing, two or three stems of something else, just whatever took my fancy until I’d made up a sizeable bunch. There was no real editing as regards colours with one exception – I still can’t get my head around bright yellow flowers, but apart from instinctively ignoring that part of the spectrum, all other colours were allowed.

I included a few stems of herb robert, that seeds itself everywhere, so can be safely classified as a weed, some comfrey and three lovely scented country roses, filling in the gaps with ladies mantle. So far my arrangement has sparked off several conversations with customers and many admiring comments. Now, not only is the countryside out there rich and verdant, my shops pretty damn floribundant as well. Oh by the way – fabulous flower topped handmade tea cosies, exclusive to The Laundry can be found here.


