FESTIVE APRICOTS, CRANBERRIES & BOOZE
Sunday December 05th 2010, 1:06 am
Month twelve, the very last Tigress’s can jam canning challenge and for December the ingredient chosen by the wonderous Tigress herself, who set the whole ball rolling in the first place, is dried fruits in all their jewelled and seasonal glory. Must admit, apart from chutneys, don’t think I’ve ever used dried fruits in my preserves so this is new for me.
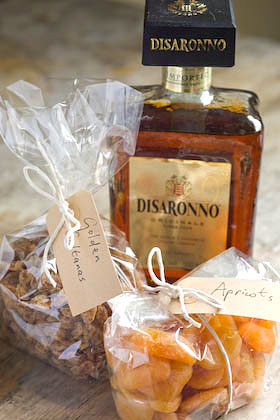
Yet again Fancy Pantry by Helen Witty, my all time favourite book, provided the inspiration. Her dried apricot & amaretto conserve sounded just perfect to meet the criteria of this months challenge, though I’m not a fan of adding alcohol to my jams. Well I say I’m not, that should be, I wasn’t. Over the last year I have discovered how a little splash of kirsch takes sour cherries from quite nice to amazing. Likewise a spoonful of calvados added to apple butter, or some Cointreau poured over squashed plums can take mundane to magnificent, adding something not necessarily consciously alcoholic but that somehow completes the balance of flavours in a wonderful way.
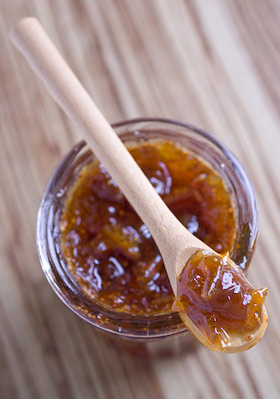
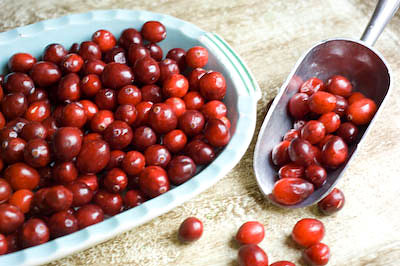
This did mean I had to shell out for a bottle of Amaretto, the down side of acquiring a stock of liqueurs, they don’t come cheap. Thankfully, this jam turned out even better than expected, really special in fact, so now I’ve got plenty of the ingredients left to make more of the same to give as presents. I added fresh cranberries to my jam which are great not only for their flavour and seasonality but for the lovely colour they bring. After I’d made the jam and started to think what it would go well with, ‘warm croissants’ absolutely shouted out to me.
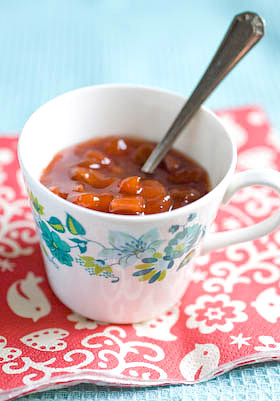
I have opted for bright orange sulphured apricots over the darker unsulphured variety for my jam because I can’t bear the thought of starting out with dark brown fruit. It doesn’t bode well in my mind, brown fruit can only get doomier as it cooks, and for a special holiday preserve you want to push the boat out a bit. This preserve could take even less sugar that I used. I did a sugar test on it using a refractrometer and found that it contained 57%. For a preserve to store well without canning, it should be nearer to 65%, so if you aren’t into canning and want to be sure this jam will store in the pantry for any length of time without worrying it will go mouldy, I’d advise you to up the sugar content from 450g to 600g, but taste wise it doesn’t benefit from it. The added alcohol will also help to act as a preservative. This jam tastes so good it most likely wont hang around long enough anyway. If you are not into canning, this should make it obvious why canning is so brilliant. You can preserve using less sugar so the overriding flavour of your jam is the fruit it contains, not sugar. Preaching over, here’s the recipe.
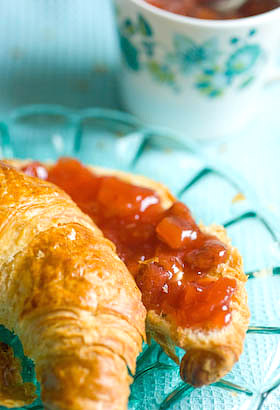
APRICOT, CRANBERRY AND AMARETTO JAM
Makes approx 1.4Kg (3 lbs) jam
225g (8oz) dried apricots
150g (5 1/2oz) golden sultanas or raisins
0.90 ltr (3 1/2 cups) water
225g (8oz) fresh cranberries
1 1/2 tsp grated orange zest
0.25ltr (1 cup) freshly squeezed orange juice
2Tbs freshly squeezed lemon juice
450g (3 cups) sugar
3Tbsp Amaretto liqueur
Chop the apricots into small evenly-shaped pieces. Place them in a bowl with the sultanas and pour over 0.75ltr (3 cups) water. Leave to soak overnight.
Next day, prepare the water bath, jars and seals ready for canning. For more info about how to hot water process, refer to the guide here. Place the cranberries in a pan with the remaining water and simmer gently for 15-20 minutes until the fruits have popped and are cooked through. Leave to cool slightly, then add all of the remaining ingredients (including soaking liquid) except the Amaretto.
Stir to dissolve the sugar and once it has, turn up the heat to a rolling boil and bring the jam to setting point (took me about 10-15 minutes), that is when a dollop on a cold plate readily forms a skin that wrinkles when you push your finger over the surface. Remove from the heat and leave to cool for a few minutes then stir in the Amaretto. Pour into hot sterilised jars, seal and process for 10 minutes. Remove from the water bath and leave till completely cold before testing the seals and labelling.
IT’S A WRAP
Well that’s it. A whole year of the Tigresscanjam completed and wow, it has been amazing. I intend to write another post soon to round up what I’ve learnt and how it has changed my approach to preserving. Thanks to dearest Tigress for taking the time to not only oversee the challenge and the monthly roundups but for asking me to take part. To think that this experience could have passed me by …. well what can I say, how foolish I would have been without that gentle nudge.
I have found all you other canjammers participating truly inspiring. Thanks to all of you for helping me learn so much. As well as introducing me to Meyer lemons, Concorde grapes and Seckel pears, ingredients I will no doubt spend the rest of my life trying to experience first hand, amongst other things, too many to mention here, I’ve got over a few hangups I had about American-isms (and Canadian-isms if there is such a thing) such as ‘canning’. We are of course divided by a common language and as the only Brit taking part, I hope that you’ve likewise picked up some of the flavour of our approach to ‘bottling’ here in the UK. – Love G x
BLACK CHILLI JAM – WHOAH!
Sunday October 17th 2010, 9:58 am
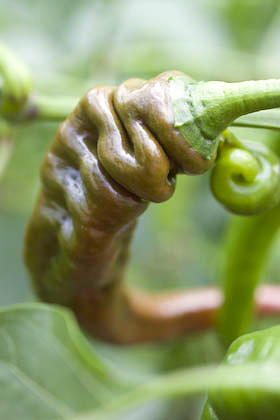
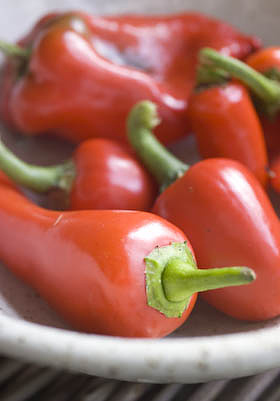
Month ten Tigress’s can jam canning challenge and for October the ingredient chosen by Kaela at Local Kitchen is chili peppers and all things capsicum. I admit, when the October ingredient was revealed, I wasn’t a gal who could tell a jalepeno from a habanero, but another month, another brilliant opportunity to explore and find out what chillis are all about and to recognise what’s hot and what’s not. As luck will have it, I didn’t have to go very far from home to do my research as growing chillis and peppers seems to be a very popular thing these days, so several friends right on my doorstep have provided the raw materials. With a greenhouse or polytunnel at your disposal, capsicums are a seemingly easy crop to cultivate. You can also grow chillis as potted plants on a windowsill.
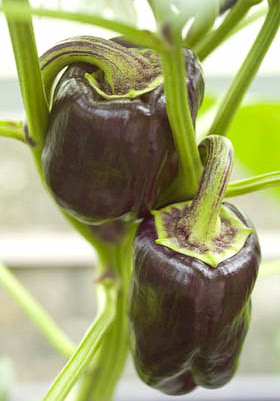
As is always the way each month, I read every recipe I could find for inspiration. With its orangy-red transparency flecked through with tiny pieces of red pepper, chilli jam holds a dazzling attraction for me, but as Morgy, next door, had given me a big bowl full of black grapes, from the vine that scrambles over the front of his rustic shed abode, I decided to use them to form the main carrying jelly for my hotter ingredients. If you haven’t got a supply of fresh grapes you could extract the juice from apples instead or I imagine that bought grape juice would work too.
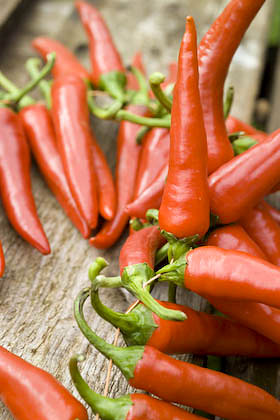
The other main ingredients came for free as well; sweet red peppers plus a purple one from my friend Shelley’s greenhouse, cayenne chilli peppers grown in the Taurus market garden. Cayenne peppers are only moderately hot, you could tell this as some little creature had been eating them in the greenhouse, chewing away at the stem end and leaving the pointy ends intact. I guess this to be a mouse called Miguel, wearing a sombrero and playing maracas. It goes to show that one end of the chilli is hotter than the other and that mice round here are made of stern stuff.
So, after extracting the black juice from the grapes this jam was starting to take a different course from the norm. I remember ‘experiencing’ a sculpture once at Tate Modern by Anish Kapoor. It wasn’t a particularly amazing looking piece, just a box painted black and slightly taller than a person. As you stepped up to a line drawn on the floor and looked within, it suddenly felt as if you were about to fall into a void or abyss and the feeling was so strong and unexpected that it made you recoil and say ‘whoah’ out loud. Anyway, that’s what this chilli jam is like, a sticky homage to that Anish Kapoor work, a jam so black when you peer into its dense glossy richness you have to hang on in case you fall through into an alternative jammy universe.
It’s not so hot it blows your socks off, but you can add more heat if you know that’s what you want. I’ve been eating it on bread with cream cheese and it’s really good. I knew immediately that it would be ideal for adding to meat stock to make a fruity gravy with a chilli kick. This is a strange instinctive feeling to have as a non meat eater of many years standing, so I have given jars away to a couple of carnivore friends to try. I’ve already had a request for 6 more jars
BLACK GRAPE CHILLI JAM
Makes approx 6 250g (1/4 pint) jars
2Kg (4.4 lbs) black grapes, whole with stems removed
350ml (1 1/2 cups) white wine vinegar
juice of 1 lemon (50ml / 1/4 cup)
1 clove of garlic, peeled and roughly chopped
300g (0.6 lbs) (approx 5) sweet red peppers, de-seeded and roughly chopped
100g (0.2 lbs) (approx 5) cayenne chilli peppers, de-seeded and roughly chopped
1 tsp salt
1Kg ( 2.2 lbs) sugar
1/4-1/2 tsp of dried chilli flakes
Place the grapes in a pan and heat gently till the juice begins to flow. Once there is plenty of juice surrounding the fruit simmer for 20 minutes, stirring from time to time to make sure it doesn’t catch on the bottom of the pan and squashing the fruit with the back of the spoon. Pour the grapes into a jelly bag suspended over a bowl and collect the juice that drips through, leaving it to drip overnight. The next day measure the juice collected. (You can also put the pulp that remains in the jelly bag through a food mill and use the de-seeded grape flesh you collect to add to another preserve.) I collected 700ml (3 cups) of juice but if your amount is different to this adjust the other ingredients accordingly.

Prepare the water bath, jars and seals ready for canning. For more info about how to hot water process, refer to the guide here. Put the peppers, chillis and garlic clove in a food processor with half of the vinegar and blitz it thoroughly to a smooth sauce consistency. Pour into a preserving pan along with the grape juice, lemon juice, salt, remaining vinegar and chilli flakes. (Another way to adjust the heat would be to include some of the fresh seeds from the chilli peppers instead of using dried flakes.) Bring to a simmer and cook through for 10 minutes then remove from the heat to cool slightly.
Add the sugar and stir over a gentle heat until the sugar is completely dissolved, then up the heat and bring to a rolling boil until it reaches setting point and a small dollop on a cold plate quickly forms a skin when you push your finger over the surface (it took me about 20 minutes). Turn off the heat and leave for 10 minutes, then stir to distribute the chilli peppers evenly through the jam. Pour into hot sterilised jars, seal and process for 10 minutes. Remove from the water bath and leave till completely cold before testing the seals and labelling.
As this is a jam with good acidity and sugar levels, it should keep well without processing so long as you follow the usual guidelines regarding care taken sterilising jars. If you do can it you are making doubly certain that your jam will be preserved safely for a year or even longer.

PLUMS EVERY WAY YOU TURN
Thursday September 16th 2010, 10:52 pm

Month nine Tigress’s can jam canning challenge and for September the ingredient chosen by Kate at the Hip Girl’s Guide to Homemaking is stone fruits. It couldn’t have been a better choice for me than this, as where I live is plum country. We even have our own local variety, the Blaisdon plum, that grows just about everywhere and apart from the occasional year when a late frost might have nipped an abundant harvest in the bud, we are usually all drowning in plums by the end of August. As well as Blaisdon trees growing in peoples gardens they grow along hedgerows and overhang onto public footpaths. In the lane that leads up to my house I can count at least 10 trees. The big problem is that not all the fruit will be within arms reach and most will be impossible to harvest no matter how resourceful and well equipped you might be.
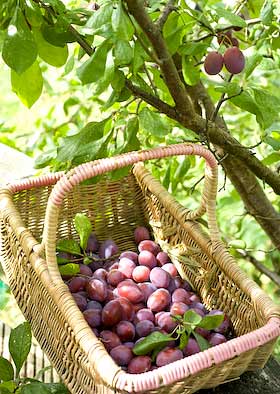
Blaisdons were once a popular variety grown for the jam making trade but became less useful once freezing fruit opened up the market, enabling manufacturers to go further afield and shop around on price. I read somewhere of someone locally with a small orchard of Blaisdons where a railway line once ran along the bottom of the garden, so the freshly picked fruit was loaded straight onto the train that then chugged its way directly to the factory, collecting fruit from others along the way.
Stephen, who lives next door but one from me, has a Blaisdon tree that very conveniently overhangs a raised decking platform in his garden. He said I could help myself to his crop, and so of course I did. This meant my September ingredient has not only been plentiful but also absolutely free. As well as these purple plums I picked some lovely acid yellow ones that grow in the field behind the house. I haven’t a clue what kind they are. And then there are the damsons… I’m not even going to include them here, suffice to say I’ve picked basket loads.

As is always the way when dealing with a glut, you have to act fast and be ready for processing. It is a mad dash to get everything tucked in and put away before the fruit flies decide to set up camp in your kitchen. I wanted to save as many plums as possible to use as ingredients later, so some have been cooked and stoned then packed into containers in the freezer. The freezer has its uses but it fills up fast and I suspect costs an outlandish amount to run. Frozen ingredients can rack up considerable additional hidden costs making my free plums not quite such a great deal. I now prefer to can as much produce as possible. Once in the jar and processed, the fruit is ready-to-go whenever required with no thawing time, you simply pop the seal and run with it.
One of my favourite discoveries since my canning journey began is bottling fruit compotes. These ready-made desserts are then instantly available and the processing means you can use less sugar. This month, as well as plums done and dusted every conceivable way, whole, squashed and pureed, specially for the Can Jam I’ve made a plum compote and filled my favourite vintage 70’s Kilner jars. I love the look of them and think it’s about time Ravenhead Kilner had the imagination to reissue them. Don’t they know bottling is back!

PLUM & BLUEBERRY COMPOTE IN CALVADOS SYRUP
Adapted from a recipe in my favourite book Fancy Pantry (1986) by Helen Witty
For each 1litre (1 quart) jar you will need:
850g (1 3/4lbs) whole plums
125g (1 cup) blueberries, rinsed and drained
3 Tbsp calvados or other good brandy
For the syrup:
275g (1 1/2 cups) sugar
0.5ltr (2 cups) water
Prepare the water bath, jars and seals ready for canning. For more info about how to hot water process, refer to the guide here.
Make the syrup by combining the sugar and water in a pan and stir to dissolve the sugar over a medium heat. Once dissolved turn up the heat and bring to the boil, then simmer uncovered for 5 minutes. Pierce each plum 2 or 3 times with a skewer or tooth pick then gently poach half of the plums for a jar at a time in the simmering syrup for about 3 minutes.
Gently lift the plums out of the syrup and pack them into a hot jar so it is filled to just below half way. Place the blueberries on top, allowing them to fall down into the gaps between the plums and the inside of the jar in a decorative way. Poach the other half of the plums in the same way then fill the jar with them, packing them to leave the appropriate amount of headroom for your type of jar. Pour 3 Tbsp calvados over the plums then top up with syrup.
De-bubble the sides using a small spatula or chopstick, wipe jar rims clean, before sealing and placing in the hot water bath. Process for 25 minutes, remove from the bath, then leave till cold before testing the seals. Label and store.
Scale down for 500ml (1/2pt) jars and process for 20 minutes.

BOTTLING TOMATOES & THE ACIDITY CUSP
Monday August 16th 2010, 1:05 pm
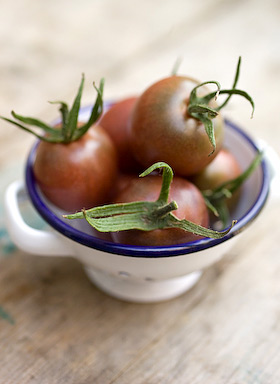
Month eight Tigress’s can jam canning challenge and for August the ingredient chosen by the inspired and inspiring Julia is tomatoes. My relationship with this ubiquitous fruit has been a checkered one. I hated tomatoes as a kid but learnt to tolerate them later on. I do like them as a sauce for pizza, applied with a lightness of touch though. I can now eat cherry tomatoes raw and, like biting into any fruit, appreciate their sweetness so I suppose you could say I’ve made progress.
But it is as objects of beauty that tomatoes especially come into their own. The resurgence of interest in growing heritage varieties has brought all these wonderfully coloured tomatoes to the fore; striped, heart and pear shaped, shaded like a shop display of lipsticks, from gold to chocolate. They are all so fantastically photogenic and worth growing for looks alone.
As an ingredient for canning, they are on the acidity cusp. Tomatoes require special attention for bottling safely using the water processing method or else should be pressure canned. They are only just on the acid side of neutral and acidity can vary for different varieties, so it is necessary to add a little more acidity in the form of lemon juice or citric acid to make sure they stay safely putt. It is important that time spent preserving has a very definite pay off later so it makes sense for me to bottle really useful tomato passata-type sauces for cooking up further down the line into pizza toppings, pasta sauces or as additions to winter casseroles.
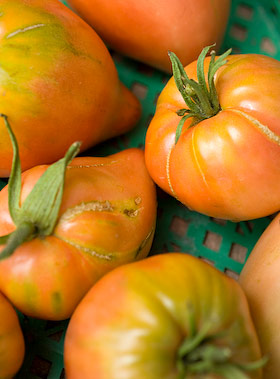
Each year I begin the growing season with high hopes for an extensive range of weird and wonderful tomato varieties. I don’t have a greenhouse so can only grow toms out in the open. We’ve had two consecutive years of blight bringing these plans to a soggy and disappointingly diseased halt, but this year the weather has been kinder. Tinned tomatoes are as cheap as chips, so I don’t think it is really cost effective to bottle tomatoes unless you have your own homegrown supply or you are able to mop up someone elses glut. The plants I have growing in the garden are still some way from the ‘glut’ stage. Thankfully my neighbour Jane has a greenhouse as well as green fingers. She sells her excess garden produce from her garden wall. Last week I picked up four generous punnets of yellow and red tomatoes from the wall and dropped my payment into the honesty box provided.
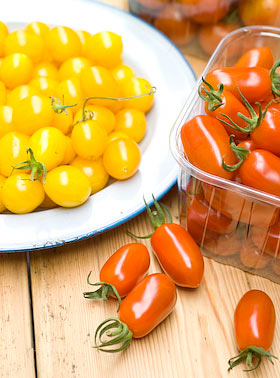
So first a basic tomato sauce. These cherry tomato varieties are as sweet as anything though perhaps not the most ideal kinds for bottling. For sauces, larger fleshy varieties like Roma and San Marzano are good. Skinning so many tiny fruits was definitely out of the question for starters. Tomatoes can be very watery, which means that they will require considerable cooking to reduce, thicken and intensify the flavour, unless some of the liquid is removed first.
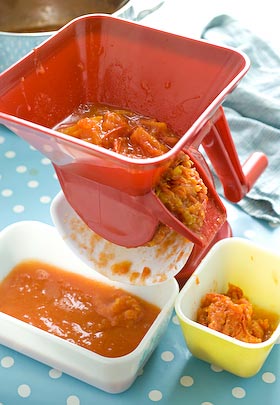
In order to give a fresher flavoured result with less cooking time I began by slitting each fruit and removing the seeds by running my thumb quickly through their middles, collecting the seeds in a sieve placed over a bowl. Any collected juice would come in handy later. After a brief cooking time of 10 minutes the de-seeded tomatoes were then processed using a passata mill, running it through several times to separate the skins from the pulp. The passata mill is a bit of kit I acquired some years ago when dreaming of a bounteous tomato crop that never materialised. The mill has sat unused in its box ever since so this was its first opportunity to prove its worth. I must say that I wasn’t too impressed. Passata-ing the tomatoes was a messy and annoying business (compounded by trying to take photographs at the same time). Tomato juice splattered all over the place and possibly it was my fault, but juice was squirting out the handle side as well! Next time I will most likely use my regular food mill over a bowl, which though still requiring patience would be less messy and more controllable. Depending on the scale of the project, to remove skins and any stray seeds you could simply push the tomatoes through a sieve if you prefer. Still too watery for my liking, I strained the flesh again briefly in a sieve collecting more juice to add to what had been collected earlier. 2.5Kg (5 1/2lbs) of tomatoes resulted in 775g (1 3/4lbs) puree and 750ml (1.3 pts) of juice.
HOW TO BOTTLE TOMATO PUREE
Prepare the water bath, jars and seals ready for bottling (canning). For more info about how to hot water process, refer to the guide here.
Put the pureed tomatoes in a pan and simmer for a short time to reach a consistency that suits you so excess juice has evaporated. If the puree is already thick enough simply bring to boiling point. I added 1 tsp sea salt (a non essential, so add salt to own taste or leave out all together) plus an aditional acidic booster. As a general guide you need to add one of the following to every 500ml (1 pt) tomato puree: 1Tbsp lemon juice or 1/4 tsp citric acid. I used balsamic vinegar instead, adding 2 Tbsp balsamic vinegar per 500ml (1pt) puree.
Place a basil leaf inside each jar against the glass and fill jars with tomato, leaving headspace required for your type of jar. Remove bubbles from sides of jars using a small spatula, wipe rims clean and seal. Process 500ml (1 pt) jars for 35 mins and 1ltr (quart) jars for 45 mins. Remove jars from water bath and leave till cold before testing the seals. Any jars with loose seals will require reprocessing or you can keep them in the fridge for using up within a few days. Remember to label all your jars before storing them.
My tomatoes made 2 x 350g (12oz) jars of sauce plus a bit more that I had with pasta for my dinner that evening.
WHAT TO DO WITH THE JUICE
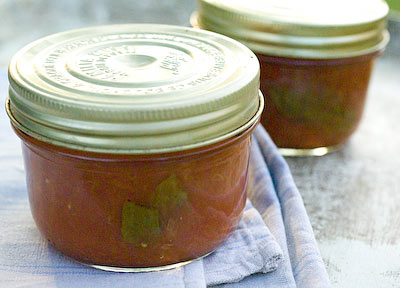
It seemed a shame to waste the lovely sweet juice collected whilst extracting the tomato puree, so I decided to turn it into tomato jelly. You could flavour tomato jelly with fresh ginger and ground coriander or finely chopped chilli. After much deliberation I eventually chose vanilla and white pepper for a jelly with a sweet / savoury crossover. This jelly is delicious on sourdough toast with cream cheese and I used it to fill tiny savoury pastry cases, topped with sour cream or crumbled goats cheese for a really exquisite little mouthful.
As tomato juice is lacking in pectin, a boost in the form of the addition of lemon or apple juice is helpful. Having bottled some whitecurrant juice several weeks earlier to use at times like this, I added some of that for its setting quality. Preserving sugar containing added pectin could also be employed here. Adjust proportions to suit what you have available.
TOMATO, VANILLA AND WHITE PEPPER JELLY
750ml (1.3 pts) tomato juice (a byproduct of making the puree above)
550g (1 1/4lb) sugar
Juice of 1 lemon or 150ml (2/3 cup) whitecurrant juice
1 vanilla pod, split and seeds scraped from inside
1/2 tsp ground white pepper
Prepare the water bath, jars and seals ready for canning. For more info about how to hot water process, refer to the guide here.
Pour the juice through a jelly bag, collecting the juice in a measuring jug. To every 600ml (1 pt) juice add 450g (1 lb sugar). Place all the ingredients in a preserving pan. Stir constantly over low heat until the sugar has dissolved then turn the heat up to bring to a rolling boil. Boil to setting point, (it took me about 10 minutes) when a blob of syrup on a cold plate will formed a skin when you push your finger over the top of it. If using a jam thermometer it will register 220F 105C. Remove the vanilla pod and fill hot jars, leaving the required headroom for their type. De-bubble the sides using a small spatula or chopstick, wipe jar rims clean, before sealing and placing in the hot water bath. Process for 10 minutes, remove from the bath, then leave till cold before testing the seals. Label and store.
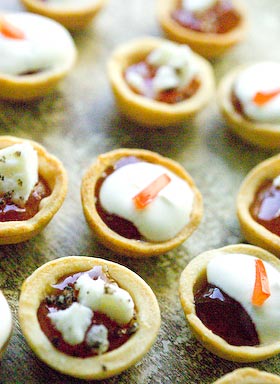
The ratio of sugar to juice is the classic one used when making jellies. This jelly is very nice indeed but I will be tempted to cut down on the amount of sugar when I make this next. It is often safe to keep jams and jellies without hot water processing (canning) them. If you do can them you are making doubly certain that they will be preserved safely for a year or even longer.
SUMMER PICKLED
Tuesday July 20th 2010, 9:56 am
Month seven Tigress’s can jam canning challenge and for July the choice of ingredients was mine, and I choose cucurbits. I began by making a jam to use up some Galia melons I’d bought to photograph, along with some frozen plums that needed using from the freezer before this years harvest requires the space. Anyhow, that’s another story, jam wasn’t what I wanted from the July canjam. The best thing about taking part in this global canning event is the stretch, the discovering anew. I was wanting to do some pickling.

I am a pickle novice, having never been drawn to them, through lack of positive experiences. Pickles for me have been onions served with cheese, English ploughmans-lunch style, Branston pickle, a manufactured brown sweet gloopy relish that has its moments in a cheese butty (sandwich), and pickled beetroot, that was once the only way you ever found this root veg and that comes with a powerful acetic hit. I do have one recollection of my friend Mary eating pickled umeboshi plums to ward off sea sickness when island hopping in Greece, they seemed pretty disgusting but did work. Later in life the pickled ginger with sushi element crept into my middle class lifestyle. That’s it, the full extent of my pickling life …. so far.
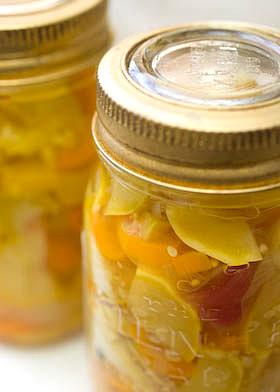
I’ve read loads of recipes and am intrigued by what is called in the US ‘Bread and Butter’ pickle. It obviously doesn’t mean these are included as ingredients but does it mean that it is meant to be eaten on bread and butter? I assumed this to be so until a google search ‘what does bread and butter pickle mean?’ pointed out another alternative. Something that is your ‘bread and butter’ is your main form of income, so bread and butter pickle could be the breadwinner of the pantry, your stalwart pickle, a good all rounder that you can’t do without. Anymore ideas, please let me know. I ended up making up a recipe based on the many I’d read. I think my summer squash pickle is more or less a bread and butter pickle, made with summer squash instead of cucumbers.
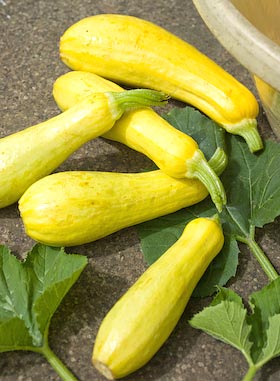
Luckily, this week in the Taurus market garden, the first summer squashes are ready to harvest. Some Early Prolific straightneck squashes provided the perfect starting point for my foray into pickling. This yellow squash is lovely eaten raw and has an excellent flavour. I decided to go for colour, adding plump purple scallions and orange sweet peppers into the mix. As often happens, the colours change during preparation, in particular the purple onions lost their hue, but I still ended up with a beautifully coloured pickle with a summery vibe.
If you, like me, have never really tried pickles, MAKE THIS ONE!!!! It is just fantastic. I only made it 2 days ago and even without the usual month mellowing off period, it tastes amazing. I haven’t a clue what you serve it with, but straight from the jar with a fork is working for me. This was just what I needed to turn me into a pickle fiend.

SUMMER SQUASH PICKLE
Makes 6 x 500ml (1pint) jars
1.5Kg ( 3 1/4lbs) summer squash courgettes or small zucchini
400g (14 oz) onions
300g (11oz) sweet peppers, 2-3 peppers
200g (7 oz) salt
1 ltr (1 3/4 pint) white wine vinegar
250ml (1/2 pt) water
450g (1lb) sugar
1 1/2 tsp celery seed
2 Tbsp mustard seed
1 tsp ground cinnamon
1 tsp turmeric
6 small dried red chillies
1 tsp black peppercorns
Top and tail the squash and cut into uniform sized slices, so they are about .5cm (1/4 in) thick. Slice the onions and deseed and slice the peppers. Place all the vegetables in a glass bowl and sprinkle with the salt, turning them all over so the salt is evenly distributed. Cover the bowl and leave for 12-24 hours. Drain off the liquid that is drawn from the veg, rinsing and draining thoroughly several times to remove as much salt as possible, finally leaving to drain.
Prepare the water bath, jars and seals ready for canning. For more info about how to hot water process, refer to the guide here. Place the vinegar, water, sugar and spices in a pan and bring to a simmer, stirring to dissolve the sugar. Simmer for 5 minutes then add the vegetables. Bring back to the boil and simmer for 5 minutes. Pack the vegetables into hot sterilised jars, filling them to leave required headroom, then top up with the vinegar, distributing the seeds evenly amongst the jars. Seal and process the jars for 10 minutes. Pickles always improve on keeping for at least a month before opening, if you can wait that long.
Pickles have a high acid content so can often be made without hot water processing (canning) them. If you can them you are making doubly certain that they will be preserved safely for a year or more.

GOT MY HEAD STUCK IN A RUMTOPF
Tuesday July 13th 2010, 9:57 pm
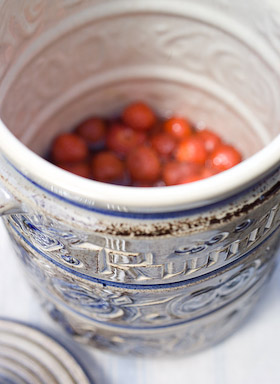
Tigress got the ball rolling back in June when she wrote about her plans to start a rumtopf using her new-fandagly fermenting crock. I don’t think I’m the only one she inspired to rumtopf-along with her, but first I needed a suitable jar. The only pots I’ve seen for making rumtopf have always struck me as hideous; big bulbous lumpy jars illustrated with fruits and the word ‘rumtopf’ etched on the front, the recipe is right there on the jar. A fermenting crock would be a very cool to use, but as they are hard to find and when found cost in the region of £80, one of them was way out of my league. I kept my eye on Ebay and eventually found a jar that I could live with. You can make do with a tall clip-top preserving jar instead if you like but I’m enjoying making my rumtopf in its own purpose designed container.
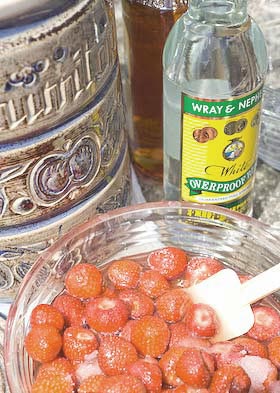
So the jar eventually arrived and it is definitely vintage 70’s. I peered inside and caught a glorious wiff. The jar was not only vintage but had been used before. I knew this as the lightly crazed inside had soaked up previous alcohol and fruit flavours. It smelt fabulous, fruity spirit with a hint of lovage! I couldn’t stop sniffing and shoving my head further inside to soak up the aroma. The jar is about head size, you could effortlessly slip your head inside whilst becoming mesmerised by this magical scent and the desire for more, but slipping it out again may not have been quite so easy. I stopped short of ending up in casualty with a rumtopf on my head. That would have been ridiculous but, come to think of it, would have ensured a mention in the Forest Review.
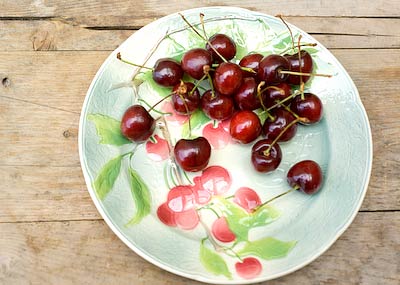
So what is a rumtopf? It is a way of preserving fruit in alcohol. You start it June – July time, add different fruits in layers as they come into season, throughout the summer and autumn, along with some sugar and enough rum or brandy to keep it submerged, and when it is full, about 6 – 8 weeks before Christmas, you then leave it till ready to devour at Christmas time. The contents can be decanted into kilner jars to give as gifts, the fruit can be eaten with cream or ice cream and the alcohol, which I understand is deceivingly dangerous, can be drunk as a liqueur or added to sparkling wine.
Most fruits are suitable with just a few exceptions; melon is too watery, the skins of blueberries and gooseberries go hard, bananas turn to mush, citrus fruits and rhubarb are a no-no. Traditionally you start with the first strawberries of the year, any amount between 250g – 750g plus half its weight in sugar. Remove the stalks and leave the fruit and sugar in a glass dish to marinate overnight and help release the juices before decanting it into the rumtopf jar. Pour rum or brandy over it until it is completely submerged, then find a plate or saucer that will fit inside the jar and push it under the alcohol so that the fruit can’t bob up to the top. I have read that the alcohol should be at least 54% proof and as spirits on general sale are usually around the 40% mark I had to seek out some overproof stuff. Asda sells an overproof white rum at 63%, so I mixed it, two thirds overproof to one third normal dark rum to get somewhere near the 54%, make the rum go further and give it a darker colour. I think this may be a mere detail and am sure that most people don’t go to so much trouble.
You continue to add more fruity layers as they appear; raspberries, cherries, nectarines, peaches, pears, plums, apricots and blackberries. Use any amount of fruit you have, adding half its weight in sugar each time and making sure to add more alcohol when needed to keep it covered. Cover the top of the jar with clingfilm and put the lid on top of that then leave it in a cool place out of the way to do its thing. If using a clear glass preserving jar, keep in a dark place as well. I’m up to my third layer of fruit so far but just can’t stop myself having a sniff everytime I walk by the jar.
LOST IN TRANSLATION
Friday January 22nd 2010, 6:15 pm
When I was a kid, my friends aunt, who was some sort of food scientist, told me that if you looked at an apple with a bad patch on it, under a microscope, you would see that the badness goes far beyond the brown bit, like spreading mycelium or the roots of a plant. This information was told as a warning, to not think it enough to just cut away the bad part and eat the rest, as what lurks beneath unseen might kill you! As I say, I am recalling a childhood memory here to dramatic effect.
Needless to say, I have always remembered this advice yet always chosen to ignore it. I was brought up to be made of sterner stuff. I follow a scale of food offness of my own design and ‘it hasn’t done me any harm’. I know that there are others whose standards in this regard are much higher than mine and just in case you are by now doubting my credentials and casting aspersions on my forthcoming artisan preserve venture, I do have an official food hygiene certificate.
For 2010, I, along with around 130 others, am taking part in Tigress’ Can Jam Challenge, an idea devised by fellow US based blogger tigressinajam, (see also tigressinapickle). The idea, to choose a different seasonal ingredient each month that can be canned. You can read the challenge outline here. It is all about ‘canning’. In the UK we don’t ‘can’ anyway, we ‘bottle’ and even that is a niche activity. Bottling, in case you don’t know, is a way of preserving food in special glass jars by employing either a hot water bath on the cooker hob or an oven method so the foodstuff is rendered sterile and will thus store in your larder for ever more. Bottling was once popular in the UK, especially during the wartime ‘make do and mend’ era. It went right out of fashion with the advent of the freezer but now seems to be making a come back with the move back to home grown fruit and veg and other eco considerations. As I am keen to know all about it, even though I am generally of the ‘scrape any mould off the top then eat the jam beneath’ school of thought, I intend to embrace the challenge and run with it.
As regular readers will already know, I am a passionate jam, chutney and pickle maker, all activities which in the US seem to come under the canning umbrella but that here somehow don’t. Basically putting your preserves through this canning process will make doubly certain that they will keep and not become contaminated. Canning requires the use of special Kilner jars (or Mason Ball jars in the US) which need new seals every time you use them. These traditional style jars, invented in 1842, have recently been reintroduced and I sell them in my shop. Unlike in the US, you can’t buy complete canning kits here with all the bits and bobs you need to get started, but you can buy some of the equipment, the rest you have to improvise. Anyhow, as the year unfolds I will be able to write about what I discover.
In order to meet the criteria of the challenge, it does mean that any preserves I make must be processed in a hot water bath, or at least I must say they are! Have you lot in the States not heard of the cellophane circle and elastic band method of sealing your jam?
January has a citrus theme. It must be wonderful to pick your ingredient straight from the tree, as some of the other challenge participants are able to do. I had to buy my fruit as none is grown here. Here is my first recipe for the 2010 Tigress’ Can Jam Challenge.
LEMON, FIG & LAVENDER MARMALADE
I am a massive fan of traditional bitter seville orange marmalade and this marmalade is just as tangy and fabulous. The lavender note adds an unusual flavour but isn’t at all over powering or over flowery. A few words first on ingredients; choose lemons that are organic where possible and unwaxed always, for this preserve. I had trouble finding dried figs without a load of gloop surrounding them, as they seem to be sold like this in supermarkets for ready-eating. Eventually I found some really nice dried Lerida figs in the health food shop. Dried lavender can vary a lot. I sell Snowshill lavender, grown in Worcestershire, sold by the scoopful in my shop and it is highly scented and natural. If you can’t find one with a good fresh scent, then please just leave it out; if you use it, it wont bring anything useful to the party.
Makes 1.3kg (3lb)
5 unwaxed lemons, approx 600g (1lb 5oz) plus 1 other lemon
400g (14oz) dried figs
25g (1oz) dried lavender
1kg (2lbs 4oz) sugar
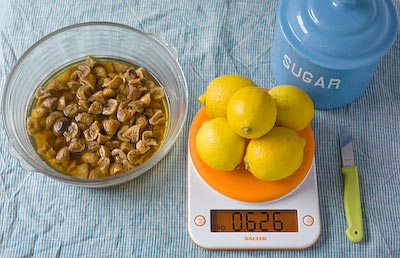
Heat the oven to 180C/ 350F/ Mk 4. Wash the 5 lemons and place in a lidded heat-proof casserole with 650ml (1 1/8pts) water, so the fruits just begin to float. Bring to a simmer, put the lid on and place in the oven to slow cook for 2 1/2 to 3 hours.
Remove the stalks from the figs and chop them into 1cm (3/8in) sized pieces (or smaller or bigger as you like, remembering they swell up as they reconstitute). Place in a preserving pan with 650ml (1 1/8pts) of water and leave them to soak while the lemons are poaching.
Remove the casserole from the oven and lift the lemons carefully with a slotted spoon out of the liquid into a sieve placed over a bowl to catch any drips. Leave them till cool enough to handle then cut each lemon in half and scoop out all the innards, collecting all the pulp and pips in a piece of muslin. Tie the muslin into a bundle and add to the preserving pan along with the poaching liquid and any liquid collected in the bowl. Chop the lemon skins finely into strips and keep on one side. Tie the dried lavender in another piece of muslin to make a bundle and add that also to the pan. Bring to the boil and simmer for 20 minutes.

Take off the heat. Remove the pulp and pip bundle and add the chopped lemon peel as well as the juice from the remaining lemon, passing it through a sieve to remove any pips if necessary. Add the warmed sugar and stir until completely dissolved then heat, bringing the pans contents to a rolling boil and test for a set after about 10 minutes and every 3-5minutes after that until setting point is reached. If you haven’t ever done this before this means that a blob of the syrup on a cold plate will readily form a skin that wrinkles when you push your finger across it. Take the pan off the heat whilst testing.
Turn off the heat, remove the lavender bundle and leave the jam to rest for 15 minutes then stir to distribute the pieces evenly before pouring into hot, clean, sterilised jars. Seal with either waxed paper discs and jam pot lids or the bottle seals and screw tops if intending to hot water process, in which case place the jars in the water bath and process for 10 minutes. For more info about how to hot water process your preserves, refer to the guide here. Leave your jars until cold and don’t forget to label and date them.
