BLAISDON PLUM & LAVENDER JAM
Thursday August 04th 2011, 4:04 pm

Just drove up the road to my house and the road side is lined with windfall plums, like a guard of honor greeting me back home. The plum thing round here is just about to kick off and I want to be ready to make the most of this abundant harvest. It’s on the doorstep and comes for free. I have written about Blaisdons, our local plum variety before and last year bottled them, see here . I also bottled squashed plums very simply, stoned and cooked in a light syrup. They were delicious and kept me in dessert for several months with custard, yogurt or cake. I need more of them alright, the larder needs to be well-stocked to take me through the winter.
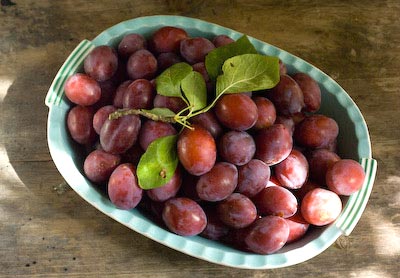
So to ease my way into the season I thought I’d start with a jam. I generally find plum jam quite uninspiring and one dimensional, so this jam called for the addition of careful thought to really make it sing. As I said on Facebook yesterday, good jam does not come from throwing everything in a pan and boiling like billio. That’s just stewing fruit and you end up with jars of sweet pink mush that somehow remain in the larder for years and that you are unable to ever get rid of. I want to make jam that is so fantastic that you quickly run out and vow you’ll make more next year. I like to macerate the fruit to draw out the juice and the fresh flavours and this method suits my way of life really well. It means you can begin to process your newly picked fruit at it’s freshest without having to get the jars and all the other paraphernalia ready. It gives you a day or two’s grace to get your head round the task in hand. You do need lots of bowls and in my kitchen and sitting room table-top space is often at a premium as bowls of fruit covered with cling film wait their turn, all topped and labeled with post it notes.
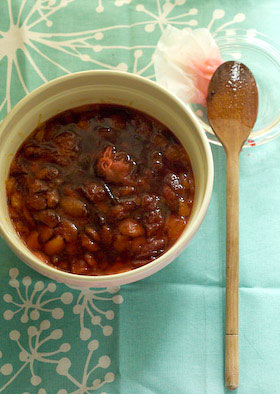
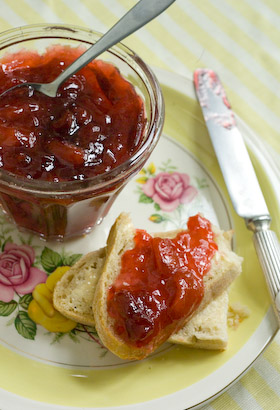
I mentioned in my last post that using lavender as a flavouring requires a light touch. It needs to be just present so it’s hard to put your finger on just what the flavouring is, to really work. This jam is delicious and is a brilliant colour too. The cooking time is kept to a minimum without too much sugar, so the plums have a tart edge to them, which any good jam should have in my opinion. I used lavender recently harvested from the garden, so though dry is also very fresh. Blaisdon plums are a cling-stone plum, so you either remove the stones after cooking them, filching them out one by one, or you cut the flesh from the stone. Some of my plums were windfalls so I needed to cut off any bruised and manky bits, so the second method, though time consuming, worked well in this instance. I have no doubt that as the season progresses, stone filching will become tedious. Right now I’m just loving the thrill of anticipation. Blaisdons – bring them on!
BLAISDON PLUM & LAVENDER JAM
Makes 1.125 kg (2lbs 4oz)
1.2Kg ( 2lb 8oz) plums or 1kg (2lb 4oz) when stoned
750g ( 1lb 12oz) sugar
juice of 1 lemon
1 Tbsp dried lavender
Chop the plums into quarters and remove the stones. Place the fruit in a bowl layered with the sugar, add the lemon juice and push the lavender, tied in a piece of muslin, down into the fruit. Cover and leave overnight to macerate.
Next day, pour the contents of the bowl into a pan and heat it through stirring until the sugar is completely dissolved. Bring to a simmer then remove from the heat, pour back into the bowl, push a piece of greaseproof paper down onto the surface of the bowl’s contents, then cover and leave to macerate for anything between 3 – 24 hours, whatever fits into your schedule.
If you plan to can or water process your jam, prepare your jars and seals, otherwise make sure your jam jars and lids are clean and hot by placing them in a warm oven for 20 minutes. Remove the lavender bundle, then with a slotted spoon remove the plum pieces from the syrup. There is no need to be too painstaking about this, it just means that your finished jam will have some nice chunks of plum flesh instead of it all being cooked into an homogenised mass!
Place the remaining syrup in a preserving pan, heat to boiling then maintain at a rolling boil until it reaches setting point. This took me about 10 minutes to achieve. Add the plum pieces and bring back to the boil and check for setting point again. Pour the jam into hot jars and seal. If you are canning your jam, process for 10 minutes then remove from the canner. Leave till cold, then test the seals. Label and date your jam.
THE START OF A BERRY ENGLISH SUMMER
Sunday June 20th 2010, 12:02 am
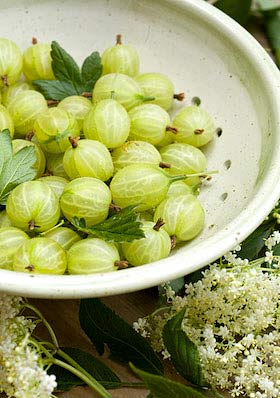
Month six Tigress’s can jam canning challenge and for June the choice of ingredients is positively bountiful with anything ending in ‘..erries’. As if that wasn’t enough, after other can jammers queried what that meant, the category was widened even further to include anything ending in ‘..urrants’ as well. I am just hoping that we haven’t covered the whole soft fruit spectrum in one fell swoop. With summer officially about to begin, at last the preserving year is shifting up a gear and a dearth is just starting to resemble a glut. After last months project, my rhubarb ketchup, that was a success but in a brown kind of way, I’ve been yearning for something colourful and British, something that sings a song of summer, con brio, whilst at the same time celebrating the beginning of the soft fruit season. So gooseberries it is.
I have cooked with gooseberries before but not to any great extent. Gooseberries are another fruit that seem to grow easily and yet are underused and under appreciated, an old fashioned country berry with an unfashionable reputation. This is another one of those puzzling fruits that is everywhere but at the same time hard to find. You either have to grow your own or know someone else who does. I’ve recently planted a few bushes on my newly acquired allotment, and though there wont be any crops to harvest this year, hopefully they will bear fruit-a-plenty in the years ahead. Varieties come with down to earth names, like Leveller, Invicta and Pax, very much old-school allotment sounding. More recently food writers have started to feature gooseberries, so perhaps they are on the cusp of a renaissance.
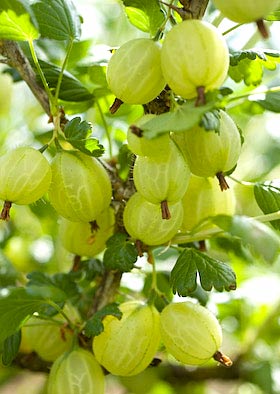
For the canjam I have chosen to make a gooseberry and elderflower jelly. There is something so pure and delicious looking about jellies and in this instance the end colour, though a glorious pinkish amber is nothing like the fresh green that the fruit starts out as. I have read that if you cook gooseberries in a copper pan they retain their green colour, but as I have no direct experience of this, I am loath to pass on the information parrot fashion. In my stainless steel jam pan, green gooseberries tend to turn an unappealing khaki colour as they cook but once the extracted juice and sugar begin to work together, an altogether more magical hue develops. Elderflowers make a classic partnership with gooseberries and should be ready for picking at the same time, though the flowers are much more fleeting. Here, in the Forest of Dean, the flowers have been in bloom for about two weeks but the berries are only just starting to ripen. I’ve used fresh elderflowers but you could use elderflower cordial instead if the only flowers to hand are past their best.
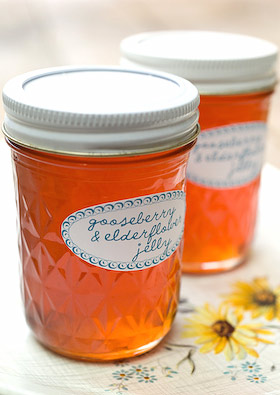
GOOSEBERRY AND ELDERFLOWER JELLY
Makes approx 1.3kg (3lbs)
2Kg (4lbs 8oz) gooseberries, rinsed and drained
approx 20 freshly picked elderflower heads
1 lemon
sugar
There’s no need to top and tail the fruit. Place fruit in a pan with 1 litre (1 3/4 pints) of water. Add the elderflowers and heat the pan, bringing to a simmer, then cook gently until the berries are soft and start to burst. Pour into a jelly bag (that has been sterilised by boiling for 5 minutes beforehand) suspended over a bowl, add the juice of the lemon and leave to drip overnight to collect all the juice. Discard the pulp remaining in the bag and measure the juice. Pour into a preserving pan and add 450g (1lb) of sugar to every 600ml (1 pint) of juice.
Prepare the water bath, jars and seals ready for canning. For more info about how to hot water process, refer to the guide here. Stir the syrup over a low heat until the sugar is completely dissolved then turn up the heat and boil rapidly to reach setting point. To test for a set, drip some syrup onto a cold plate and see if it quickly forms a skin that will wrinkle when you push your finger across the surface. Alternatively, use a jam thermometer and when it shows 105C (220F) you know setting point has been reached. (I usually employ both methods at the same time to be on the safe side!) Pour into the jars leaving required headroom for your type of jars, seal and hot water process for 10 minutes. Remove the jars from the water bath and leave them till completely cold before testing the seals are vacuum fixed. Label and store.
You can omit hot water processing if you wish as a jelly of this type should store well without, but processing makes it extra safe and will mean the jelly should keep for a year or longer.


