FESTIVE APRICOTS, CRANBERRIES & BOOZE
Sunday December 05th 2010, 1:06 am
Month twelve, the very last Tigress’s can jam canning challenge and for December the ingredient chosen by the wonderous Tigress herself, who set the whole ball rolling in the first place, is dried fruits in all their jewelled and seasonal glory. Must admit, apart from chutneys, don’t think I’ve ever used dried fruits in my preserves so this is new for me.
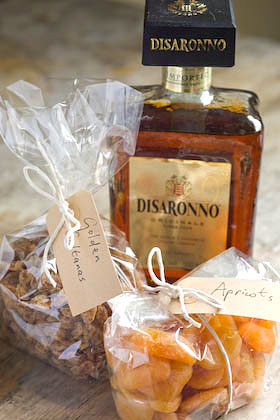
Yet again Fancy Pantry by Helen Witty, my all time favourite book, provided the inspiration. Her dried apricot & amaretto conserve sounded just perfect to meet the criteria of this months challenge, though I’m not a fan of adding alcohol to my jams. Well I say I’m not, that should be, I wasn’t. Over the last year I have discovered how a little splash of kirsch takes sour cherries from quite nice to amazing. Likewise a spoonful of calvados added to apple butter, or some Cointreau poured over squashed plums can take mundane to magnificent, adding something not necessarily consciously alcoholic but that somehow completes the balance of flavours in a wonderful way.
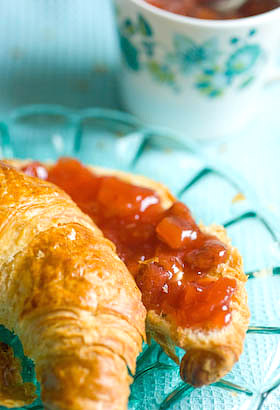
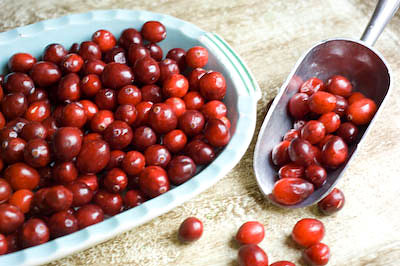
This did mean I had to shell out for a bottle of Amaretto, the down side of acquiring a stock of liqueurs, they don’t come cheap. Thankfully, this jam turned out even better than expected, really special in fact, so now I’ve got plenty of the ingredients left to make more of the same to give as presents. I added fresh cranberries to my jam which are great not only for their flavour and seasonality but for the lovely colour they bring. After I’d made the jam and started to think what it would go well with, ‘warm croissants’ absolutely shouted out to me.
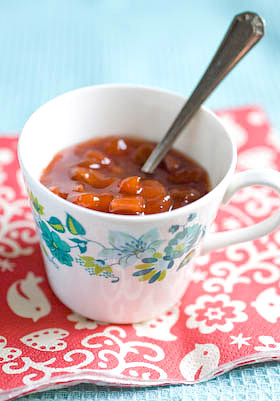
I have opted for bright orange sulphured apricots over the darker unsulphured variety for my jam because I can’t bear the thought of starting out with dark brown fruit. It doesn’t bode well in my mind, brown fruit can only get doomier as it cooks, and for a special holiday preserve you want to push the boat out a bit. This preserve could take even less sugar that I used. I did a sugar test on it using a refractrometer and found that it contained 57%. For a preserve to store well without canning, it should be nearer to 65%, so if you aren’t into canning and want to be sure this jam will store in the pantry for any length of time without worrying it will go mouldy, I’d advise you to up the sugar content from 450g to 600g, but taste wise it doesn’t benefit from it. The added alcohol will also help to act as a preservative. This jam tastes so good it most likely wont hang around long enough anyway. If you are not into canning, this should make it obvious why canning is so brilliant. You can preserve using less sugar so the overriding flavour of your jam is the fruit it contains, not sugar. Preaching over, here’s the recipe.
APRICOT, CRANBERRY AND AMARETTO JAM
Makes approx 1.4Kg (3 lbs) jam
225g (8oz) dried apricots
150g (5 1/2oz) golden sultanas or raisins
0.90 ltr (3 1/2 cups) water
225g (8oz) fresh cranberries
1 1/2 tsp grated orange zest
0.25ltr (1 cup) freshly squeezed orange juice
2Tbs freshly squeezed lemon juice
450g (3 cups) sugar
3Tbsp Amaretto liqueur
Chop the apricots into small evenly-shaped pieces. Place them in a bowl with the sultanas and pour over 0.75ltr (3 cups) water. Leave to soak overnight.
Next day, prepare the water bath, jars and seals ready for canning. For more info about how to hot water process, refer to the guide here. Place the cranberries in a pan with the remaining water and simmer gently for 15-20 minutes until the fruits have popped and are cooked through. Leave to cool slightly, then add all of the remaining ingredients (including soaking liquid) except the Amaretto.
Stir to dissolve the sugar and once it has, turn up the heat to a rolling boil and bring the jam to setting point (took me about 10-15 minutes), that is when a dollop on a cold plate readily forms a skin that wrinkles when you push your finger over the surface. Remove from the heat and leave to cool for a few minutes then stir in the Amaretto. Pour into hot sterilised jars, seal and process for 10 minutes. Remove from the water bath and leave till completely cold before testing the seals and labelling.
IT’S A WRAP
Well that’s it. A whole year of the Tigresscanjam completed and wow, it has been amazing. I intend to write another post soon to round up what I’ve learnt and how it has changed my approach to preserving. Thanks to dearest Tigress for taking the time to not only oversee the challenge and the monthly roundups but for asking me to take part. To think that this experience could have passed me by …. well what can I say, how foolish I would have been without that gentle nudge.
I have found all you other canjammers participating truly inspiring. Thanks to all of you for helping me learn so much. As well as introducing me to Meyer lemons, Concorde grapes and Seckel pears, ingredients I will no doubt spend the rest of my life trying to experience first hand, amongst other things, too many to mention here, I’ve got over a few hangups I had about American-isms (and Canadian-isms if there is such a thing) such as ‘canning’. We are of course divided by a common language and as the only Brit taking part, I hope that you’ve likewise picked up some of the flavour of our approach to ‘bottling’ here in the UK. – Love G x
POACHED QUINCE ON MY PORRIDGE
Tuesday November 16th 2010, 10:36 pm
Month eleven, already the penultimate month of Tigress’s can jam canning challenge and for November the ingredient chosen by the talented artisan preserver Confituras aka blogger Cosmic Cowgirl is apples, pears and quince, a versatile selection of orchard fruits with delicious potential.
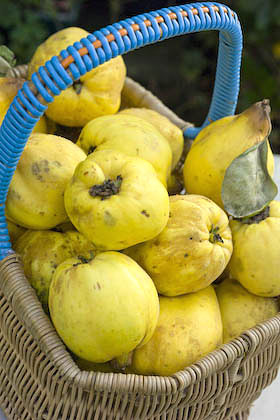
I could find a gazillion uses for each of these, but have chosen luscious quinces for this canjam contribution. A few days ago I used up the last quince of the year. I always vow to bottle plenty and never seem to achieve my ambition. Once this fruit grabs you, you are totally smitten. Considering how fab they are it surprises me that quince aren’t more popular; they are still seen as an unusual fruit. You have to seek them out and may find a supply at a farmers market, otherwise you need your own quince tree or to know someone else who has one. They take at least 5 years to produce fruit by the way if you are thinking of planting one.
They are one of the few fruits that I love so much, I’d pay real money just for a whiff of, never mind a taste of, each year, though this time was lucky enough to find a supply for free when someone kindly advertised quinces up for grabs on the local Freecycle. I moved at the speed of light to get round to that house, believe me. These Freecyclers had 2 trees heaving with fruit, that were so laden they had had to be propped up with stakes and ropes. It gave me the opportunity to see quinces growing on the tree for the first time and to notice what untidy trees they are to produce such exceptional fruits.
Of course, one of quinces magical qualities, apart from the wonderous unmistakable scent, is the way a hard unpalatable fruit turns delicious at the same time turning such a wonderful shade of deep ruby red as it cooks. I’m generally of the mind that long cooking times are of no benefit to ingredients, but quince turns this notion on its head. You need to slow cook ’em and slow cook ’em till they change colour, which can take 3 – 6 hours.
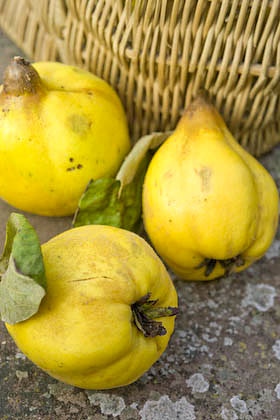
As regards the pantry, I want a supply of quince in spiced vanilla syrup, as straightforward as that. This is when canning makes such perfect sense and in theory allows you to preserve such a fabulous ingredient to last you all year round till the next time, though I haven’t managed that thus far. Preserving enough quince in jars is my ambition. A favourite way to serve them, on oatmeal porridge with Greek yogurt for breakfast. As simple as that. To prepare, they are quite hard work to peel and cut, so don’t expect elegant slices.
POACHED QUINCE IN VANILLA SYRUP
To fill 2 x 500ml (1 pint) jars
6 – 8 quinces
1 lemon
600ml (2 1/2 cups) water
250g (1 cup) sugar
1 cinnamon stick
1 vanilla pod
a few cloves
Scrub the quinces to remove the fuzzy coating. Peel, quarter and core the fruit. Cut each quince quarter into 2 or 3 slices, depending on the size of the fruit and immediately drop them into a bowl of acidulated water (water with some lemon juice added, as they discolour very quickly if you don’t).
You can put peel and cores in a pan, cover with water and simmer for 4 hours, topping up with more water if necessary, then pour into a jelly bag, collecting the juice that drips through overnight. You can use this juice to top up the syrup if you find you need more to fill your jars and use what is left to make quince jelly. I also put the pulp left in the jelly bag through a food mill to make a quince puree, so nothing goes to waste.
Preheat the oven to 110 C (225 F, Mk 1/4). Make a sugar syrup by heating the water and sugar together, stirring until the sugar has dissolved. Drain and place the quince slices in a large ovenproof casserole, adding the cinnamon stick, cloves, a few pieces of lemon peel and the vanilla pod, after splitting it lengthways and scraping and the seeds out from the middle. Pour the syrup over the fruit and spices. Put the casserole on the hob and bring to the boil then remove from heat. Place a lid on the casserole and cook in the oven for 5 – 6 hours.
Another way to cook the quinces is to use a slow cooker. Place the quince, spices and hot sugar syrup in the slow cooker casserole and cook on high for the first hour, then turn down to low and cook for 6 – 8 hours, by which time the fruit will have turned a deep red wine colour.
Prepare the water bath, jars and seals ready for canning. For more info about how to hot water process, refer to the guide here.
Fill hot jars with quince slices, distributing the spices and vanilla pod amongst the jars and top up with syrup, leaving the required headspace for your type of jars. De-bubble, to remove air pockets, wipe the jar rims clean then seal and process for 15 minutes. Remove from the water bath and leave till completely cold before testing the seals and labelling.

OATMEAL PORRIDGE
For 2 people
100g (1/2 cup) organic medium oatmeal
650ml (3 1/4 cups) water
a pinch of salt
Toast the oatmeal in a pan for a few minutes, stirring with a wooden spoon until you begin to smell the toasted oat aroma. Add the water and salt and bring to a simmer, then cook for 20-30 minutes until thickened as you like it and cooked through, adding more water if necessary. That’s all there is too it!
STORING BRAMLEYS & APPLE GINGERBREAD
Sunday November 14th 2010, 2:04 pm
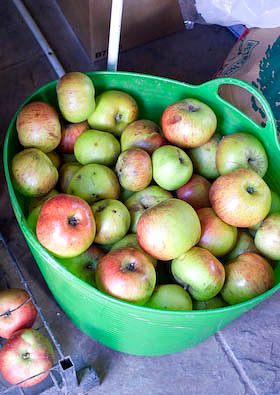
Bramley Seedling apples are one of the most popular apples grown for cooking in the UK. They are an apple that stores well; if kept in the right conditions they should keep for 6 or 7 months. Even so, I will still be using some to make apple sauce, pie fillings and apple butter, processed in jars to stock the pantry. It is just really convenient to have some jars already to go.
If you have some Bramleys you want to store, choose the best unblemished fruit for longer storage and use up any bruised fruit first. It is usually a good idea to wrap fruits separately in tissue or newspaper, but there is no need to do this with Bramleys, simply arrange them so they aren’t touching each other by placing them in shallow drawers or crates. A dark cool frost-free shed, garage or cellar is the ideal place, preferably with an optimum temperature of 6 – 7 degrees C. Make sure to check them every few weeks and weed out any bad apples before they have any influence on the rest.

Here is another easy recipe that uses more of the same apple puree I made for the apple cake recipe posted yesterday. I’m very partial to cake recipes where the butter is either rubbed into the mixture or melted. Even though I have the help of my trusty vintage Kenwood Chef, I for some reason avoid the creaming the butter and sugar together thing whenever I can. Anyhow, this apple gingerbread cake is perfect for serving in the afternoon with a cup of tea and can be rustled together as quick as a flash if someone decides to call round. I have put a thin layer of ginger icing over the top of the cake. Another alternative that I think could work well would be an apple cider syrup poured over the cake after piercing the top with a skewer. Next time perhaps …
APPLE GINGERBREAD
First make the apple puree:
500g (1lb) bramley or other cooking apples, peeled, cored and roughly chopped
125ml (1/4 cup) of cider or water
125ml (1/4 cup) maple syrup or sugar to taste
Place the apples in a pan with the cider or water and bring to a simmer, then cook gently for around 20 minutes, until the apples become a fluffy puree when stirred with a spoon. Add the maple syrup or sugar to taste. Leave to cool. This will make slightly more than you will need, but it leaves a bit extra to serve with the gingerbread.
175 g (6 oz) plain flour
2tsp baking powder
1tsp ground ginger
3 cloves, 5 black peppercorns and the seeds from 4 cardamons, ground fine in a pestle and mortar
85g (3oz) brown sugar
100g (4oz) golden syrup (is this what is called corn syrup in the US?)
85g (3oz) butter
125g (5oz) apple puree
30g (2 lumps) stem ginger, roughly chopped
1 egg, beaten
Preheat the oven to 180C (350F, Mk 4). Grease a 20cm (8in) square baking tin and line with baking paper. Sift the flour, baking powder and spices into a bowl. Place the brown sugar, syrup and butter in a pan and heat gently till everything is melted and combined then leave to cool. Add the syrup mixture and all the remaining ingredients to the flour and spices in the bowl and mix together to combine. Pour the mixture into the prepared tin and bake for 25 – 30 minutes. Remove from the oven, leave to cool for a short time until firm enough to turn out onto a cooling rack.
To ice the cake:
85g (3oz) icing sugar
1 Tbsp stem ginger syrup
1-2 tsp warm water, if required
Sift the icing sugar and add the syrup. Mix together, adding some water if needed to a spreadable consistency. Pour the icing over the still warm cake and spread evenly with a knife. I like a very fine layer of icing on my cake. If you like a thicker icing then double up on the ingredients and make it less runny so it doesn’t all run off the top of the cake.

CRAB APPLES, SLOES AND JELLY APPLES
Tuesday October 26th 2010, 5:00 pm

There’s still a way to go, but gradually I am conquering the mountain of fruits that inhabits my kitchen. Apples and grapes are still turning up by, what seems like, the shed load but the foraged fruits are becoming less plentiful and day by day more jars are filled and shelf space becomes more scarce. The pantry is now looking well stocked up for the winter and it makes the arduous jobs carried out along the way, fade to a distant memory. Like when I pitted cherries until three in the morning or spent over three hours shelling enough cob nuts to fill the tweeniest jar. Bramble scarred and nettle stung hands are at last healing after all the hedgerow foraging for rosehips and sloes. Why do they always grow surrounded by a duvet of nettles as well as having their own built in barbed protection for extra measure? There is still lots to do but at the same time it feels as if the big preserving season is starting to wind down.
Everything made more recently has become more than one thing; canning apple juice produced a jelly bag full of apple pulp that in turn became apple butter; grapes juiced to make chilli jam likewise transformed into grape butter. Apple and damsons cooked and pureed earlier for cheese stretched to make an additional 3 pots of curd and the remainder, two sheets of fruit leather. The other day I had a fundamental thought – Note to self, remember to eat all this stuff!

Sloe gin is maturing nicely and will be ready to drink by Christmas. Still with a colander full of sloes and a good amount of wild crab apples to use up it seems the ideal opportunity to rustle up a jelly and with a plentiful supply of vanilla pods, left over stock from my recently closed emporium, I decided to add them into the mix at the same time. I reckoned that to be an adequate combination of ingredients for my jelly until a handful of japonica fruits, eight small rock hard unyielding specimens, caught my eye, so they might as well join the party as well.
Japonica are the fruit of the ornamental garden shrub Chaenomeles Japonica and are similar to a quince. They are best used for making jelly and are sometimes referred to as jelly apples. I underestimated just what an impact these few fruits would have on this jelly. As soon as they started to cook in with the other ingredients, my house was filled with that fabulous perfumed quince scent. I added them as an afterthought but even with so few fruits they brought a lovely character along, in a ‘less is more’ way. I’m sure this jelly will taste fab without japonica as well, please feel encouraged to make things up as you go along with the ingredients you have to hand. All three main ingredients are high in pectin, the stuff that helps jam to set, so are perfect for a jelly. The end result has a beautiful colour flecked through with vanilla seeds and tastes heavenly. The quantities stated below are the amounts I had at my disposal and are given as a guide. My recommendation is to use approximately twice as many crab apples as sloes and calculate the amount of sugar based on the amount of juice this produces.
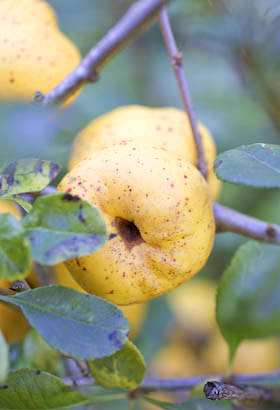
CRAB APPLE, SLOE AND JAPONICA JELLY WITH VANILLA
Makes approx 2.2Kg (5 lbs)
775g (1 3/4lbs) sloes, rinsed and drained
1275g (2 3/4lbs) crab apples, rinsed, drained and roughly chopped
a handful of japonica, approx 8 fruits (optional), rinsed drained and cut into quarters
sugar
1 vanilla pod
Place the fruits in a large pan. Add enough water to barely cover and heat to a simmer. Cook for approximately 30 minutes, until the fruit is cooked through, mashing the fruit with the back of a wooden spoon and giving it a stir now and again. Remove from the heat and pour into a jelly bag suspended over a bowl to collect the juice. Leave overnight to drip through.
Next day measure the juice and pour it into a jam pan. (Rather than waste the fruit pulp from the jelly bag, you can push it through a sieve or food mill to make a puree then use to make a fruit butter.) For every 600ml (2 1/2cups) juice, add 450g (1lb) sugar. Split the vanilla pod lengthways and scrape out the sticky seeds inside with the sharp point of a knife. Add the pod and the seeds to the pan.
Place clean jam jars and lids in the oven to sterilise for 20 minutes at 100C (225F) or alternatively prepare a water bath and jars if you intend to can your jelly. Stir over a low heat to dissolve the sugar, then turn up the heat and bring to a rolling boil, maintaining until setting point is reached (this took me 20 minutes). To test for this, a blob of syrup on a cold plate will form a skin that wrinkles as you draw your finger across the surface. Remove the vanilla pod then pour into hot jars and seal. Alternatively hot water process for 10 minutes. Refer to previous posts and link for more canning information if you are new to this. Leave till completely cold and set then remember to label.

The crab apple and sloe images are from a set of 50 cards of flowering trees and shrubs produced and given away with Will’s cigarettes in 1924.
Finally, a book recommendation: a recent find and now a favourite, Fruits of the Hedgerow and Unusual Garden Fruits by Charlotte Popescu (published 2005, Cavalier Paperbacks) is a really useful and charming book that I have spent many hours reading through for inspiration and it’s a snip on Amazon.
BLACK CHILLI JAM – WHOAH!
Sunday October 17th 2010, 9:58 am
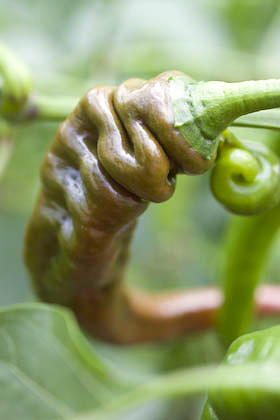
Month ten Tigress’s can jam canning challenge and for October the ingredient chosen by Kaela at Local Kitchen is chili peppers and all things capsicum. I admit, when the October ingredient was revealed, I wasn’t a gal who could tell a jalepeno from a habanero, but another month, another brilliant opportunity to explore and find out what chillis are all about and to recognise what’s hot and what’s not. As luck will have it, I didn’t have to go very far from home to do my research as growing chillis and peppers seems to be a very popular thing these days, so several friends right on my doorstep have provided the raw materials. With a greenhouse or polytunnel at your disposal, capsicums are a seemingly easy crop to cultivate. You can also grow chillis as potted plants on a windowsill.
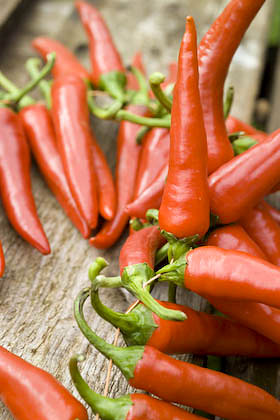
As is always the way each month, I read every recipe I could find for inspiration. With its orangy-red transparency flecked through with tiny pieces of red pepper, chilli jam holds a dazzling attraction for me, but as Morgy, next door, had given me a big bowl full of black grapes, from the vine that scrambles over the front of his rustic shed abode, I decided to use them to form the main carrying jelly for my hotter ingredients. If you haven’t got a supply of fresh grapes you could extract the juice from apples instead or I imagine that bought grape juice would work too.
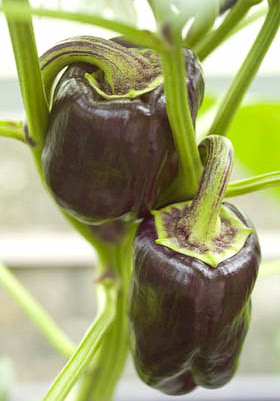
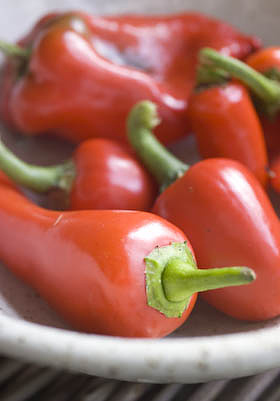
The other main ingredients came for free as well; sweet red peppers plus a purple one from my friend Shelley’s greenhouse, cayenne chilli peppers grown in the Taurus market garden. Cayenne peppers are only moderately hot, you could tell this as some little creature had been eating them in the greenhouse, chewing away at the stem end and leaving the pointy ends intact. I guess this to be a mouse called Miguel, wearing a sombrero and playing maracas. It goes to show that one end of the chilli is hotter than the other and that mice round here are made of stern stuff.
So, after extracting the black juice from the grapes this jam was starting to take a different course from the norm. I remember ‘experiencing’ a sculpture once at Tate Modern by Anish Kapoor. It wasn’t a particularly amazing looking piece, just a box painted black and slightly taller than a person. As you stepped up to a line drawn on the floor and looked within, it suddenly felt as if you were about to fall into a void or abyss and the feeling was so strong and unexpected that it made you recoil and say ‘whoah’ out loud. Anyway, that’s what this chilli jam is like, a sticky homage to that Anish Kapoor work, a jam so black when you peer into its dense glossy richness you have to hang on in case you fall through into an alternative jammy universe.
It’s not so hot it blows your socks off, but you can add more heat if you know that’s what you want. I’ve been eating it on bread with cream cheese and it’s really good. I knew immediately that it would be ideal for adding to meat stock to make a fruity gravy with a chilli kick. This is a strange instinctive feeling to have as a non meat eater of many years standing, so I have given jars away to a couple of carnivore friends to try. I’ve already had a request for 6 more jars
BLACK GRAPE CHILLI JAM
Makes approx 6 250g (1/4 pint) jars
2Kg (4.4 lbs) black grapes, whole with stems removed
350ml (1 1/2 cups) white wine vinegar
juice of 1 lemon (50ml / 1/4 cup)
1 clove of garlic, peeled and roughly chopped
300g (0.6 lbs) (approx 5) sweet red peppers, de-seeded and roughly chopped
100g (0.2 lbs) (approx 5) cayenne chilli peppers, de-seeded and roughly chopped
1 tsp salt
1Kg ( 2.2 lbs) sugar
1/4-1/2 tsp of dried chilli flakes
Place the grapes in a pan and heat gently till the juice begins to flow. Once there is plenty of juice surrounding the fruit simmer for 20 minutes, stirring from time to time to make sure it doesn’t catch on the bottom of the pan and squashing the fruit with the back of the spoon. Pour the grapes into a jelly bag suspended over a bowl and collect the juice that drips through, leaving it to drip overnight. The next day measure the juice collected. (You can also put the pulp that remains in the jelly bag through a food mill and use the de-seeded grape flesh you collect to add to another preserve.) I collected 700ml (3 cups) of juice but if your amount is different to this adjust the other ingredients accordingly.

Prepare the water bath, jars and seals ready for canning. For more info about how to hot water process, refer to the guide here. Put the peppers, chillis and garlic clove in a food processor with half of the vinegar and blitz it thoroughly to a smooth sauce consistency. Pour into a preserving pan along with the grape juice, lemon juice, salt, remaining vinegar and chilli flakes. (Another way to adjust the heat would be to include some of the fresh seeds from the chilli peppers instead of using dried flakes.) Bring to a simmer and cook through for 10 minutes then remove from the heat to cool slightly.
Add the sugar and stir over a gentle heat until the sugar is completely dissolved, then up the heat and bring to a rolling boil until it reaches setting point and a small dollop on a cold plate quickly forms a skin when you push your finger over the surface (it took me about 20 minutes). Turn off the heat and leave for 10 minutes, then stir to distribute the chilli peppers evenly through the jam. Pour into hot sterilised jars, seal and process for 10 minutes. Remove from the water bath and leave till completely cold before testing the seals and labelling.
As this is a jam with good acidity and sugar levels, it should keep well without processing so long as you follow the usual guidelines regarding care taken sterilising jars. If you do can it you are making doubly certain that your jam will be preserved safely for a year or even longer.

A FRUIT CHEESE ON THE WILD SIDE
Thursday October 14th 2010, 11:59 pm

On many afternoons recently, I’ve taken an hour or so out, to go for a walk foraging for ingredients. Some days this gives me a headache, as foraging can be a very intense activity and the level of ‘looking’ becomes a bit over the top. It is a brilliant way of discovering things though, when you look that hard you see things you would otherwise miss and find things you didn’t know where there. Foraging is not without its dangers however. I am forever getting my hair tangled in trees, ripping my legs through brambles and wacking my head on low branches when intently focused on something just out of arms reach. It is just too tantalising to go away from the path when you think there might be something to be found ‘off piste’. The other day I came across some windfall wild crab apples that required that I crouch down and crawl on all fours under low lying branches to gather them up to take home. Going forward wasn’t such a problem but backing out with my basket full and a camera round my neck wasn’t quite so easy.
A couple of weeks earlier I’d been to harvest wild damsons, from a place in the forest I’d found the year before so I already had plenty of damsons at home waiting for the jam kettle. One by one, as you clock another crop, you are able to add them to your own personal ordinance survey map of fruits and berries.
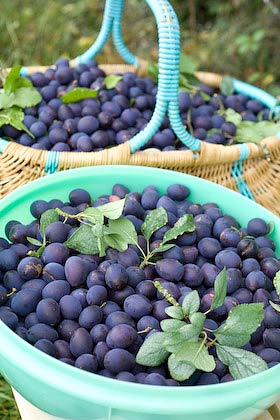
I love damsons anyway and the idea of mixing them with the crab apples, both wild fruits together, harvested on my doorstep, seemed a perfect pairing. Damsons can be quite a pain to stone and wild damsons being smaller means there’s even more stones to contend with. Making a fruit cheese is the perfect solution, as both fruits can be cooked with very little in the way of preparation and then be forced through a food mill to leave just the fruit puree and dispense with peel and pips, cores and stones. Though it does require considerable patience I like using a food mill, but last year I found a vintage attachment for my Kenwood Chef on eBay that does the same thing, so now I’m all automated.
Membrillo, made from quince, is probably the most popular fruit cheese, served with the cheese board at the end of a meal, but damsons and crab apples have a particularly appealing Englishness about them. Fruit cheeses are cooked down until they are really thick and will set solid as they cool. This means they can be turned out and served in slices as opposed to dolloped from a spoon. They need to be contained in jars or pots with slightly sloping sides that are wider at the top so they turn out easily. There are small glass jam jars around made for this purpose but I’m really lucky that Martin, in the pottery at Taurus Crafts made me some special hand-thrown stoneware jam pots, inspired by some vintage French ones I own. It is advised that in order to make it easy to turn out the cheese, you lightly oil the ‘moulds’ using ground nut oil or some glycerine if you just happen to have some handy.

CRAB APPLE AND WILD DAMSON CHEESE
Rinse and drain the crab apples. Chop them roughly and place in a pan. Add enough water to just cover the fruit, bring to the boil and simmer gently for 20-30 minutes, till cooked through. Remove from the heat, leave to cool then push through a fine seive or food mill over a bowl to remove the skins, cores and pips and leave a smooth puree.
Rinse and drain the damsons, place in a pan and add just enough water to barely cover the fruit. Bring to the boil and simmer for 30 minutes, till cooked through and the fruit has burst. Remove from the heat, leave to cool, then push through a sieve or process with a food mill to remove the skins and stones and leave a smooth damson puree.
I combined 800g (1.75lbs) damson puree with 400g (14oz) apple puree, so two thirds damsons to one third apple, but you can change the ratio to suit yourself and the quantities you have available. To every 600g (1.3lbs) fruit add 450g (1lb) sugar. Place the fruit and sugar in a pan and stir over a low heat until the sugar is completely dissolved. Turn up the heat and bring to the boil then simmer, stirring from time to time to be sure it doesn’t catch and burn on the bottom of the pan. Continue to cook until the mixture thickens considerably and when you pull the spoon across the centre it draws a line. This may take and hour or even longer to achieve and it is best to be patient and keep the heat really low under the pan. Pour the mixture into hot sterilised jars that are lightly oiled, cover with greaseproof waxed circles and seal. Leave till set and cold.

FORAGING FOR ROSE HIPS
Tuesday October 12th 2010, 12:32 am

This is such a great time of year to go out foraging. I’m getting so used to collecting my ingredients for free, I can hardly imagine buying any from now on. As well as berries and fruits gathered from the hedgerows when out walking, the house is full of an abundance of other free stuff people have given me that requires attention; apples, pears, grapes, green tomatoes, cucumbers, quinces, all set to become jams, pickles, jellies and fruit butters. It is sometimes quite a facing to deal with it all but the opportunity to stock the pantry is just to good to pass up, so I feel compelled to endeavour to work my way through all these luscious ingredients before they disappear for another year.
It is amazing how much produce is out there going begging and often people with a plentiful supply of fruit have neither the time or inclination to do anything with it so are all too happy to give it away to someone who will make use of it. The more you let it be known that you are there to take these ingredients off others hands, the more stuff seems to turn up. Hence my kitchen smells of apples and quinces and I don’t have an empty basket or colander in the place.
Cordials and syrups are perfect comestibles to make yourself and this is when canning makes such sense. Whilst jams and pickles often have enough acidity, sugar and cooking time to ensure they’ve a good chance of staying safe enough to eat for months on end without water processing them (at least by European standards anyway), cordials must be either frozen or canned to help them keep for longer than a few weeks in the fridge. Smart delis and farm shops sell all sorts of cordials but they are really easy to make yourself. It is the pasturisation part that is the big mystery for most people.

Rosehip syrup is an old traditional recipe, known for being high in vitamin C, so therefore particularly good for you. It does of course contain sugar and is cooked for a while which must surely reduce the amount of vitamin C, but hey, it tastes really good. According to Wild Food by Roger Phillips, rose hips contain four times as much vitamin C as blackcurrant juice and twenty times as much as oranges, so even with a reduction from processing they appear to be stuffed full of goodness. It isn’t always so easy to find a plentiful supply of rosehips all in one go, in which case gather them whenever you see them and keep them in a container in the freezer until you have accrued enough. It is said that rosehips are best after a frost anyway but I find they’ve usually gone over by then so best not take the chance and miss them altogether. Making them into cordial thankfully helps avoid the fiddly and arduous job of removing the seeds from each hip, one by one, as they all come out in the jelly bag. The seeds are what impish schoolboys once used as itching powder in the good old days. I wouldn’t want them down the back of my liberty bodice.
HOW TO MAKE ROSEHIP SYRUP
Makes 1.5ltrs ( 2 1/2 pints)
1Kg (2 lbs) rosehips
2.5ltrs (4 1/2pts) water
450g (1lb) sugar
Wash and drain the rosehips and remove stems and stalks with scissors. Blitz them in a food processor, or put through a mincer, to help smash them up. Put half the water in a pan and bring to the boil, then add the rosehips bring back to the boil and remove from the heat. Leave to macerate for 20 minutes.
Pour into a jelly bag suspended over a bowl to collect the drips and leave for an hour or so. Boil the remaining water and add the pulp from the jelly bag, bringing back to the boil and removing from the heat exactly as before. Leave to macerate for 20 minutes then pour into the jelly bag, collecting the liquid that drains through and adding it to the first amount collected.
Prepare the water bath, jars and seals or bottles ready for canning. For more info about how to hot water process, refer to the guide here.
Pour the combined juice into a pan and boil it until reduced to approximately 900ml (1 1/2 pints). Add the sugar and stir over a low heat until dissolved. Turn up the heat and boil for 5 minutes. Pour into sterilised bottles, seal and process for 5 minutes. Leave till cold before testing the seals, label and store.

PLUMS EVERY WAY YOU TURN
Thursday September 16th 2010, 10:52 pm

Month nine Tigress’s can jam canning challenge and for September the ingredient chosen by Kate at the Hip Girl’s Guide to Homemaking is stone fruits. It couldn’t have been a better choice for me than this, as where I live is plum country. We even have our own local variety, the Blaisdon plum, that grows just about everywhere and apart from the occasional year when a late frost might have nipped an abundant harvest in the bud, we are usually all drowning in plums by the end of August. As well as Blaisdon trees growing in peoples gardens they grow along hedgerows and overhang onto public footpaths. In the lane that leads up to my house I can count at least 10 trees. The big problem is that not all the fruit will be within arms reach and most will be impossible to harvest no matter how resourceful and well equipped you might be.
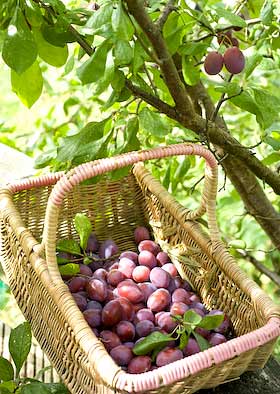
Blaisdons were once a popular variety grown for the jam making trade but became less useful once freezing fruit opened up the market, enabling manufacturers to go further afield and shop around on price. I read somewhere of someone locally with a small orchard of Blaisdons where a railway line once ran along the bottom of the garden, so the freshly picked fruit was loaded straight onto the train that then chugged its way directly to the factory, collecting fruit from others along the way.
Stephen, who lives next door but one from me, has a Blaisdon tree that very conveniently overhangs a raised decking platform in his garden. He said I could help myself to his crop, and so of course I did. This meant my September ingredient has not only been plentiful but also absolutely free. As well as these purple plums I picked some lovely acid yellow ones that grow in the field behind the house. I haven’t a clue what kind they are. And then there are the damsons… I’m not even going to include them here, suffice to say I’ve picked basket loads.

As is always the way when dealing with a glut, you have to act fast and be ready for processing. It is a mad dash to get everything tucked in and put away before the fruit flies decide to set up camp in your kitchen. I wanted to save as many plums as possible to use as ingredients later, so some have been cooked and stoned then packed into containers in the freezer. The freezer has its uses but it fills up fast and I suspect costs an outlandish amount to run. Frozen ingredients can rack up considerable additional hidden costs making my free plums not quite such a great deal. I now prefer to can as much produce as possible. Once in the jar and processed, the fruit is ready-to-go whenever required with no thawing time, you simply pop the seal and run with it.
One of my favourite discoveries since my canning journey began is bottling fruit compotes. These ready-made desserts are then instantly available and the processing means you can use less sugar. This month, as well as plums done and dusted every conceivable way, whole, squashed and pureed, specially for the Can Jam I’ve made a plum compote and filled my favourite vintage 70’s Kilner jars. I love the look of them and think it’s about time Ravenhead Kilner had the imagination to reissue them. Don’t they know bottling is back!

PLUM & BLUEBERRY COMPOTE IN CALVADOS SYRUP
Adapted from a recipe in my favourite book Fancy Pantry (1986) by Helen Witty
For each 1litre (1 quart) jar you will need:
850g (1 3/4lbs) whole plums
125g (1 cup) blueberries, rinsed and drained
3 Tbsp calvados or other good brandy
For the syrup:
275g (1 1/2 cups) sugar
0.5ltr (2 cups) water
Prepare the water bath, jars and seals ready for canning. For more info about how to hot water process, refer to the guide here.
Make the syrup by combining the sugar and water in a pan and stir to dissolve the sugar over a medium heat. Once dissolved turn up the heat and bring to the boil, then simmer uncovered for 5 minutes. Pierce each plum 2 or 3 times with a skewer or tooth pick then gently poach half of the plums for a jar at a time in the simmering syrup for about 3 minutes.
Gently lift the plums out of the syrup and pack them into a hot jar so it is filled to just below half way. Place the blueberries on top, allowing them to fall down into the gaps between the plums and the inside of the jar in a decorative way. Poach the other half of the plums in the same way then fill the jar with them, packing them to leave the appropriate amount of headroom for your type of jar. Pour 3 Tbsp calvados over the plums then top up with syrup.
De-bubble the sides using a small spatula or chopstick, wipe jar rims clean, before sealing and placing in the hot water bath. Process for 25 minutes, remove from the bath, then leave till cold before testing the seals. Label and store.
Scale down for 500ml (1/2pt) jars and process for 20 minutes.

SCONES AT THE VILLAGE SHOW
Tuesday August 31st 2010, 11:50 am
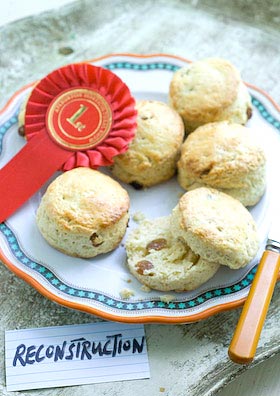
I want to share my joy with you, the moment my scones, entered into the produce show at our village hall at the weekend, won first prize. I certainly never expected this triumph so when I went into the hall to find out the results and spotted I’d been awarded the first prize, OK I can see now, it was a bit over the top, running round the hall punching the air with my jumper pulled up over my head!
I’d been in a right quandary in the lead up to the event. Last weeks British Bake Off programme on TV had featured scones and it was only then I thought I’d enter some in the Aylburton show. The scone class has always seemed too highly contested for me to have winning ambitions. After the British Bake Off programme I pressed the red button to watch expert baker and programme judge Paul Hollywood show how to make his ‘failsafe’ scones. With classic baking like this it is always extraordinary how the same ingredients can be mixed to give totally different results. I was appalled that he used 2 eggs and when out of the oven I thought his scones too high baked. Straight to Twitter someone described his scones as ‘pants’ so I wasn’t alone. How we all have an opinion; to add fruit or leave plain, use self raising flour or plain, adding the traditional cream of tartar and baking soda yourself, using sour milk, buttermilk etc etc. See this excellent and comprehensive roundup about scone making.
Even though I’ve made scones loads of times this all sent me a bit wobbly and over the following few days I made several batches trying different recipes, other than my own, thinking they would be appreciably better than mine, but none worked out how I wanted. On the morning of the show facing the decision whether to enter fruit scones or not I fell back on my own tried and tested recipe that you can find here. The first batch I made I forgot to put the sugar in. There was just enough time to make another lot and get it right, though the look of the second batch wasn’t so good. Suffice to say, got down to the village hall, added my entry to the baking table and as they say… the rest is history.
Couldn’t find my favourite cutter so had to use a slightly larger 6.5cm (2 1/2in) diameter cutter instead. This made 7 scones and the last 2 had to be cut from reformed dough, which isn’t ideal if you are aspiring for 6 perfect matching specimens. Also as the category was for fruit scones I added 50g sultanas to my plain scone recipe as well. Paul Hollywood gave a good tip in his red button masterclass. He said when brushing the tops of the scones with milk/egg wash watch none drips down the sides as this can set and prevent the scones from rising evenly. Mind you, a wonky scone looks quite good, don’t you think?
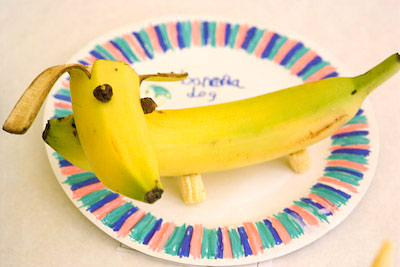
Our village show is really great. Very charming and relaxed. So relaxed in fact that you can never guauge what the criteria is for success. You can spend time faffing about with your presentation only to be beaten by a bottle of ketchup in a plastic bottle, but it is all good fun and everyone pretends they are taking it in good heart and that’s the main thing. Will be posting more pictures later but this is my highlight of the show this year – Banana Dog.
BOTTLING TOMATOES & THE ACIDITY CUSP
Monday August 16th 2010, 1:05 pm
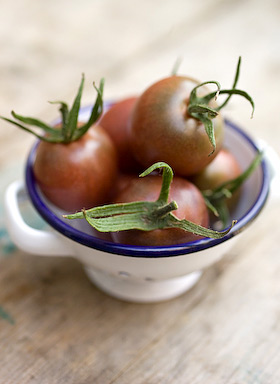
Month eight Tigress’s can jam canning challenge and for August the ingredient chosen by the inspired and inspiring Julia is tomatoes. My relationship with this ubiquitous fruit has been a checkered one. I hated tomatoes as a kid but learnt to tolerate them later on. I do like them as a sauce for pizza, applied with a lightness of touch though. I can now eat cherry tomatoes raw and, like biting into any fruit, appreciate their sweetness so I suppose you could say I’ve made progress.
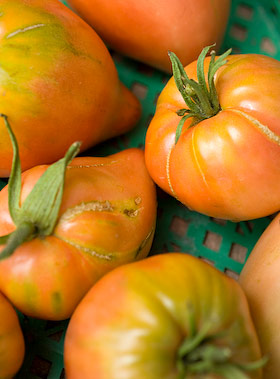
But it is as objects of beauty that tomatoes especially come into their own. The resurgence of interest in growing heritage varieties has brought all these wonderfully coloured tomatoes to the fore; striped, heart and pear shaped, shaded like a shop display of lipsticks, from gold to chocolate. They are all so fantastically photogenic and worth growing for looks alone.
As an ingredient for canning, they are on the acidity cusp. Tomatoes require special attention for bottling safely using the water processing method or else should be pressure canned. They are only just on the acid side of neutral and acidity can vary for different varieties, so it is necessary to add a little more acidity in the form of lemon juice or citric acid to make sure they stay safely putt. It is important that time spent preserving has a very definite pay off later so it makes sense for me to bottle really useful tomato passata-type sauces for cooking up further down the line into pizza toppings, pasta sauces or as additions to winter casseroles.
Each year I begin the growing season with high hopes for an extensive range of weird and wonderful tomato varieties. I don’t have a greenhouse so can only grow toms out in the open. We’ve had two consecutive years of blight bringing these plans to a soggy and disappointingly diseased halt, but this year the weather has been kinder. Tinned tomatoes are as cheap as chips, so I don’t think it is really cost effective to bottle tomatoes unless you have your own homegrown supply or you are able to mop up someone elses glut. The plants I have growing in the garden are still some way from the ‘glut’ stage. Thankfully my neighbour Jane has a greenhouse as well as green fingers. She sells her excess garden produce from her garden wall. Last week I picked up four generous punnets of yellow and red tomatoes from the wall and dropped my payment into the honesty box provided.
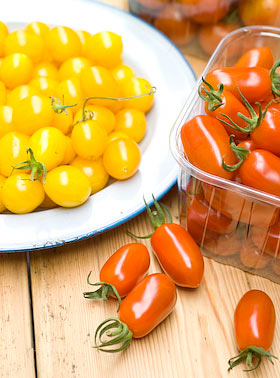
So first a basic tomato sauce. These cherry tomato varieties are as sweet as anything though perhaps not the most ideal kinds for bottling. For sauces, larger fleshy varieties like Roma and San Marzano are good. Skinning so many tiny fruits was definitely out of the question for starters. Tomatoes can be very watery, which means that they will require considerable cooking to reduce, thicken and intensify the flavour, unless some of the liquid is removed first.
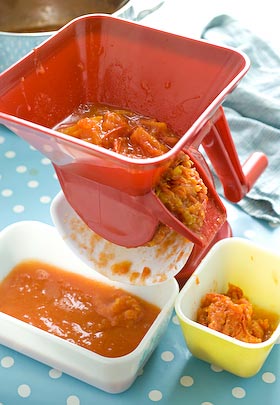
In order to give a fresher flavoured result with less cooking time I began by slitting each fruit and removing the seeds by running my thumb quickly through their middles, collecting the seeds in a sieve placed over a bowl. Any collected juice would come in handy later. After a brief cooking time of 10 minutes the de-seeded tomatoes were then processed using a passata mill, running it through several times to separate the skins from the pulp. The passata mill is a bit of kit I acquired some years ago when dreaming of a bounteous tomato crop that never materialised. The mill has sat unused in its box ever since so this was its first opportunity to prove its worth. I must say that I wasn’t too impressed. Passata-ing the tomatoes was a messy and annoying business (compounded by trying to take photographs at the same time). Tomato juice splattered all over the place and possibly it was my fault, but juice was squirting out the handle side as well! Next time I will most likely use my regular food mill over a bowl, which though still requiring patience would be less messy and more controllable. Depending on the scale of the project, to remove skins and any stray seeds you could simply push the tomatoes through a sieve if you prefer. Still too watery for my liking, I strained the flesh again briefly in a sieve collecting more juice to add to what had been collected earlier. 2.5Kg (5 1/2lbs) of tomatoes resulted in 775g (1 3/4lbs) puree and 750ml (1.3 pts) of juice.
HOW TO BOTTLE TOMATO PUREE
Prepare the water bath, jars and seals ready for bottling (canning). For more info about how to hot water process, refer to the guide here.
Put the pureed tomatoes in a pan and simmer for a short time to reach a consistency that suits you so excess juice has evaporated. If the puree is already thick enough simply bring to boiling point. I added 1 tsp sea salt (a non essential, so add salt to own taste or leave out all together) plus an aditional acidic booster. As a general guide you need to add one of the following to every 500ml (1 pt) tomato puree: 1Tbsp lemon juice or 1/4 tsp citric acid. I used balsamic vinegar instead, adding 2 Tbsp balsamic vinegar per 500ml (1pt) puree.
Place a basil leaf inside each jar against the glass and fill jars with tomato, leaving headspace required for your type of jar. Remove bubbles from sides of jars using a small spatula, wipe rims clean and seal. Process 500ml (1 pt) jars for 35 mins and 1ltr (quart) jars for 45 mins. Remove jars from water bath and leave till cold before testing the seals. Any jars with loose seals will require reprocessing or you can keep them in the fridge for using up within a few days. Remember to label all your jars before storing them.
My tomatoes made 2 x 350g (12oz) jars of sauce plus a bit more that I had with pasta for my dinner that evening.
WHAT TO DO WITH THE JUICE
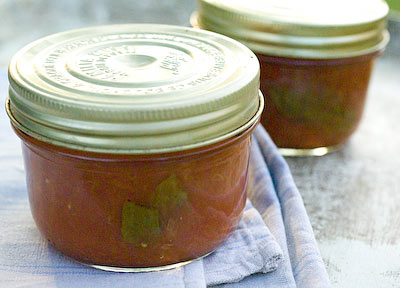
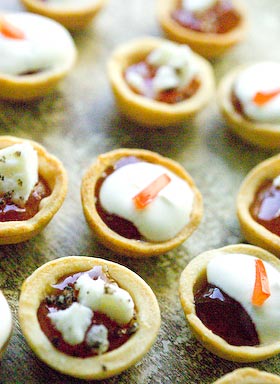
It seemed a shame to waste the lovely sweet juice collected whilst extracting the tomato puree, so I decided to turn it into tomato jelly. You could flavour tomato jelly with fresh ginger and ground coriander or finely chopped chilli. After much deliberation I eventually chose vanilla and white pepper for a jelly with a sweet / savoury crossover. This jelly is delicious on sourdough toast with cream cheese and I used it to fill tiny savoury pastry cases, topped with sour cream or crumbled goats cheese for a really exquisite little mouthful.
As tomato juice is lacking in pectin, a boost in the form of the addition of lemon or apple juice is helpful. Having bottled some whitecurrant juice several weeks earlier to use at times like this, I added some of that for its setting quality. Preserving sugar containing added pectin could also be employed here. Adjust proportions to suit what you have available.
TOMATO, VANILLA AND WHITE PEPPER JELLY
750ml (1.3 pts) tomato juice (a byproduct of making the puree above)
550g (1 1/4lb) sugar
Juice of 1 lemon or 150ml (2/3 cup) whitecurrant juice
1 vanilla pod, split and seeds scraped from inside
1/2 tsp ground white pepper
Prepare the water bath, jars and seals ready for canning. For more info about how to hot water process, refer to the guide here.
Pour the juice through a jelly bag, collecting the juice in a measuring jug. To every 600ml (1 pt) juice add 450g (1 lb sugar). Place all the ingredients in a preserving pan. Stir constantly over low heat until the sugar has dissolved then turn the heat up to bring to a rolling boil. Boil to setting point, (it took me about 10 minutes) when a blob of syrup on a cold plate will formed a skin when you push your finger over the top of it. If using a jam thermometer it will register 220F 105C. Remove the vanilla pod and fill hot jars, leaving the required headroom for their type. De-bubble the sides using a small spatula or chopstick, wipe jar rims clean, before sealing and placing in the hot water bath. Process for 10 minutes, remove from the bath, then leave till cold before testing the seals. Label and store.
The ratio of sugar to juice is the classic one used when making jellies. This jelly is very nice indeed but I will be tempted to cut down on the amount of sugar when I make this next. It is often safe to keep jams and jellies without hot water processing (canning) them. If you do can them you are making doubly certain that they will be preserved safely for a year or even longer.


