
Happy Easter from The Laundry and Laundryetc.

Happy Easter from The Laundry and Laundryetc.

The big citrus preserving fest is just about over now. The Seville oranges have finished for the year and though there is always some citrus fruit available to buy all year round, with a plentiful supply of rhubarb just around the corner, I’ve had quite enough of the colour orange and am ready to don my rose tinted spectacles. Actually I haven’t made too much marmalade this year for one reason or another, but full of the usual good intentions still managed to buy the fruit anyway.
So time to clear the decks. That bowl of kumquats that I searched so earnestly to find, that pomelo that has sat patiently in the kitchen for the last few weeks and the handful of ruby oranges that I had almost forgotten were there, all need using up pronto. And then there are unwaxed lemons, 2 limes with peel starting to yellow and 3 bog-standard oranges that somehow got mixed in with the blood oranges at the fruit and veg shop. Oh, and a few bitter Seville oranges too. So to celebrate the last of the citrus why not use the whole lot in one fell swoop.
In some ways a recipe for this fruit-medley marmalade isn’t necessarily that useful to anyone else as the chances of you having the same mixture of fruits may be unlikely and the idea of going out with a shopping list for this exact combination fruitless. But knowing some basic principles for making marmalade is useful and can encourage everyone to use what they have as well as give you confidence to do your own thing if you fear stepping outside of the box. If that all sounds too much like hard work, by all means follow the recipe to the letter or sample a marmalade made earlier; pink grapefruit, rhubarb and cardamon marmalade or gooseberry and lime marmalade or perhaps lemon, fig and lavender marmalade, which is a good one for making just about any time during the year.
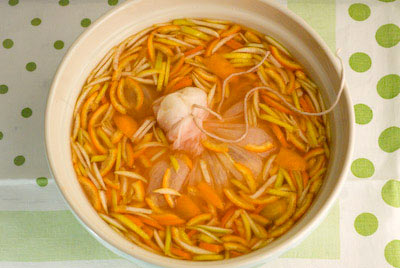
I love marmalade with a tart edge to it rather than being too sweet, so using bitter oranges suits me down to the ground. There is a difference between a bitter marmalade and a BITTER marmalade, the latter caused by the inclusion of the fruit’s pith. An overpowering unpleasant bitterness somehow coats the inside of your mouth and stays with you for ages after you’ve eaten your toast! I also love peel in my marmalade, lots of peel. Without it marmalade would simply be jelly! Hand cutting peel can be a tedious part of the process and it is hard to get a really fine even cut. For me this is all part of the ceremony of marmalade making, though luckily I don’t make huge batches. I do have a special bean shredding attachment for my Kenwood Chef which can do the job neatly, easily and quickly, though rarely use it, but if you intend to make marmalade big time it might be worth finding something similar to streamline the job.
The peel needs to be really well cooked first, seemingly overcooked, as it candies and hardens once it is boiled in the sugar syrup. Jane Hasell-McCosh, who founded and organises the annual Marmalade festival at her home, Dalemain Mansion, Nr Penrith, told me that undercooked peel is the most common reason for entries being marked down. The peel should first be cooked until when pressed between finger and thumb it disintegrates, and that can take between 1-2 hours of slow cooking to achieve. Of course, if you like a chewier texture, cook it for less time but don’t expect any rosettes for your efforts.
Different kinds of citrus fruits contain varying amounts of pectin, the stuff that helps jam to set, so you do need to do whatever you can to make the most of what pectin there is. Tying pips and pith into a bundle with muslin and soaking them with the peel in the water or juice overnight helps to extract the available pectin. I have never found it necessary to add extra pectin to my marmalade.
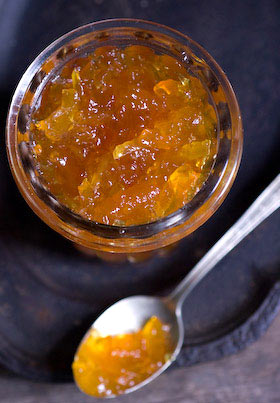
Use your own combination of citrus fruits. You could include grapefruits, mandarins and sweet oranges as alternatives. Roughly match the total weights shown in the recipe but don’t get too hung up on matching measurements exactly.
MIXED CITRUS MARMALADE
Makes approx 1.25Kg (4 x 1/2 pint jars and a bit)
Fruit with combined weight approx 1240g (2 3/4lbs):
kumquats (325g / 12oz)
1 pomelo (465g / 1lb)
3 Seville oranges (325g / 12oz)
1 lemon (125g / 4 oz)
300ml (1/2 pt) mixed citrus fruit juice (I used blood oranges and limes, close to past their prime but still full of juice)
1.2ltrs (2 1/4 pts) water
approx. 800g (1 3/4lbs) sugar
Wash and scrub all the fruit and drain in a colander. Cut the kumquats lengthways into quarters and remove and collect the pips. Remove the peel from the pomelo, Seville oranges and lemon. Pull away the thick pith from the pomelo and any from the oranges and lemon that comes away easily and discard it, then roughly chop the flesh from the fruits, collecting it together with any juice and the kumquat pips. Finely chop the peel into shreds. This made approximately 360g (12oz) chopped peel and 750g (1 1/2lbs) pips and flesh. Wrap the pips and flesh into a bundle with muslin tied securely with string.
Place the peel, muslin bundle, juice and water in a bowl and leave to soak for 12-24 hours. Put everything from the bowl into a pan with a lid, bring to a simmer and cook gently until the peel is soft, which may take 1 – 2 hours. Remove the muslin bag, collecting any liquid that drips from it. Separate the peel from the juice by pouring through a sieve over a bowl, then measure and weigh them both separately.
At this stage it made 700ml (1 1/4pts) juice and 480g (1lb) cooked peel. To calculate how much sugar I needed I made two calculations; one for the amount of juice and one for the weight of the peel then added them together. I choose a classic sugar to juice ratio as used for making a jelly of 400g (14oz) sugar to every 600ml (1 pint) juice = 460g (1lb), plus 70% sugar to weight of peel = 336g (12oz). 460g (1lb) + 336g (12oz) = 796g Rounded up to 800g (1 3/4lbs).
Prepare clean jars and lids by sterilising them in a low oven, keeping them warm till needed. If you plan to can (water process) your marmalade, prepare the water bath and jars and place jar seals in a pan of hot water on the hob.
Place the peel, juice and sugar in a preserving pan and stir over a gentle heat until the sugar is dissolved, then turn up the heat and bring to a rolling boil until the marmalade reaches setting point (a blob of the syrup on a plate quickly forms a skin that wrinkles when you push a finger over it). This took me about 10 minutes to achieve. Skim if necessary and allow the marmalade to cool for 5-10 minutes then stir to distribute the peel. Pour the marmalade into hot jars and seal. If you are canning your jam, process for 5 minutes then remove from the canner. Leave till cold, then test the seals. Don’t forget to label and date your marmalade.

I was visiting my Mum in hospital over Christmas and suddenly became aware that I was talking about the price of potatoes. I wisely stopped short of telling how I had bought 2 bags of organic spuds on special offer for just £2 the previous day! Once I realised the mundane nature of my conversation, it struck me as so absurd I was stricken with a bout of hysteria that left me unable to speak for 10 minutes or so, no doubt to the relief of the other family members present.
You see, I find frugality and penny pinching totally dull. Having said that, whereas 6 years ago I wouldn’t have been able to tell you the price of butter, times have changed. I’m now a dab hand at rustling up a feast using ingredients from the ‘reduced for quick sale’ bin at the supermarket and can sniff out a bargain a mile off these days. There seems to be an assumption that preserving is part of a ‘make do and mend’ mindset but for me it is far from that. It is primarily about the quality of the food we eat, taking notice of and making use of what is often right there on our doorstep, respecting those ingredients and reducing waste in the process. At the same time, by following the seasons through ingredients it certainly reminds me to savour the seasons, so time doesn’t simply pass by in a heartbeat.
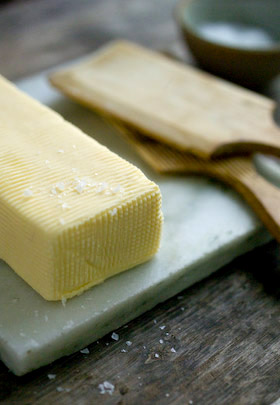
I’ve been wanting to make my own butter for ages. Having read quite a bit about it, it was a matter of finding the raw ingredient, to have a go. Last June my wonderful canning chum Tigress wrote here about making enough butter to see her through the year, freezing the butter and bi-product buttermilk. Much respect Tigress, who having driven to Vermont to collect the cream, then hand churned it one Mason jar at a time!
Nothing quite so romantic or arduous for me, I was just waiting for the cream to appear at the supermarket on special offer, then my trusty vintage Kenwood Chef would do the hard work for me. With Netherend Dairy just down the road producing butter that is highly appreciated in foodie circles, there is hardly much point in making my own unless the cream comes at a bargain price. Seemingly, once Christmas is out of the way, the supermarkets have plenty of excess cream going cheap, ridiculously cheap. To make butter you need normal double or whipping cream, not the UHT longlife stuff. I bought up plenty last week and have been pleasantly surprised by how much butter it has turned into, much more than I’d expected. Being short of freezer space I now have the problem of where to put it!

HOW TO MAKE BUTTER
900ml (32 fl oz) double cream produced 468g (1 lb) butter and 285ml (1/2 pt) buttermilk
Using a Kenwood Chef or other stand mixer fitted with paddle or ‘K’ beater, beat the cream on a medium speed for approximately 10 minutes, keeping a keen eye on it towards the end. The cream will thicken then begin to stiffen, then in an instant the butter and buttermilk separate. At that moment you need to be ready to turn the mixer off, otherwise the buttermilk sloshes all over the place.
Pour into a sieve, collecting the buttermilk in a bowl underneath. The butter needs to be washed in water to remove any other buttermilk trapped inside it. Some people use their hands to mash the butter under a running tap, others use a potato masher. Whichever method you choose, the water needs to run clear as any buttermilk remaining will encourage the butter to go rancid quicker.
Once all the buttermilk is away you can press the butter into a bowl or give it a good wacking with butter pats, which leave lovely traditional ridge patterns on the surface. If you wish to add salt then this is the time to work it through the butter so it is evenly distributed. The butter can be wrapped in waxed paper or placed in sealed storage boxes before freezing. The buttermilk can be used for baking and I have frozen some in smaller cup-sized containers so they are handy sized for when I want to make scones, soda bread or my blueberry buttermilk and almond cake – yum!

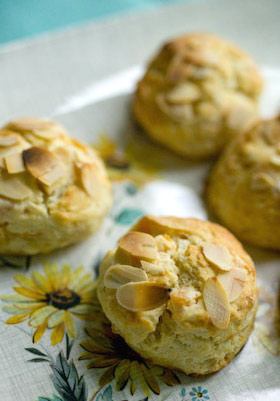
This apricot vanilla buttermilk scone recipe is another great way of using both butter and buttermilk. I love making these for breakfast as they aren’t too sweet and are soft enough to be eaten without any extra butter spread on them. You can of course add a dollop of jam if you really have too and serve them for tea later in the day.
APRICOT VANILLA BUTTERMILK SCONES
Makes approx 10 small, 5cm (2in) diameter scones
60g (2oz) dried apricots, soak in boiling water for an hour or more, drain then pat dry with kitchen towel before chopping into small chunks
225g (8oz) self-raising flour
pinch of salt
75g (3oz) butter
30g (1oz) caster sugar
1tsp vanilla extract
4-6 Tbsp buttermilk, plus a bit more if needed and to brush the tops
Flaked almonds
Pre heat the oven to 220C (425F) Mk7
Sift the flour and salt into a bowl. Cut the butter into pieces and rub into the flour until the mixture resembles breadcrumbs. Add the sugar and dried apricots. Mix the vanilla extract into the buttermilk and add it to the flour mixture, working quickly with a fork to form a dough which is soft but not sticky. Bring the mixture together and with floured hands press it onto a floured surface so it is about 2.5cm (1 in) thick.
Cut out scones and place on a greased baking tray. Push the dough offcuts together again and cut the last scone or 2 from that, so none goes to waste. Brush the tops with buttermilk and sprinkle with flaked almonds. Bake for 15-20 minutes until they are risen and starting to be tinged golden. Remove from oven and eat them warm. They are lovely split and toasted later on too.

I just remembered this partially prepared blog post from a few months ago and thought it appropriate to finish it. At the time I was gathering mushrooms from the field by my house and it had reminded me of my favourite mushroom pie recipe that I have made many many times. The recipe comes from a book from 1972, Cookbook For The New Age, Earth Water Fire Air by Barbara Freidlander. When given to me, I’d just decided to become vegetarian, had married at a ridiculously young age and was starting out learning about life and food and cooking. I have made this pie and variations of it on so many occasions and it has been served as part of Christmas lunch many times as well, which is why I’m publishing it now, in case you are looking for some last-minute inspiration.
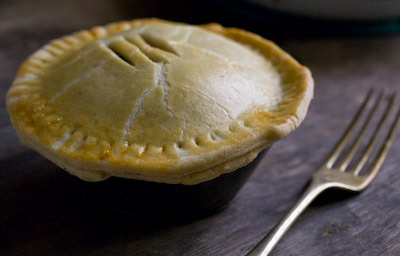
I’m not so pleased with my pictures here but it is the recipe that is important on this occasion. The book is American so is written in cups and pounds, which at the time was very peculiar and exciting for me to translate. I’m going to copy it as is and for the sake of speed have no intentions of adding the metric conversion this time round, but hope you’ll get the gist and feel inspired anyway. More often than not I’ve used hazelnuts in place of the cashews and usually toast them lightly first.
MUSHROOM PIE
Makes 1 large or 2 small pies
CRUST
2 cup pastry flour
1/4 tsp salt
1/4 pound butter
1/4 cup cold milk
FILLING
1 pound mushrooms, sliced
5 celery stalks, chopped
1 small onion, chopped
1/4 cup unsalted cashew nuts, chopped
pinch of thyme
salt and pepper to taste
4Tbsp butter
Cream sauce **
Make the pastry in the usual way (rub the butter into the flour and salt then add the milk and bring it together to form a ball). Leave in fridge to chill whilst the filling is prepared.
Saute the first 6 filling ingredients together in 4Tbsp butter, cover and cook until the mushrooms are tender. If there seems to be lots of liquid from the mushrooms, cook for a while without the lid to help it evaporate.
Meanwhile in another pan make the cream sauce** Combine the sauce and mushroom mixture and blend well. Check the seasoning and adjust at this point. Preheat oven to 400F 200C Mk6.
Cut the pastry dough into 2 pieces, one slightly smaller for the pie lid than the other for the base. Roll out the pastry on a floured board for the base and line a greased pie tin. Pour/spoon in the filling. Roll out the pastry lid, cut a few slits in the centre, brush the base edges with milk or water and lay the lid in place sealing the edges. Brush the top with milk or beaten egg to glaze. Place in the oven, reduce the temperature to 350F 180C Mk4 and bake for 40-45 minutes till nicely golden.
** CREAM SAUCE
2Tbsp butter
2Tbsp flour
1/2 cup milk
salt and pepper
freshly grated nutmeg
Melt the butter in a pan over low heat, add the flour and stir to form a roux. Gradually add the milk, stirring between each addition to make a smooth sauce. Let it cook for a few minutes then season. For the pie the sauce can be quite thick as the mushroom mixture will make it thinner.

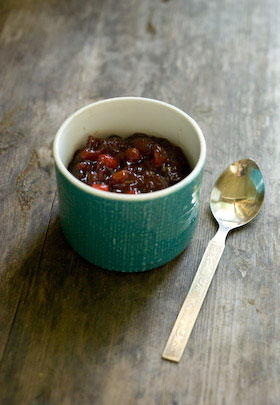
I prefer to use the ingredients I find on my doorstep, but sometimes occasion decrees it’s time to push the boat out. I’d love to find homegrown cranberries but have never seen them for sale on my travels, though Sainsburys are selling Kent grown cranberries this year, but only available in that area. So for my special Christmas jam, my cranberries are from the US, dried apricots from Turkey and pineapple from Costa Rica. I hope all you locavores will forgive me! For some of you lucky enough, these ingredients will be on your doorstep.
I saw mention of this combination in an old book of mine and thought it worth exploring. In that recipe the pineapple came in a tin and for my first experiment I used a tin of crushed pineapple in natural juice. Having noticed fresh pineapples not much different in price to tinned, I decided to use fresh for my second batch. Both work well with perhaps the fresh having just that added zing you might expect. The final flourish – apricot brandy, just makes this fabulous jam extra special, befitting the season.
The fruits cook down to a ‘feltly’ consistency, which from my experience means you need to watch it doesn’t catch on the bottom of the pan and burn. So don’t leave the bubbling jam kettle for even a minute or your jam may be spoilt. My recipe calls for relatively little sugar. This does mean that it is advisable to store the preserve in the fridge or the ideal alternative, do like I do and can it. That way it will store for a year or even longer. Serve on toast, scones or with your celebration meal as a relish. I’m off to make some more.
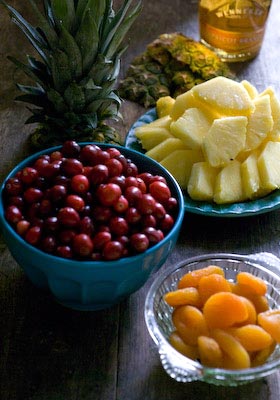
CRANBERRY, APRICOT AND PINEAPPLE JAM
Makes 1.3Kg (5 x 1/2pt jars)
1 med size pineapple, approx 1100g (2 1/2lbs) in weight or a 432g (15oz) tin crushed pineapple in juice
150g (5oz) dried apricots
300g (1x 12oz pack) fresh cranberries, rinsed and drained
450g (1lb) sugar
apricot brandy (optional)
Prepare the pineapple; slice off the top and base and pare away the skin. Chop down through the centre lengthways and cut into 4, then remove the woody core. Slice the flesh into chunks then pulse in a food processor to give a fine texture. Pour into a sieve over a bowl and collect the juice that drips through. With my 1100g pineapple, this gave me 280g (10oz) pulp and 200ml (7 fl oz) of juice. (You don’t need to be spot on here just aim for approximately that amount.) Chop the apricots into small even pieces and place in a bowl with 200ml (7 fl oz) of boiling water plus the pineapple juice and leave to soak for several hours or overnight.
If you plan to can (water process) your jam, prepare the water bath and jars and place jar seals in a pan of hot water on the hob. Alternatively, prepare clean jars by sterilising them in a low oven, keeping them warm till needed. Place the cranberries, apricots, crushed pineapple and soaking juices in a preserving pan. Add another 200ml (7 fl oz) water and cook gently for approximately 20 minutes, until the cranberries have started to pop and the mixture combines and takes on a ruby glow. Remove from heat for 5 minutes then add the sugar. Stir over a gentle heat until completely dissolved, then up the heat and bring to a rolling boil, taking great care that it doesn’t burn. It only takes 5-10 minutes before you can see the texture is thickened and a small blob on a cold plate will hold its shape. Turn off the heat. Leave for 5 minutes then stir in 3-5 Tbsp apricot brandy.
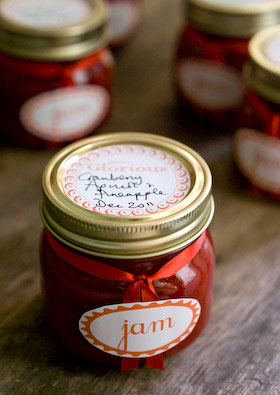
Pour into prepared hot jars leaving 0.5cm (1/4in) headroom, tap jars on worktop to de-bubble, clean rims and seal, then process for 10 minutes. Remove jars from water bath and leave until completely cold before testing the seals. Alternatively, pot the hot jam into clean hot jars and seal then store in the fridge when cold.

Apologies for my long absence. I’ve been reassessing how I allocate my time! That and my Mum being ill has given me a lot to think about. That doesn’t mean I haven’t been busy though. Once you have been following the seasons with ingredients, watching, anticipating, harvesting, canning and preserving for a while, it becomes second nature, the way that you live and a direct and real connection to the food you eat. I’ve become particularly aware of this by being displaced due to my Mum being ill. I have by necessity been spending time away from my home and my patch, the place I have been observing and making use of so intensely for the last few years. It just meant I’ve had to find new connections in a city I left 30 years ago.
Yesterday it was time to rustle up my Christmas wreath. The wreath base has been used on previous occasions and is a favourite; washed and weathered, looseley twisted vine that comes already wrapped with some tatty raffia from a previous incarnation, perfect. I wanted my wreath to be a celebration of what nature has handed me in 2011 and would have searched for a few remaining sloes on branches or scavenged some crab apples of a neighbours tree, but I didn’t want it to turn into a performance. So I just went around the garden looking and snipping and then very simply pushed stems through between the twisted vine base. I used some lengths of straggling clematis that the cold had turned dark crimson, some plump orange-red rosehips, sprigs of bay; the fresh growth tips of bay trees branches, hypericum with black fruits set amongst stunning red tinted leaves and finally some unripe blackberries that found themselves double-crossed by deceiving weather conditions. You don’t need much for it to work. My tip if you are new to this sort of thing and want to have a go, is to use your foliage in 3’s, to give a loosley structured and organic result odd numbers work best.
I hope that you enjoy the holiday season ahead, whatever it means to you and look forward to starting afresh in 2012. In such uncertain times one thing shouts out to me loud and clear – CANNING IS THE WAY TO GO! Just saying. Have a good one.

Just drove up the road to my house and the road side is lined with windfall plums, like a guard of honor greeting me back home. The plum thing round here is just about to kick off and I want to be ready to make the most of this abundant harvest. It’s on the doorstep and comes for free. I have written about Blaisdons, our local plum variety before and last year bottled them, see here . I also bottled squashed plums very simply, stoned and cooked in a light syrup. They were delicious and kept me in dessert for several months with custard, yogurt or cake. I need more of them alright, the larder needs to be well-stocked to take me through the winter.
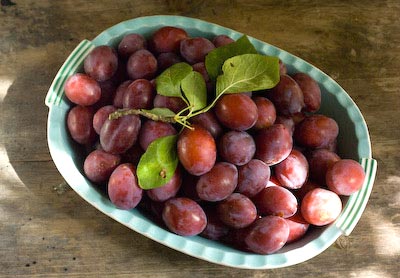
So to ease my way into the season I thought I’d start with a jam. I generally find plum jam quite uninspiring and one dimensional, so this jam called for the addition of careful thought to really make it sing. As I said on Facebook yesterday, good jam does not come from throwing everything in a pan and boiling like billio. That’s just stewing fruit and you end up with jars of sweet pink mush that somehow remain in the larder for years and that you are unable to ever get rid of. I want to make jam that is so fantastic that you quickly run out and vow you’ll make more next year. I like to macerate the fruit to draw out the juice and the fresh flavours and this method suits my way of life really well. It means you can begin to process your newly picked fruit at it’s freshest without having to get the jars and all the other paraphernalia ready. It gives you a day or two’s grace to get your head round the task in hand. You do need lots of bowls and in my kitchen and sitting room table-top space is often at a premium as bowls of fruit covered with cling film wait their turn, all topped and labeled with post it notes.
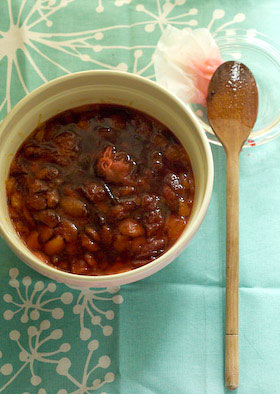
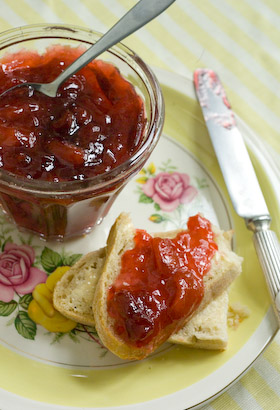
I mentioned in my last post that using lavender as a flavouring requires a light touch. It needs to be just present so it’s hard to put your finger on just what the flavouring is, to really work. This jam is delicious and is a brilliant colour too. The cooking time is kept to a minimum without too much sugar, so the plums have a tart edge to them, which any good jam should have in my opinion. I used lavender recently harvested from the garden, so though dry is also very fresh. Blaisdon plums are a cling-stone plum, so you either remove the stones after cooking them, filching them out one by one, or you cut the flesh from the stone. Some of my plums were windfalls so I needed to cut off any bruised and manky bits, so the second method, though time consuming, worked well in this instance. I have no doubt that as the season progresses, stone filching will become tedious. Right now I’m just loving the thrill of anticipation. Blaisdons – bring them on!
BLAISDON PLUM & LAVENDER JAM
Makes 1.125 kg (2lbs 4oz)
1.2Kg ( 2lb 8oz) plums or 1kg (2lb 4oz) when stoned
750g ( 1lb 12oz) sugar
juice of 1 lemon
1 Tbsp dried lavender
Chop the plums into quarters and remove the stones. Place the fruit in a bowl layered with the sugar, add the lemon juice and push the lavender, tied in a piece of muslin, down into the fruit. Cover and leave overnight to macerate.
Next day, pour the contents of the bowl into a pan and heat it through stirring until the sugar is completely dissolved. Bring to a simmer then remove from the heat, pour back into the bowl, push a piece of greaseproof paper down onto the surface of the bowl’s contents, then cover and leave to macerate for anything between 3 – 24 hours, whatever fits into your schedule.
If you plan to can or water process your jam, prepare your jars and seals, otherwise make sure your jam jars and lids are clean and hot by placing them in a warm oven for 20 minutes. Remove the lavender bundle, then with a slotted spoon remove the plum pieces from the syrup. There is no need to be too painstaking about this, it just means that your finished jam will have some nice chunks of plum flesh instead of it all being cooked into an homogenised mass!
Place the remaining syrup in a preserving pan, heat to boiling then maintain at a rolling boil until it reaches setting point. This took me about 10 minutes to achieve. Add the plum pieces and bring back to the boil and check for setting point again. Pour the jam into hot jars and seal. If you are canning your jam, process for 10 minutes then remove from the canner. Leave till cold, then test the seals. Label and date your jam.
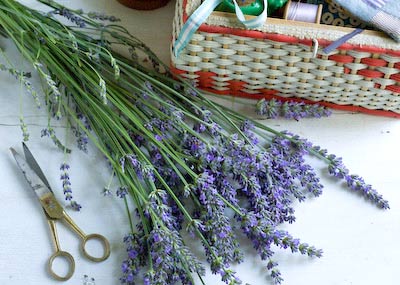
The other day whilst walking back from the preserving garden I suddenly caught a whiff of lavender on the breeze. Looking to the house alongside me, I could see through to a garden where there were two long hummocks of the stuff, running the whole width of the lawn, all in full spikey bloom and an intense shade of purple. The bees were having a field day. It was well worth stopping to breathe in another purposeful whiff before going on my way. Lavender is in flower so fleetingly, and it reminded me to harvesting some to dry for the linen drawer as well as some for culinary use. As a little goes a long way, plants in the garden at home, though nowhere as lush as those I had passed, would yield quite enough for drying without leaving them noticeably shorn.
It isn’t a crop that requires much in the way of pest control so is easy to grow organically. All the better for flavouring ice cream, buttery biscuits and cupcake icing. But a lightness of touch is most definitely required, as you can easily have too much of a good thing and end up with an overpowering medicated result. The flavour needs to be just there but hardly discernable, so getting the balance precise can be tricky. True lavenders, such as Lavandula augustifolia, including the popular Hidcote and Munstead varieties, are best for this, whereas the lavender hybrids called lavandins, bred especially for their oil are best avoided, as they are more likely to leave a strong camphorous aftertaste if used to flavour food.
Ideally picked on a dry sunny day when the flowers are just on the cusp of bursting open, you only need to tie a bunch together with string and hang it upside down, somewhere dry and shaded for the flowers to dry out in no time. When completely dried through, just crumble the brittle flowers away from the stems and store them in a sealed jar alongside your other herbs and spices. You could then use some to make my lemon, fig and lavender marmalade, which is featured in my friend, Canadian writer and canner, Sarah B Hood’s new book We Sure Can available in the UK from September. I’ve also just made some Blaisdon plum and lavender jam, which has been a big success, so i will post that recipe next to encourage you on your fragranced journey.
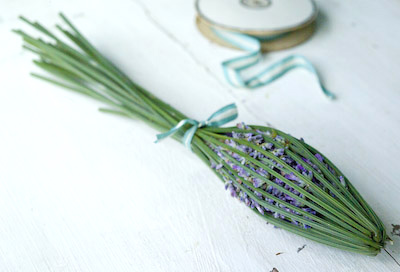
I thought I’d show you another traditional way to store a bundle of lavender, for scenting linens, where the flowers are encased in a cage made from the flower stems woven with ribbon. Called a lavender bottle, made this way, the flowers stay put and don’t go all over the place, so it can be pushed in between layers of stored bedlinen, kept in a drawer with your smalls or hung in the wardrobe to keep your best clothes sweet. For this the lavender variety is immaterial, the smellier the better.
Again pick your lavender on a dry sunny day when the flowers are just about to be or are partly open. The stems need to be long, green and pliable. Pick an odd number of stems, I used 21 here, and bundle them together, so all the flowers are bunched up together and the stems are smooth, pulling off any smaller flowers lower down. Tie tightly together below the flower heads with a piece of thin ribbon or twine. Then one by one, bend the stems back over the flowers so they form a cage around them. You do have to try and arrange the stems as evenly spaced as possible to keep things as neat as you can at this stage.
Tie a piece of ribbon or twine tightly around the stems to hold everything in place. Now, take a long length of narrow ribbon, 5-10mm (1/4-1/2in) wide is ideal, and starting at the top pointy end, wrap one end of the ribbon around one of the stems and fix it in place with a few stitches made with needle and thread. Begin to weave the ribbon in and out of the stems (you may find a bodkin useful to help with this), working round the stem cage and pulling the ribbon evenly to give the lavender bottle a good shape. When the flowers are completely encased by the woven ribbon, tuck the end of the ribbon around a stem and fix in place with a few stitches with needle and thread. Trim the stems to the length you like then tie the stems tightly together with ribbon at both ends. Leave the bottle to dry out for a while and give the flowers a squeeze from time to time to reactive the scent.

Another fab way to scent bedlinen and clothing is to spray them lightly with lavender linen water whilst ironing or just before you put them freshly laundered into the linen or airing cupboard.

It is cherry time again and the pitter is at the ready. Last year it was put to good use as I removed the stones from an abundance of fruit going well into the night. This year I’m unlikely to be so lucky … or unlucky depending how you look at it. The cherry harvest is nowhere near as lush as it was in 2010, but that’s OK. I like my canning years to have distinctive differences, so each year I have new ingredients to find and explore.
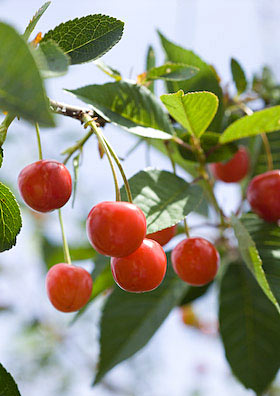
I’ve still got some jars of canned morello cherries in the larder as so many were put away last summer and the joy of canning means you can store enough to see you through more than one season, if you do it right. Morellos are a sour cherry, for culinary use only, that I have never found for sale. The ones I preserved in a light syrup were, on first tasting, fairly undistinguished and plain – no big deal. That is until you add a splash of kirsch and pour on some cream, and then they become something totally exquisite. I have served them that simply on many occasions since last summer and opened a jar to make the filling of a black forest brownie cake more than once. So this year my cherry canning is set to be on a modest scale.
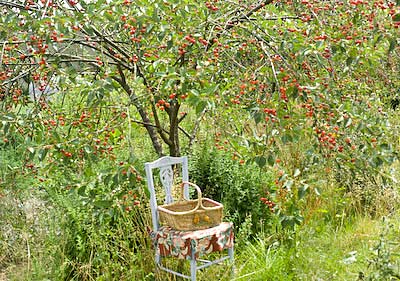
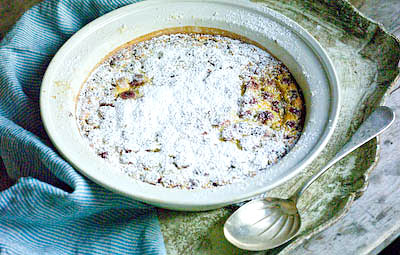
Cherry clafoutis is another traditional pudding that uses sour cherries and works well with fresh or bottled fruit. This isn’t time to skimp on filling – it should be well packed with fruit with all the gaps adjoining melded with custardy batter. There is some debate as to whether you should leave the stones in the fruit or remove them. As the stones imbue a slight almondy flavour to the pudding, many people say they are essential. I prefer to serve and eat food without the hassle of filching out stones as I go, so add a splash of amaretto or kirsch to complete the flavours. A clafoutis is so easy to make and needs to be eaten whilst still warm from the oven, though having said that, I have eaten leftovers for breakfast the next day, and very nice it was too. Any syrup remaining can be drunk like cordial with sparkling water added.
CHERRY CLAFOUTIS
Serves 6 (generously)
3 eggs
100g (1/2 cup) caster sugar
1tsp vanilla extract
1/4tsp salt
40g (1/3rd cup) plain flour
200ml (1 cup) milk
450g (16oz) fresh cherries, pitted or whole
(or 400g (14oz) if using bottled/canned , well drained)
kirsch or amaretto
some icing sugar (optional)
Butter a 25cm diameter earthenware or enamel dish. Pre-heat the oven to 200C (400F, Mk 6).
If you are using a mixer, just throw the first 6 ingredients together and beat together to form a smooth batter. Working by hand, whisk eggs, sugar, vanilla and salt together, then add the flour followed by the milk to make a smooth batter.
Pour half into the prepared dish, spread the cherries over the batter and splash with a few teaspoonfuls of your chosen liqueur. Pour the rest of the batter over the fruit. Bake for 40-45 minutes until the top is lightly golden and the custard centre is beginning to set. Leave to cool for a while so the custard sets further. Serve warm dredged with icing sugar and another drizzle of liqueur if you like.

I’m so glad I made a concerted effort to get the preserving garden allotment sorted out earlier in the season. I’ve been distracted for the last few weeks so the plot has been neglected and there’s now much weeding to be done to make it all neat and tidy again. But sometimes a break is necessary if only to accept that to some degree, what will be will be. Now comes the payoff. The berries are ripening and my longed for supply of strawberries has become a reality.
The other day I picked my first substantial batch and there should be several more punnets full to come in the next few weeks. The bulk of my plants are Cambridge Favourite, which I chose as a classic jam making variety. Planted autumn 2009, there was no fruit to speak of last year and the plants sent out lots of runners, some of which I encouraged to root and establish. The plan was that this year would be the first season to expect any fruit and I’m not disappointed.
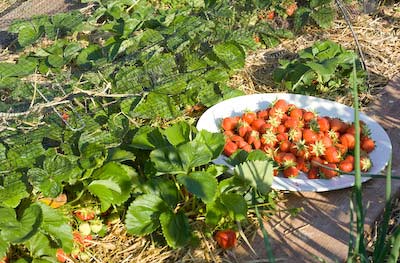
The rule of strawberry picking is to chose a warm dry day for it and, of course, to eat as many berries, warmed by the sun, as you can, right there and then. These berries are just so sweet and packed with flavour. When picked that warmth quickly ‘cooks’ them and they lose their polished look in moments once they are detached from the plant, so you need to get them cooled fast. Even after my seasonal binge there were still 3 kilos of fruit to take home to preserve.
I plan to make jam with subsequent pickings but for this first load I wanted to can compote and syrup, using my harvest as fresh as possible to capture this exceptional flavour. Strawberries aren’t highly rated for bottling as they overcook fast but making compotes to eat out of season to serve with yogurt or vanilla cheesecake or a simple sponge cake with cream …. well, that does it for me. This is were canning makes such sense. Jam is usually overladen with sugar and jam makers often complain that they have far too much of it to consume, but compote can contain much less sugar, so the flavour of the fruit shines through and by water processing it, you can then stock the pantry with jars that will keep throughout the year ahead.
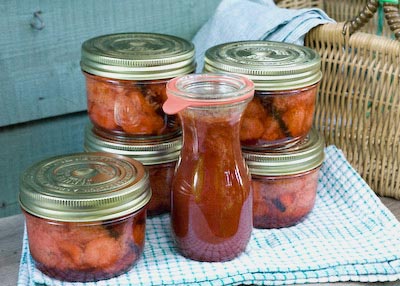
With canning generally, it is important to use jars that are a size that suits how many people you feed. I like to use smallish jars so once opened I know none will go to waste. My next door neighbours brought me these Le Parfait Familia Wiss 350ml jars back from France recently so they looked to be just perfect for the job. I canned the left-over syrup in a 250ml sized Weck flask and there is another half flask, in the fridge for using up now.
The berries need to be macerated with sugar overnight so their lovely juice is drawn out, turning the sugar to syrup at the same time. I wasn’t sure how much syrup the berries would produce but there was enough left over to bottle on its own. This syrup is just fab stirred through Greek yogurt and I’ll be churning some vanilla ice cream soon to make another perfect partnership. The compote will go with just about anything.

STRAIGHT-LACED STRAWBERRY COMPOTE
Makes 6 x 350ml (7 x 1/2 pint) jars compote, plus approx 375ml (3/4 pt) strawberry syrup
3Kg (6 1/2lbs) strawberries
350g (12oz) sugar (adjust to your taste)
2 vanilla pods
1Tbsp balsamic vinegar
Rinse and drain the fruit if you must! As I knew exactly where my fruit came from and that it had been mulched with straw to keep the berries clean and off the soil, I didn’t wash the fruit … so you choose! Remove the stalks and halve the largest berries then place in a large glass or ceramic bowl, sprinkling the sugar in layers between the fruit as you go. Split the vanilla pods and scrape out the sticky seeds then bury the pods and stir the seeds in amongst the berries. Cover the bowl with cling film or a plate and leave in a cool place or the fridge overnight.
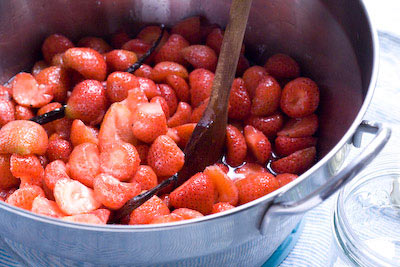
Prepare the water bath, jars and lids for canning*. Pour the fruit, sugar, vanilla and any juice into a preserving pan. Warm it through stirring until all the sugar is dissolved. Add the balsamic vinegar then bring all to a simmer and cook through for 2 minutes. Using a slotted spoon or sieve remove the berries and vanilla pods from the syrup into a warm bowl. This way the softened berries will still be surrounded by syrup. (Some fruit pulp will remain in the syrup. If you want to make a smoother syrup from your left-overs then pass it through a sieve.) Cut each vanilla pod into 3 then using a jam funnel, pack the strawberries into the jars, to come just below the headroom line for the type of jars you are using. Push a piece of vanilla pod down the side of each jar so it shows against the glass. Top up with hot syrup from the pan if necessary, so the berries are submerged.
De-bubble the fruit around the sides of the jar using a narrow spatula or chop stick to release any trapped air bubbles, wipe the jar rims clean and seal. Water process for 10 minutes then remove from the water bath and leave till cold. Check the seals and label your jars ready to store. If any of your seals fail, use the compote as if fresh*.
For the remaining syrup in the pan, bring to a brisk boil for 5 minutes till the syrup is slightly thickened or to your liking. Pour into hot jars to the headroom line appropriate for your type of jar (Weck flasks can be filled almost to the top), tap the jar on the counter to release any trapped air bubbles, wipe rims and seal. Process for 10 minutes then remove from water bath and leave till cold before testing seals are fixed.
*If you don’t intend to water process the compote and syrup it should keep, if refrigerated, for about a week.
